
Picking
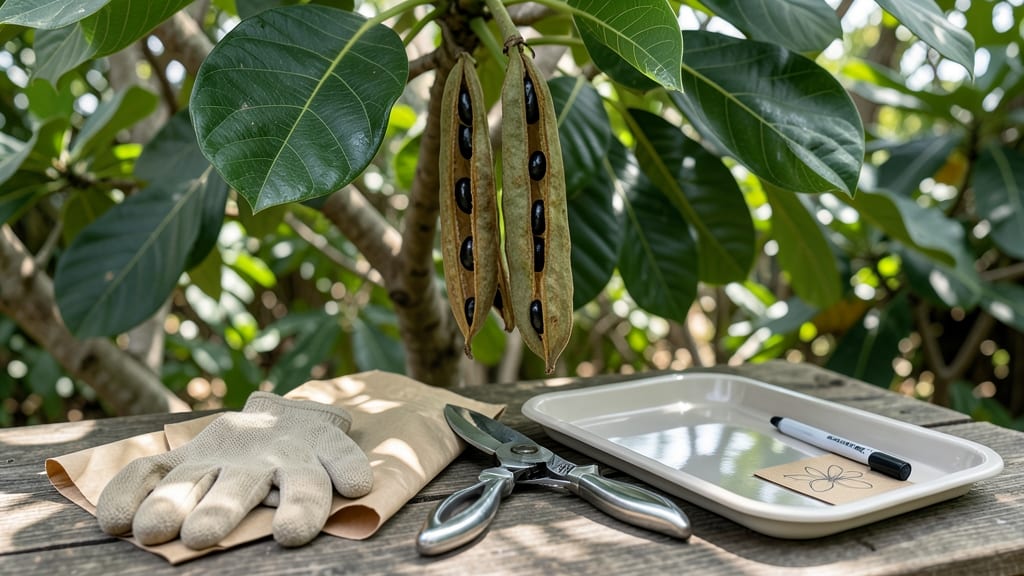
Harvesting plumeria seed pods at the right moment means the difference between viable seeds and dust. 🌿 The pods must be fully mature—deep brown, dry to the touch, and starting to split naturally—but still intact enough to prevent seed loss.
Rushing too early or waiting too long ruins your chances of growing new plants from scratch.
You’ll need just a few simple tools: sharp pruning shears for clean cuts, a small bucket for collecting pods, and a soft cloth to wipe away any debris. The twist-resistant technique starts with identifying pods that feel papery and hollow when tapped—these are ready.
Avoid harvesting pods that are already cracked open or covered in mold, as those seeds won’t sprout.
Once you’ve selected the right pods, twist gently at the base until they release with a faint pop—this preserves the seed’s integrity. Place them in a dry, shaded spot to finish drying for 3-5 days before storing in a paper bag.
Properly handled, these seeds can remain viable for up to a year, giving you a head start on next season’s tropical blooms.
Common mistakes include harvesting pods too soon (seeds won’t germinate) or storing them in plastic (traps moisture and causes rot). If pods crack open prematurely, scoop out the seeds immediately—they’ll still work if dried quickly. Patience here pays off with healthy seedlings ready for transplanting in 6-8 weeks.
📚 In This Guide
- What you need
- Instructions
- Tips and common mistakes
- Wrapping up and next steps
What you need
- ● Mature plumeria seed pods: Choose fully ripe, brown, and slightly papery pods (typically 3–6 inches long). Pro tip: Wait until they naturally detach or turn crispy to the touch!
- ● Sharp pruning shears or garden scissors: A pair with bypass blades (for clean cuts) or anvil blades (for tougher pods). Disinfect with rubbing alcohol before use.
- ○ Glove (optional but recommended): Wear nitrile or latex gloves to protect your hands from sticky sap and potential skin irritation.
- ● Clean cutting surface: A wooden board, plastic tray, or newspaper to contain mess and sap splatter.
- ● Paper towels or cloth: For wiping sap and cleaning tools between cuts.
- ● Small bowl or container: A glass or ceramic dish (wide and shallow) to collect seeds and prevent spills.
- ● Toothpick or fine-tip tweezers: For gently priying open stubborn seed pods or extracting seeds.
- ● Rubbing alcohol (70% isopropyl): To sterilize tools and reduce mold risk during seed storage.
- ● Seed-starting mix: A light, well-draining mix (e.g., 50% perlite + 50% coconut coir) for immediate planting.
- ● Spray bottle with water: To mist seeds and mix if you’re planting right away.
- ● Labeling tags: Small waterproof labels to mark seed varieties or harvest dates.
- ● Plastic bag with breathable holes: For temporary seed storage (keep in a cool, dry place for up to 2 weeks).
Step-by-Step instructions for harvesting plumeria seed pods
Plumeria seed pods are delicate—harvest them wrong and you’ll crush the seeds inside. Here’s my foolproof method for collecting viable seeds without damaging the pods.
🌿 Step 1: Identify and Wait for Mature Pods
Plumeria seed pods start green and firm, then turn brown and papery when ready. Wait until they’re fully brown and dry to the touch—this usually takes 6-8 weeks after flowering. If you harvest too early, the seeds inside won’t be fully developed. I tap the pod gently with my fingernail; if it sounds hollow, it’s ready.
Choose pods that are 1-2 inches long and slightly wrinkled. Avoid any that feel soft or squishy—those are overripe and may have already released seeds. A good pod will open naturally when you apply just a little pressure.
✂️ Step 2: Cut Pods at the Right Time of Day
Harvest pods in the early morning when temperatures are cool—this prevents the pods from drying out too quickly. Use clean, sharp pruning shears to snip the pod from the stem, leaving a ¼-inch stub. Cutting too close to the branch can damage the plant’s growth points.
Place the harvested pods in a paper bag (not plastic—it traps moisture and causes rot). Keep them in a shady, dry spot for 1-2 days before opening. This mimics the natural drying process and ensures the seeds inside are fully mature.
🌱 Step 3: Open Pods Without Crushing the Seeds
Lay the dried pod on a clean, flat surface. Gently twist the pod away from you—this is the key to avoiding seed damage. The pod should split open naturally along its seam. If it resists, let it dry another day; forcing it will crush the seeds inside.
Once open, you’ll see flat, brown seeds inside. Remove them carefully with a small spoon or your fingers. Discard any seeds that are shriveled or discolored—they won’t germinate. Store viable seeds in a paper envelope in a cool, dry place until ready to plant.
💧 Step 4: Prepare Seeds for Germination
Plumeria seeds have a hard outer shell that slows water absorption. Soak them in lukewarm water for 12-24 hours to soften the coating. Change the water halfway through to prevent mold. You’ll know they’re ready when the outer shell starts to crack slightly.
After soaking, plant the seeds ¼ inch deep in a well-draining seed-starting mix. Keep the soil moist but not soggy—plumeria seeds rot easily if overwatered. Place the container in a warm, bright spot (but not direct sun) and cover it with plastic wrap to retain humidity. Germination takes 2-4 weeks—be patient!
⏰ Step 5: Monitor and Transplant Seedlings
Once seedlings emerge, remove the plastic wrap and move them to a sunny windowsill or under grow lights. Plumeria seedlings are sensitive to cold—keep them in a spot where temperatures stay above 65°F. Thin seedlings to 1 inch apart to prevent overcrowding.
When seedlings develop 2-3 sets of true leaves (about 8-12 weeks after planting), transplant them into 4-inch pots with fresh potting mix. Harden them off for a week before moving outdoors—this helps them adjust to outdoor conditions without shock.
Tips & tricks for perfect plumeria seed harvesting
Real talk: Harvesting plumeria seed pods is all about patience and gentle technique. Here's how to avoid the common mistakes that ruin seeds before they even sprout.
Pod Selection Matters: The 6-8 week waiting period is non-negotiable—this is when seeds fully mature inside. I learned this the hard way after harvesting green pods that yielded no viable seeds. Look for pods that are completely brown and slightly wrinkled, not just changing color. A good test is tapping them gently; they should sound hollow like an empty shell.
Timing Secret: That early morning harvest in Step 2 isn't just about cool temperatures—it's about dew protection. The moisture from morning dew helps maintain pod hydration during your 1-2 day drying period. If you harvest later in the day, pods dry too quickly and become brittle, making them nearly impossible to open without crushing seeds.
The Twist Technique: When opening pods in Step 3, the "twist away from you" isn't just a suggestion—it's physics. Twisting toward you risks crushing seeds against your palm. The natural seam of the pod wants to split away from the plant's growth direction, which is why this method works best. If pods resist, let them dry another day rather than forcing them.
Germination Wisdom: The 12-24 hour soaking time is crucial for breaking that hard outer shell, but don't overdo it. I've seen seeds develop mold when left soaking beyond 24 hours. Change that water halfway through to maintain cleanliness, and use lukewarm water—cold water shocks the seeds while hot water can damage the delicate outer coating.
Pro Tips for Harvest Plumeria Seed Pods
- Real talk: Harvesting plumeria seed pods is all about patience and gentle technique.
- Pod Selection Matters: The 6-8 week waiting period is non-negotiable—this is when seeds fully mature inside.
- Timing Secret: That early morning harvest in Step 2 isn't just about cool temperatures—it's about dew protection.
Frequently asked questions
Got questions about harvesting plumeria seed pods? You’re not alone! Here are some of the most common queries—and their straightforward answers—to help you succeed.
When is the best time to harvest plumeria seed pods?
The ideal time to harvest is when the pods turn light brown and begin to split open slightly (usually 3–6 weeks after flowering). Harvesting too early means seeds aren’t mature; waiting too long risks them drying out or scattering. Aim for a warm, dry day to minimize moisture-related issues.
What if my seed pods won’t open naturally?
If pods stay closed, gently twist or roll them between your fingers to encourage splitting. Avoid cutting—this can damage the seeds. For stubborn pods, place them in a paper bag for 24 hours; the friction from shaking may help. Never force them open—patience is key!
Can I harvest seeds from store-bought plumerias?
Yes, but results vary. Hybrid plumerias (like those sold commercially) may not produce true-to-type seeds—expect surprises in fragrance, color, or growth habits. For predictable traits, harvest seeds from named varieties or heirloom plants. If you’re unsure, ask the nursery about the plant’s lineage!
How long do harvested seeds stay viable?
Plumeria seeds remain viable for 1–2 years if stored properly in a cool, dry place (like a sealed container with silica gel). Avoid refrigeration—humidity is the enemy! For best results, plant or sow seeds within 6 months of harvest. Freshness = higher germination rates!
What’s the easiest way to germinate plumeria seeds?
Soak seeds in warm water for 24 hours before planting to soften the shell. Use a well-draining mix (like perlite + peat) and keep soil moist but not soggy. Place pots in bright, indirect light (no direct sun) and maintain 70–80°F temperatures. Germination can take 2–6 weeks—persistence pays off!
Wrapping up and next steps
Harvesting plumeria seed pods is a rewarding way to grow your own fragrant trees—and with the right technique, you’ll boost your success rate!
Remember to wait for the pods to wrinkle and turn brown, use a twist-and-pull method for easy removal, and store seeds in a cool, dry place until planting. Whether you’re a seasoned gardener or a curious beginner, patience and care will pay off with healthy, thriving seedlings.
Now that you’re ready to harvest, why not share your progress? Snap a photo of your seed pods or young sprouts and tag us—we’d love to see your green thumbs in action! 🌱✨