
Picking
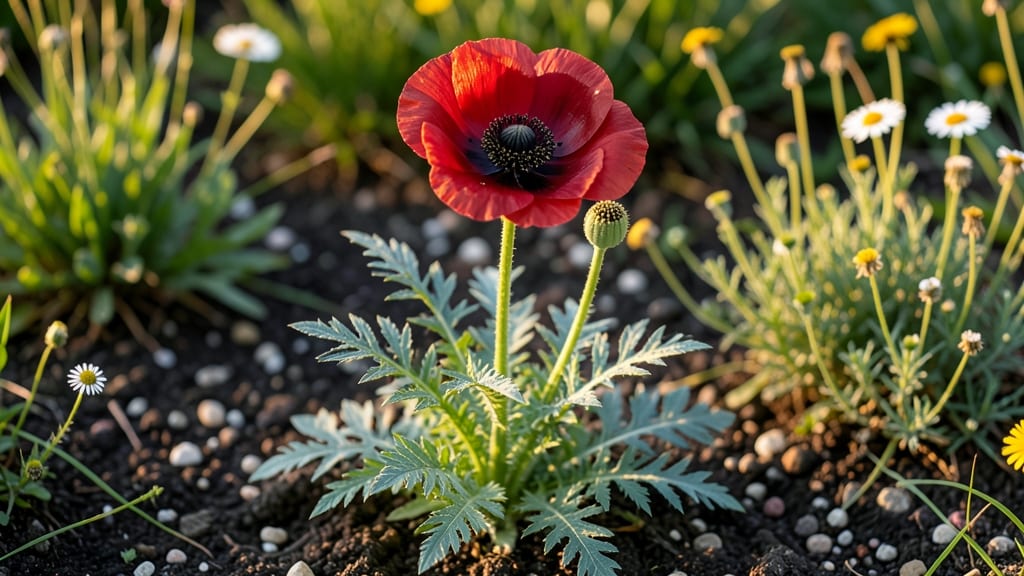
Cold-stratifying Hungarian breadseed poppy seeds unlocks their full potential in just 60 days—and the results are worth the wait. 🌱 These striking plants deliver edible seeds, delicate blooms, and a unique texture that gardeners and cooks adore, but they demand patience and the right conditions to thrive.
The secret to success starts with a 6-week cold treatment in the fridge, mimicking winter's natural process. This step transforms stubborn seeds into eager sprouts, while well-draining soil and full sun create the perfect growing environment. Even beginners can master this method with the right preparation.
By summer, you'll be harvesting nutty-flavored seeds for baking or pressing them into oil, while the papery blooms add drama to bouquets. The plants grow tall and sturdy, making them ideal for cottage gardens or even container growing in small spaces.
Common challenges like bolting or powdery mildew are easily managed with proper spacing and airflow. With these tips, you'll avoid the most frustrating pitfalls and enjoy a harvest that's both beautiful and useful.
📚 In This Guide
- What you need
- Instructions
- Tips and common mistakes
- Wrapping up and next steps
What you need
- ● Hungarian breadseed poppy seeds: 1–2 oz (30–60g) of high-quality, cold-stratified seeds (ensure they’re labeled for sprouting or breadseed varieties).
- ● Cold-stratification supplies: 1 resealable plastic bag (quart-sized or larger)
- ● 1 cup (85g) of damp peat moss or coco coir (moistened but not soggy)
- ○ Optional: Vermiculite (1 cup) for better moisture retention
- ● Growing containers: 6–12 small pots (3–4 inches in diameter) with drainage holes
- ● OR 1–2 seedling trays with individual cells
- ● Potting mix: 2–3 cups of light, well-draining soil (e.g., a 50/50 blend of peat moss and perlite or cactus/succulent mix).
- ● Misting bottle or spray nozzle for gentle watering.
- ● Clear plastic wrap or a humidity dome to retain moisture during germination.
- ● Basic gardening tools: Small hand trowel or spoon for transplanting
- ● Scissors or pruners (for trimming seedlings later)
- ● Grow lights or sunny windowsill: A south-facing window or LED grow lights (12–16 hours/day) for optimal growth.
- ○ Thermometer (optional but helpful): To monitor soil temps (ideal: 60–70°F (15–21°C) during stratification).
- ○ Fertilizer (optional): A balanced liquid fertilizer (e.g., 10-10-10) diluted to half-strength for seedlings.
Step-by-Step instructions for growing Hungarian breadseed poppies
Cold-stratification is the secret to breaking these seeds' dormancy—here's how to do it right.
🌱 Step 1: Prepare Seeds for Cold Stratification
First, soak the seeds in lukewarm water for 24 hours to soften the hard outer shell. This mimics natural winter moisture and speeds up germination. I use a small glass jar with a loose lid so seeds stay submerged but not packed tightly.
After soaking, drain the water completely and let the seeds air-dry on a paper towel for 12 hours. This prevents mold while keeping them moist enough for stratification. You'll know they're ready when the outer coating looks slightly wrinkled but still pliable.
🥶 Step 2: Stratify Seeds in a Moist, Cold Environment
Fill a sealed plastic bag with dampened peat moss or coconut coir—just enough moisture to feel damp like a wrung-out sponge. Add the prepped seeds and seal the bag tightly, squeezing out excess air. Place it in your refrigerator's crisp drawer (34-40°F) for 6-8 weeks.
Check the bag weekly to ensure the medium stays moist but not soggy. If condensation forms on the inside, open the bag for 30 minutes to air it out. This cold treatment mimics winter's natural dormancy period, breaking the seed's dormancy so it knows spring has arrived.
☀️ Step 3: Sow Stratified Seeds in Well-Draining Soil
After stratification, fill small pots with a mix of 50% potting soil and 50% perlite to ensure excellent drainage—poppies hate soggy roots. Plant seeds ¼ inch deep, spacing them 1 inch apart in the pot. Gently press the soil around them to ensure good contact but don't compact it.
Place the pots in a bright, indirect light location (like a north-facing window) and maintain soil moisture by watering only when the top ½ inch feels dry. Avoid overwatering—poppy seeds rot easily when kept too wet. You'll see the first sprouts in 7-14 days.
🌿 Step 4: Transplant Seedlings to Outdoor Garden Beds
Once seedlings develop 2-3 sets of true leaves (not just the initial cotyledons), they're ready for transplanting. Harden them off by placing them outdoors in a sheltered spot for 2-3 hours daily over 5-7 days, gradually increasing exposure.
Choose a sunny location with full sun (6+ hours daily) and well-draining soil. Poppies thrive in slightly poor soil—amend heavy clay with compost and sand. Space mature plants 12-18 inches apart to allow for their airy, open growth habit.
✂️ Step 5: Maintain and Harvest for Seed Production
Water deeply but infrequently—once weekly during dry spells is enough. Poppies are drought-tolerant once established, but they won't produce as many seed heads if stressed. Fertilize lightly with a balanced 10-10-10 mix at planting and again when flowers appear.
Leave spent flowers on the plant to dry and form seed pods. Harvest seeds when the pods turn brown and papery, then rub them between your hands to release the tiny black seeds. Store them in a cool, dry place for next year's planting—properly stratified seeds germinate reliably for years.
Tips & tricks for perfect Hungarian breadseed poppy germination
These simple yet game-changing strategies will help you coax even the trickiest poppy seeds into thriving plants.
Soaking Precision: The 24-hour lukewarm water soak in Step 1 is non-negotiable for breaking dormancy, but here's the secret: use water that's warm enough to feel comfortable to your wrist—not scalding. I've ruined batches by using hot water, which can cook the delicate embryos. Also, give the jar a gentle swirl every 8 hours to prevent seeds from sticking together. This ensures even hydration for all seeds.
Stratification Environment: While the 34-40°F refrigerator temperature is ideal, placement matters just as much. The crisp drawer's humidity can sometimes be too high—if you notice condensation forming within 24 hours, transfer the bag to a slightly warmer part of the fridge (around 40°F) and check it more frequently. The goal is consistent moisture without soggy conditions that invite mold. I keep a small notebook by my fridge to record each check-in date.
Post-Stratification Planting: When you're ready to plant after the 6-8 weeks, resist the urge to rush! Let the seeds sit at room temperature for 12 hours before planting to prevent shock. This mimics the natural temperature fluctuations seeds experience in spring. Also, use a small spoon to create planting holes—this prevents crushing the delicate seeds and ensures they stay at that perfect ¼-inch depth.
Pro Tips for Hungarian Breadseed Poppy
- These simple yet game-changing strategies will help you coax even the trickiest poppy seeds into thriving plants.
- Soaking Precision: The 24-hour lukewarm water soak in Step 1 is non-negotiable for breaking dormancy, but here's the secret: use water that's warm enough to feel comfortable to your wrist—not scalding.
- Stratification Environment: While the 34-40°F refrigerator temperature is ideal, placement matters just as much.
Frequently asked questions
Got questions about growing Hungarian breadseed poppy? You’re not alone—this unique seed has a few quirks! Here are answers to the most common queries to help you succeed.
How do I know if my Hungarian breadseed poppy seeds are viable?
Test viability by placing a few seeds in a damp paper towel, sealing them in a bag, and storing them in a warm spot for 3–5 days. If they don’t sprout, they may need cold stratification (soak in water for 12 hours first). Fresh seeds often germinate within 7–14 days under ideal conditions.
Why aren’t my seeds germinating after cold stratification?
Cold stratification mimics winter, but timing matters! Ensure seeds get 4–6 weeks in the fridge (not freezer) before planting. If they still refuse to sprout, check moisture (keep soil damp, not soggy) and warmth (70–75°F is ideal). Old seeds (<2 years) may need re-stratification or a fresh batch.
Can I grow Hungarian breadseed poppy indoors?
Start seeds in pots with well-draining soil, place them near a sunny window, or use a grow light. Thin seedlings to 2–3 inches apart once they sprout. Transplant outdoors after the last frost when soil is at least 50°F. A south-facing window works, but supplement with light if growth stalls.
What’s the best way to harvest and store the seeds?
Harvest when seed pods turn brown and papery (usually 60–90 days post-flowering). Snap pods off and dry them in a paper bag for 1–2 weeks in a warm, dry place. Store seeds in an airtight container in the fridge for up to 2 years. Pro tip: Toast seeds lightly before grinding for a nuttier flavor!
Are there alternatives if I can’t find Hungarian breadseed poppy?
Try blue poppy (Meconopsis) or California poppy (Eschscholzia) for similar ease, but neither offers the same culinary uses. For baking, sesame seeds or flaxseeds mimic the toasty crunch, though they lack the poppy’s unique earthy sweetness. Check local seed swaps or specialty stores for hard-to-find varieties!
Wrapping up and next steps
Growing Hungarian breadseed poppy is a rewarding journey that brings vibrant blooms and edible seeds to your garden in just 60 days! 🌱 With the right cold-stratification techniques and a little patience, you’ll unlock a harvest of nutritious seeds perfect for baking, cooking, or even crafting.
Whether you’re a seasoned gardener or a curious beginner, this guide makes the process simple and fun.
Ready to dive in? Start by gathering your supplies, then follow the steps to stratify and sprout your seeds. Once your poppies are thriving, share your progress—or even your homegrown treats—with fellow gardeners! 🌸