
Lawn
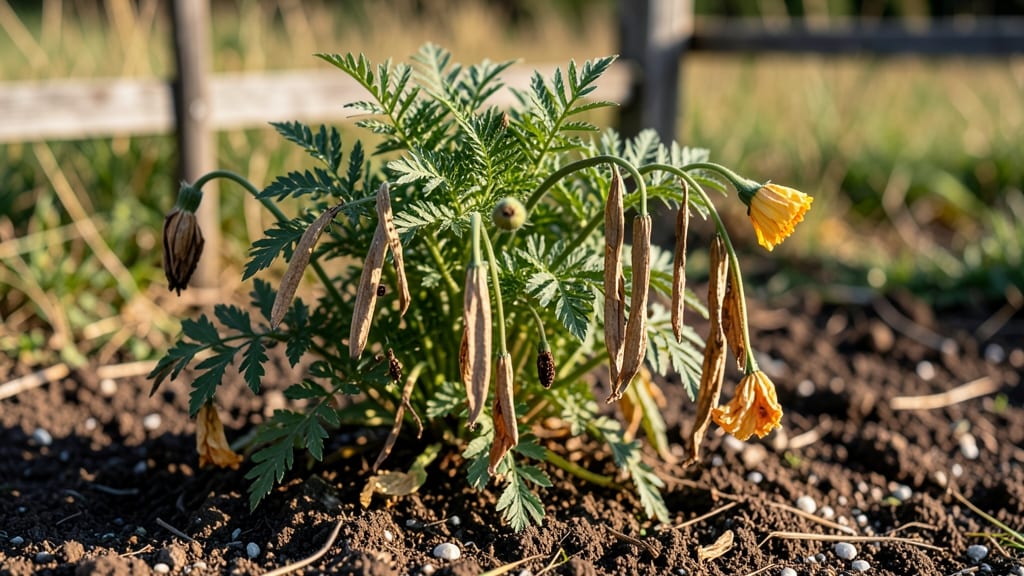
Saving marigold seed pods from this year means bold, reliable blooms next spring—no store-bought seeds needed. 🌻 These little brown pods hold the key to next season's golden flowers, but only if you handle them right from harvest to planting.
The trick starts with timing: wait until the pods turn paper-dry and brown before collecting them in late fall. Skip the green ones—they won’t store well. Once you’ve gathered them, spread them on a screen or paper towel in a cool, dry place for 2-3 weeks to fully dry.
This step prevents mold and keeps seeds viable for years. When it’s time to plant, give them a cold stratification boost—simulate winter by chilling the pods in the fridge for 4-6 weeks. This mimics natural conditions and signals the seeds to sprout when you’re ready.
By spring, you’ll have sturdy seedlings that outperform weak nursery starts. Works for French, African, or signet marigolds—just adjust your planting timeline based on your frost date. Here’s how to do it without losing a single seed.
📚 In This Guide
- What you need
- Instructions
- Tips and common mistakes
- Wrapping up and next steps
What you need
- ● Marigold seed pods: 20–50 fresh, fully dried pods (harvested after blooms fade and turn brown).
- ● Cold stratification setup: 1 large resealable plastic bag (gallon-sized or larger)
- ● 1–2 paper towels or coffee filters (to absorb moisture)
- ○ Optional: A small amount of perlite or sand (1–2 tbsp) for drainage
- ● Storage container: A clean, airtight container (e.g., a small Tupperware or mason jar).
- ● Labeling supplies: Masking tape + permanent marker (to track stratification dates).
- ● Freezer or refrigerator: A space with a consistent temperature between 35–40°F (2–4°C).
- ● A humidity pack (e.g., a damp sponge wrapped in a cloth) to maintain moisture.
- ● A small notebook to log stratification progress and germination notes.
- ● Gloves (if handling prickly pods or sensitive to cold).
- ● Seedling trays (if planning to sow stratified seeds directly into soil).
How to cold-stratify marigold seed pods for next year's blooms
Cold stratification mimics winter's natural process—here's how to trick marigolds into germinating strong and true.
🌱 Step 1: Harvest and Dry the Seed Pods
Collect mature marigold seed pods when they turn brown and dry on the plant. I snip them with clean scissors and lay them in a single layer on paper towels in a warm, dry spot. Keep them out of direct sunlight—too much heat can cause premature cracking.
Check daily for 7-10 days until the pods open completely and release their seeds. If you see moisture forming, spread them out more. Once fully dry, store the seeds in a paper envelope labeled with the variety and harvest date. Paper breathes better than plastic and prevents mold.
💧 Step 2: Prepare the Stratification Mix
Fill a shallow container with a mix of equal parts moistened perlite and peat moss—this mimics the moisture-retaining yet well-draining conditions of winter soil. I use a quart-sized container for about 40-50 seeds, enough to cover the bottom 1 inch deep. Moisten the mix until it feels like a wrung-out sponge—damp but not dripping.
Spread the marigold seeds evenly across the surface. Don't bury them—they need light to germinate. A light sprinkle of additional mix (just enough to cover the seeds) keeps them in place without suffocating them.
☀️ Step 3: Replicate Winter Conditions
Place the container in a refrigerator set to 35-40°F for 4-6 weeks. This cold period breaks seed dormancy—without it, many marigold seeds won't germinate reliably. I store mine on the crisper drawer shelf where humidity stays steady. Check weekly to ensure the mix remains moist but not soggy.
After 4-6 weeks, move the container to a warm, bright spot (65-75°F) with indirect light. You'll see the first sprouts in 7-14 days. If no germination occurs after 2 weeks, return the container to the fridge for another 2 weeks before trying again.
🌿 Step 4: Transplant Seedlings for Healthy Growth
Once seedlings reach 2 inches tall with 2-3 true leaves, transplant them into 2-3 inch pots filled with seed-starting mix. Handle gently—marigold seedlings are delicate. I use a small spoon to lift them, keeping the root ball intact. Water lightly after transplanting to settle the soil.
Keep the pots in bright, indirect light for the first week, then gradually introduce direct sunlight over 3-5 days. Avoid overwatering—let the top inch of soil dry between waterings. You'll know they're thriving when new leaves appear vibrant green and stems stay sturdy.
⏰ Step 5: Harden Off Before Outdoor Planting
Two weeks before your last frost date, start hardening off seedlings by placing them outside in a sheltered, shaded spot for 1-2 hours the first day. Gradually increase outdoor time by 1 hour daily until they can tolerate a full day outside. This prepares them for real garden conditions.
Plant outdoors after all frost risk has passed, spacing them 12-18 inches apart in full sun. Water deeply at planting and mulch with 1-2 inches of organic mulch to retain moisture. Your cold-stratified marigolds will bloom earlier and more vigorously than store-bought seedlings.
Tips & tricks for perfect marigold seed pod stratification
These little tricks will help you maximize your marigold seed germination success—no guesswork required.
Pod Maturity Matters: The 7-10 day drying period in Step 1 is your quality control window. If pods crack open too soon, they release seeds prematurely. Look for pods that are completely brown and dry to the touch—like crispy autumn leaves. This ensures you're capturing seeds at their peak viability.
Moisture Balance is Key: When preparing the stratification mix in Step 2, squeeze a handful—it should feel like a wrung-out sponge. Too wet and you risk mold; too dry and seeds won't wake up. I keep a spray bottle handy to add just enough water to maintain that perfect dampness without drowning the seeds.
Temperature Consistency: The 35-40°F refrigerator range in Step 3 is critical—this mimics winter's natural chilling period. If your fridge runs hotter, try the vegetable crisper drawer where temps are most stable. And here's a pro move: I place the container in a sealed plastic bag with a few ice cubes to maintain steady cold temps without freezer burn.
Light Exposure Strategy: After moving to warm conditions in Step 3, place your container near an east-facing window for gentle morning light. This prevents leggy seedlings that stretch toward harsh midday sun. If you notice seedlings leaning, rotate the container daily so all sides get equal light exposure.
Pro Tips for Marigold Seed Pods
- These little tricks will help you maximize your marigold seed germination success—no guesswork required.
- Pod Maturity Matters: The 7-10 day drying period in Step 1 is your quality control window.
- Moisture Balance is Key: When preparing the stratification mix in Step 2, squeeze a handful—it should feel like a wrung-out sponge.
Frequently asked questions
Got questions about marigold seed pods and cold stratification? You’re not alone! Here are some of the most common queries—plus straightforward answers to help you prep those pods for next season like a pro.
Why do marigold seed pods need cold stratification?
Cold stratification mimics winter’s natural chilling process, breaking seed dormancy. Without it, marigold seeds may sprout unevenly or not at all. Think of it as a "wake-up call" for seeds—just like how a long winter nap helps plants recharge for spring!
How long should I cold-stratify marigold seed pods?
Most marigold seed pods thrive with 4–8 weeks of cold treatment (35–45°F). Place them in a sealed bag with damp peat moss or a paper towel in your fridge. Check periodically to ensure they stay moist but not soggy. Patience pays off—consistent chilling yields stronger, more reliable blooms!
Can I skip cold stratification and still grow marigolds?
Yes, but germination may be slower or less predictable. If you’re in a mild-winter zone, sow seeds directly in fall or early spring. For cooler climates, stratification boosts success rates by up to 80%. Pro tip: Mix a few stratified and non-stratified seeds to hedge your bets!
My seed pods are moldy after stratification—what went wrong?
Mold usually means too much moisture or poor airflow. Ensure your pods are in a well-ventilated container (like a breathable paper towel) and avoid sealing them airtight. If mold appears, discard the pods and try again with drier conditions. A quick fix: Spritz lightly with a 1:10 hydrogen peroxide solution (3%) to kill spores before restarting.
Can I reuse marigold seed pods from last year?
Store dry pods in a cool, dark place (like a jar with silica gel) until stratification time. Just ensure they’re completely dry before storing to prevent mold. Label them by variety—some heirloom marigolds (like ‘Bonanza’ or ‘French’) produce even more vibrant blooms from saved seeds!
Wrapping up and next steps
Marigold seed pods hold the secret to next year’s vibrant blooms—and with cold stratification, you’re giving them the perfect head start! 🌱 By following these steps, you’ll boost germination rates, save time, and enjoy stunning, reliable flowers season after season.
Whether you’re a seasoned gardener or just starting, this method is your ticket to easier, more successful growing.
Ready to transform those seed pods into next year’s garden stars? Grab your materials, set a reminder, and get stratifying—your future marigolds will thank you! Start now and watch your garden thrive.