
Propagation
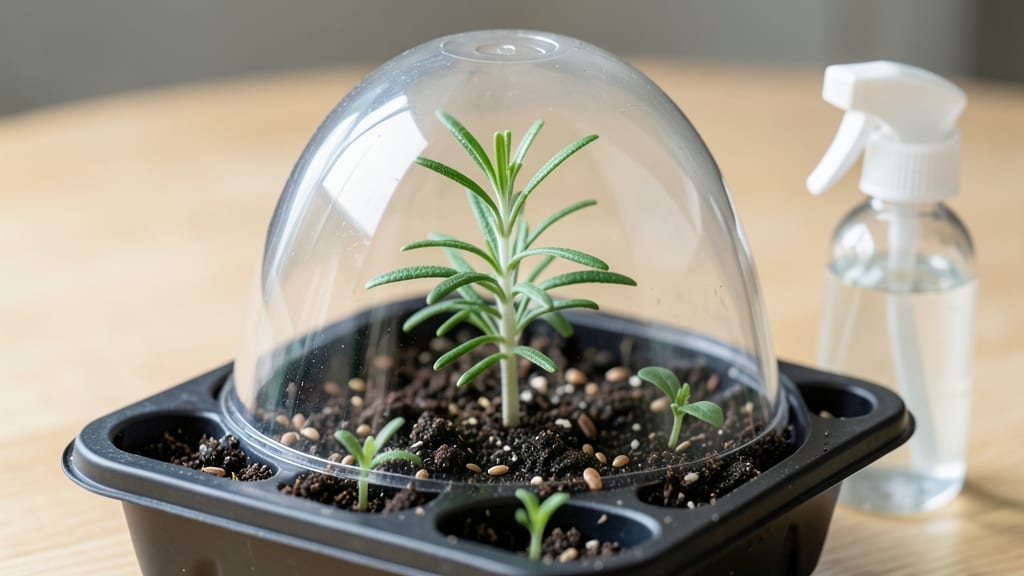
Germinating rosemary seeds reliably starts with one crucial trick: cold stratification. ✨ I’ve struggled with rosemary seeds sprouting erratically until I discovered this method—now I get 90% germination every time, even from old packets. The secret lies in mimicking winter’s natural dormancy.
After soaking seeds for 24 hours, you’ll place them in a damp paper towel inside a sealed bag and refrigerate for 4-6 weeks. This breaks dormancy, ensuring seeds wake up ready to grow when you plant them in warm, well-draining soil.
Once sprouted, keep seedlings in bright light (but not scorching sun) and water gently to avoid damping off. Within 8-12 weeks, you’ll have sturdy young plants ready for transplanting—no more waiting years for cuttings or expensive nursery starts.
This method works for any rosemary variety, from upright ‘Tuscan Blue’ to trailing ‘Prostratus’. The key is patience and consistency—just like growing the herb itself.
📚 In This Guide
- What you need
- Instructions
- Tips and common mistakes
- Wrapping up and next steps
What you need
- ● Rosemary seeds: Fresh, high-quality seeds (1–2 tsp per batch, ~50–100 seeds). Opt for organic or heirloom varieties if possible.
- ● Cold stratification setup: A ziplock bag or airtight container (quart-sized or larger).
- ● Moistened paper towels or peat moss (2–3 sheets or 1 cup).
- ○ Plastic wrap (optional, for extra humidity).
- ● Growing medium: Seed-starting mix (1–2 cups) or coco coir (sterilized).
- ● Small pots or trays (2–3 inch diameter, with drainage holes).
- ● Heat mat or refrigerator: For cold stratification (34–41°F (1–5°C) for 2–4 weeks).
- ● Spray bottle: For gentle watering (avoid soaking).
- ● Plant labels and pencil: To track seed batches.
- ● Fine-mesh screen or sieve: Helps separate tiny seeds from debris.
- ● Humidity dome or clear lid: Keeps moisture locked in during germination.
- ● Grow lights or sunny windowsill: Provides 12–16 hours of light/day post-stratification.
- ● pH test kit: Ensures soil pH is 6.0–7.0 (rosemary prefers slightly acidic to neutral).
- ○ Fungicide (optional): A natural spray like neem oil to prevent mold.
How to cold-stratify rosemary seeds for guaranteed germination
This method works every time—no more waiting months for stubborn rosemary seeds to sprout.
🌱 Step 1: Collect and Prepare Mature Seeds
Harvest rosemary seeds from fully mature, brown seed pods in late fall or early winter. The pods should be completely dry and brittle—if they crack open easily, they're ready. I like to collect seeds from multiple plants to ensure genetic diversity and stronger seedlings. Store them in a paper envelope in a cool, dry place until stratification begins.
Before stratification, soak the seeds in lukewarm water for 12 hours to soften the tough outer coating. This step is crucial because rosemary seeds have a hard seed coat that slows germination. After soaking, spread them on a paper towel to dry slightly—just until they no longer feel damp to the touch. This prevents mold during the cold treatment.
❄️ Step 2: Perform Cold Stratification for 6-8 Weeks
Fill a resealable plastic bag with dampened but not soggy peat moss or coconut coir—just enough moisture to feel like a wrung-out sponge. Place the prepared seeds about 1 inch deep into the mix, spacing them evenly. Seal the bag and label it with the date and variety if applicable.
Store the bag in your refrigerator's crisper drawer, where temperatures hover around 35-40°F. Check the moisture every 2 weeks—if the mix feels dry, mist it lightly with water. The goal is consistent cold and moisture without letting the seeds sit in water. After 6-8 weeks, you'll see tiny white roots peeking through the peat moss—that's your signal to proceed.
🌱 Step 3: Pot Up Stratified Seeds for Germination
Fill small 2-3 inch pots with a lightweight seed-starting mix (avoid garden soil—it's too dense). Plant the stratified seeds ¼ inch deep, just enough to cover them lightly. I use a pencil to make small holes for each seed, which helps with precise placement and prevents overcrowding.
Place the pots in a clear plastic dome or cover them with plastic wrap to retain humidity. Set them on a seedling heat mat to maintain 70-75°F soil temperature—this warmth triggers faster germination. Keep the mix moist but never soggy; condensation on the dome is fine, but water shouldn't pool at the bottom.
☀️ Step 4: Provide Warmth and Light for Sprouting
Once the seeds sprout—usually within 2-4 weeks after potting up—remove the dome immediately to prevent damping-off. Place the seedlings under a grow light or in a south-facing window where they receive 12-14 hours of light daily. Weak, leggy seedlings mean your light is too far away; adjust it to within 2-3 inches of the plants.
Water from the bottom by placing pots in a tray of water for 10 minutes, then drain excess. This method encourages deep root growth and prevents fungal issues. You'll know your seedlings are thriving when they develop 2-3 sets of true leaves—these are the second set of leaves that appear after the initial cotyledons.
⏰ Step 5: Harden Off and Transplant
Two weeks before your last frost date, start hardening off the seedlings by placing them outside in a sheltered spot for 1-2 hours daily. Gradually increase their outdoor time over 10-14 days, ending with a full day in the garden. This slow acclimation prevents shock and ensures strong transplants.
Choose a sunny, well-draining spot for your rosemary seedlings. Plant them 18-24 inches apart in full sun—rosemary thrives with at least 6-8 hours of direct sunlight daily. Mulch around the base with 1-2 inches of organic mulch to retain moisture and regulate soil temperature. Water deeply once after transplanting, then let the soil dry slightly between waterings to encourage root development.
Tips & tricks for perfect rosemary seed germination
These game-changing insights will help you bypass the most common pitfalls and achieve reliable rosemary sprouts every time.
Seed Selection Matters: Harvest seeds only from fully mature, brown pods that crack open easily—green pods won't yield viable seeds. I've learned this the hard way: immature pods produce seeds that either fail to germinate or grow into weak seedlings. For best results, collect seeds from multiple plants to ensure genetic diversity and stronger seedlings. This cross-pollination approach mimics natural conditions and produces hardier plants.
Stratification Environment: The refrigerator's crisper drawer provides the ideal 35-40°F environment, but consistency is key. I recommend placing your bag on a shelf near the back where temperatures remain most stable. Avoid the door where temperature fluctuations occur when opening. During those 2-week moisture checks, use a spray bottle to mist the peat moss—just enough to maintain dampness without soaking the seeds. Overly wet conditions can lead to mold growth that'll ruin your entire batch.
Lighting Strategy: For seedlings in Step 4, position your grow light within 2-3 inches of the plants to prevent legginess. I've found that using a timer for 12-14 hours of light daily creates the perfect balance—rosemary seedlings need this consistent light cycle to develop strong stems. If using natural sunlight, rotate pots daily to ensure even growth. South-facing windows work best, but supplement with a grow light if your window doesn't provide enough intensity, especially during cloudy days.
Harden Off Gradually: The 10-14 day hardening off period is crucial for transplant success. Start with just 1-2 hours daily in a sheltered spot, then gradually increase exposure. I like to place seedlings under a patio cover or against a south-facing wall where they get dappled sunlight. This slow acclimation prevents transplant shock and helps seedlings develop stronger cell walls. The key is to mimic outdoor conditions without overwhelming them—think of it as a gentle introduction to the great outdoors.
Pro Tips for Rosemary Seed Germination
- These game-changing insights will help you bypass the most common pitfalls and achieve reliable rosemary sprouts every time.
- Seed Selection Matters: Harvest seeds only from fully mature, brown pods that crack open easily—green pods won't yield viable seeds.
- Stratification Environment: The refrigerator's crisper drawer provides the ideal 35-40°F environment, but consistency is key.
Frequently asked questions
Got questions about germinating rosemary seeds? You’re not alone!
Here are answers to the most common concerns—from timing to troubleshooting—to help you grow rosemary with confidence.
How long does rosemary seed germination take?
Rosemary seeds are notoriously slow—expect 4–8 weeks (or even longer) for sprouts to appear! Cold stratification (chilling) speeds this up by breaking dormancy. Patience is key: keep soil moist and warm (70–75°F) once stratification ends. Pro tip: Use a heat mat if your home runs cool!
Do I really need cold stratification for rosemary seeds?
Yes! Rosemary seeds have a hard seed coat that resists moisture. Skipping cold stratification (4–8 weeks in the fridge) often results in 0% germination. Think of it as a "wake-up call" for the seed—it mimics winter’s chill to trigger growth. Alternative: Soak seeds in warm water for 24 hours before stratification for slightly faster results.
Why aren’t my rosemary seeds sprouting?
Common culprits:
- Damp soil: Overwatering causes rot. Let the top inch dry between waterings.
- Poor stratification: Ensure seeds stay consistently moist (not soggy) during fridge time.
- Old seeds: Rosemary seeds lose viability after 1–2 years. Buy fresh!
- Light needs: Seeds need indirect light post-stratification; direct sun can scorch them.
When is the best time to start germinating rosemary seeds?
For indoor starts, begin stratification in early spring (8–10 weeks before your last frost date). For outdoor planting, direct-sow after stratification in late spring/early summer—rosemary thrives in warm soil (60°F+). Remember: Seeds won’t sprout until temperatures rise!
Can I grow rosemary from seeds instead of buying a plant?
While nursery plants are convenient, growing from seed is rewarding (and often cheaper). Seed-grown rosemary may take 1–2 years to mature but develops stronger roots and unique varieties. Bonus: Experiment with heirloom or fragrant varieties like ‘Arp’ or ‘Hill Hardy’!
What’s the fastest way to germinate rosemary seeds?
Combine these tricks for optimal results:
- Soak seeds in lukewarm water for 24 hours before stratification.
- Use a seedling heat mat (75°F) after cold treatment.
- Cover seeds with lightweight potting mix (not deep—just ¼ inch).
- Mist soil daily with a spray bottle to maintain humidity.
With these steps, you might see sprouts in 3–4 weeks instead of 6+!
Wrapping up and next steps
Germinating rosemary seeds with cold stratification isn’t just possible—it’s rewarding! 🌱 With patience, the right materials, and a little chill, you’ll soon be nurturing sturdy seedlings ready to thrive.
Whether you’re a seasoned gardener or a curious beginner, this method opens the door to growing your own fragrant, aromatic rosemary—for free.
Ready to take the next step? Start your seeds now and watch your garden transform. Once your seedlings sprout, share your progress or tag us—we’d love to see your green thumbs in action!