
Lawn
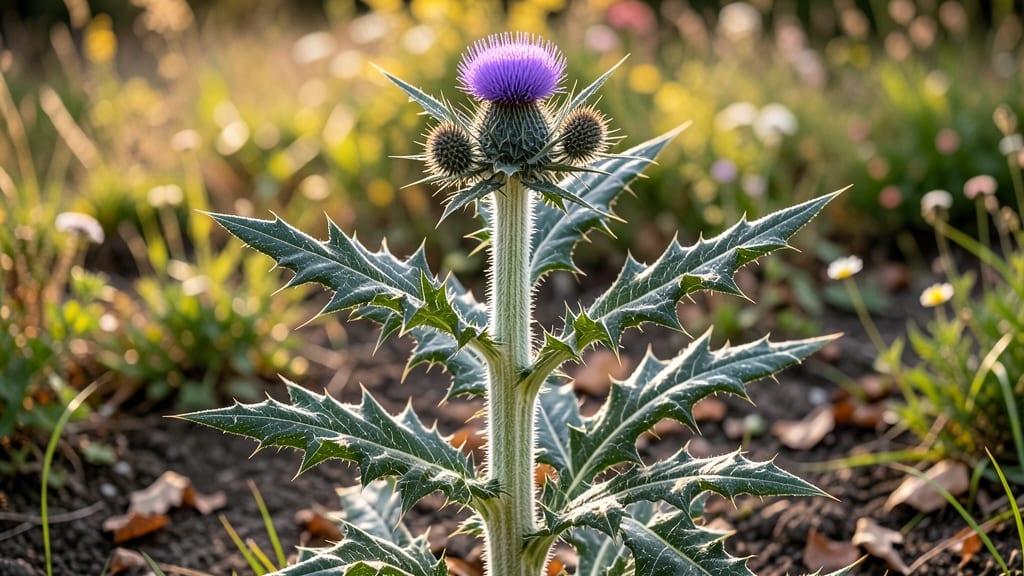
Growing milk thistle from seed requires a cold stratification trick that mimics winter's natural process. 🌱 I learned the hard way—my first batch of seeds sat dormant for months until I discovered this secret. The key is patience and a little help from your freezer to break dormancy.
This hardy perennial thrives in poor soil and full sun, making it perfect for wildflower meadows or cottage gardens. You'll need well-draining soil, minimal watering once established, and a sunny spot that gets at least six hours of light daily. The spiky purple blooms attract pollinators all summer long.
Once you've cracked the cold stratification code, germination rates improve dramatically—expect sprouts within 2-4 weeks after stratification. The plants grow tall (up to 6 feet) with striking white-veined leaves that add dramatic texture to borders.
Harvest seeds in late summer for next year's crop or use young leaves in salads (they taste like artichokes!). Just watch for rust fungus and keep plants spaced to prevent overcrowding.
📚 In This Guide
- What you need
- Instructions
- Tips and common mistakes
- Wrapping up and next steps
What you need
- ● Milk thistle seeds: 1–2 oz (30–60g) of high-quality, fresh seeds (look for Silybum marianum or "blessed milk thistle").
- ● Cold stratification setup: Small paper towel or dampened coffee filter (enough to cover seeds in a single layer).
- ● Ziplock bag or airtight container (quart-sized or larger).
- ● Refrigerator with a crisper drawer (kept at 34–40°F (1–4°C)).
- ● Growing containers: Seed trays or small pots (3–4 inches deep) with drainage holes.
- ● Well-draining potting mix (avoid heavy clay soils—opt for a chalky or sandy loam blend).
- ● Basic gardening tools: Spray bottle (for gentle watering).
- ● Small hand trowel or spoon (for transplanting seedlings).
- ● Grow lights: LED or fluorescent lights (12–16 hrs/day) for indoor seedlings.
- ○ Heat mat: Optional for speeding up germination (70–75°F / 21–24°C).
- ● Seedling heaters: Small plastic domes or cloches to retain moisture.
- ● pH test kit: To ensure soil pH is 6.0–7.5 (milk thistle prefers slightly alkaline).
- ● Compost or worm castings: For nutrient-boosted soil (10–20% mix with potting soil).
- ● Label markers: To track seed varieties and planting dates!
Step-by-step instructions for germinating milk thistle seeds
Here's how I break down the cold stratification process—it's the secret to beating those stubborn germination barriers.
🌱 Step 1: Prepare the Seeds for Cold Treatment
Milk thistle seeds need 60-90 days of cold stratification to break dormancy. Start by placing them in a clean, dry container with a paper towel or dampened vermiculite. I like to use a small plastic bag with a twist tie—just enough room to shake them gently later.
Moisten the towel or vermiculite until it feels like a wrung-out sponge (not dripping). Seal the container and store it in your refrigerator's crisper drawer where temperatures stay 35-40°F. Check weekly to ensure no mold appears—if you see fuzzy growth, toss the batch and start fresh.
⏰ Step 2: Monitor and Test for Germination Readiness
After 45 days, remove the container and inspect the seeds. You'll notice some may have tiny cracks or a slightly swollen appearance—that's your cue they're waking up. If none show signs, return them to cold storage for another 15-30 days.
Here's the thing—don't rush this. Seeds that haven't experienced enough cold will either rot or take months to sprout. I've learned the hard way that patience here prevents weeks of frustration later. Once you see 20-30% of seeds cracked, they're ready for planting.
🪴 Step 3: Plant Stratified Seeds in Germination Mix
Fill small pots (2-3 inches deep) with a sterilized mix of 50% potting soil and 50% perlite to ensure excellent drainage. Plant seeds ¼ inch deep—deeper planting delays germination because they need light to trigger sprouting.
Space them about 1 inch apart since milk thistle seedlings are delicate. Mist the surface lightly with water until the top inch feels damp. Cover the pots with clear plastic wrap to maintain humidity, but prop it up slightly so condensation doesn't sit on the seeds.
☀️ Step 4: Provide Warmth and Light for Sprouting
Move the pots to a warm spot (70-75°F) with bright, indirect light. A seedling heat mat helps if your home runs cooler. You should see sprouts in 10-21 days—watch for the first tiny leaves to unfurl.
Once they emerge, remove the plastic wrap immediately to prevent damping-off. Keep the soil consistently moist but never soggy. You'll know moisture is right when the surface looks slightly damp but not glistening. Rotate pots weekly so seedlings grow straight toward the light.
Tips & tricks for germinating milk thistle seeds
These little-known strategies will help you turn stubborn milk thistle seeds into thriving plants with minimal frustration.
Cold Stratification Consistency: The 60-90 days of cold treatment is non-negotiable for milk thistle seeds—this mimics their natural winter dormancy period. I recommend setting a calendar reminder every 15 days to gently shake the container. This prevents seeds from sticking together and ensures even exposure to cold. Place the container in the coldest part of your fridge (usually the bottom shelf) where temperatures stay consistently between 35-40°F. If your fridge fluctuates, consider a dedicated seed stratification fridge for more reliable results.
Germination Readiness Test: After the initial 45 days, look for those telltale signs of readiness: tiny cracks along the seed coat or a slightly swollen appearance. I've found that using a magnifying glass helps spot these subtle changes. If you're unsure, perform the "float test"—place seeds in a glass of water. Viable seeds will sink while empty ones float. This simple test saves you from planting non-viable seeds that will just rot in your soil mix.
Soil Mix Secrets: The 50/50 potting soil to perlite ratio is crucial for preventing damping-off disease while ensuring proper drainage. I always sterilize my potting mix by baking it in the oven at 200°F for 30 minutes before use—this kills any potential pathogens. For extra insurance, you can add a sprinkle of cinnamon to the soil surface before planting, which acts as a natural antifungal agent. This step has saved me from multiple failed germination attempts.
Light Management: While bright indirect light is ideal during the sprouting phase, be cautious of direct sunlight which can scorch delicate seedlings. I've had success using a simple LED grow light on a timer for 12 hours a day. Position it about 6 inches above the seedlings and adjust as they grow. Watch for seedlings leaning toward the light—this is their way of telling you they need to be rotated or the light source moved for even growth.
Pro Tips for Milk Seed Thistle
- These little-known strategies will help you turn stubborn milk thistle seeds into thriving plants with minimal frustration.
- Cold Stratification Consistency: The 60-90 days of cold treatment is non-negotiable for milk thistle seeds—this mimics their natural winter dormancy period.
- Germination Readiness Test: After the initial 45 days, look for those telltale signs of readiness: tiny cracks along the seed coat or a slightly swollen appearance.
Frequently asked questions
Got questions about growing milk thistle seeds?
You’re not alone! Here are answers to the most common concerns—from timing to troubleshooting—so you can tackle this resilient plant with confidence.
Do milk thistle seeds need cold stratification?
Yes! Milk thistle seeds (Silybum marianum) are notoriously slow to germinate without cold stratification. Soak seeds in water for 24 hours, then refrigerate them in a damp paper towel for 4–6 weeks before planting. This mimics winter conditions and tricks them into breaking dormancy. Pro tip: Freeze them for 2 weeks if short on time—just don’t thaw them completely before planting!
How long does it take for milk thistle seeds to germinate?
Patience is key! After stratification, germination can take 2–6 weeks (or even longer in cool soil). Keep seeds moist but not soggy, and maintain soil temps between 60–75°F (15–24°C). If nothing sprouts after 8 weeks, try lightly nicking the seed coat with sandpaper—sometimes the shell is just too tough.
Can I grow milk thistle indoors first?
Start seeds indoors 6–8 weeks before your last frost using well-draining pots (like seed trays with holes). Use a 50/50 mix of potting soil and perlite to prevent rot. Once seedlings have 2–3 true leaves and soil warms (above 50°F/10°C), transplant them outdoors—harden them off first to avoid shock.
What’s the best way to deal with weeds around milk thistle?
Milk thistle is tough, but weeds can still compete. Mulch heavily (with straw or wood chips) to suppress weeds naturally. Hand-pull any invaders early, as milk thistle’s spiny leaves make it hard to work around once established. Warning: Wear gloves—those prickles pack a punch!
Is milk thistle invasive? Should I worry about it spreading?
Milk thistle is not highly invasive like some weeds, but it self-seeds aggressively in ideal conditions (full sun, poor soil). To control spread, deadhead flowers before they go to seed or harvest seeds for your garden. If you’re in a dry climate, it’s less likely to naturalize—just monitor plants in your area.
Wrapping up and next steps
Growing milk thistle seed may seem tricky at first, but with the right techniques—like cold stratification—you’ll unlock a resilient, drought-tolerant plant perfect for wildflower meadows or pollinator gardens. 🌱 Whether you’re a beginner or a seasoned gardener, patience and preparation pay off with stunning blooms and ecological benefits.
Ready to take the next step? Start small with a test batch of seeds, experiment with your local climate, and soon you’ll be sharing your thriving milk thistle patches with fellow gardeners. Happy growing! 🌿