
Lawn
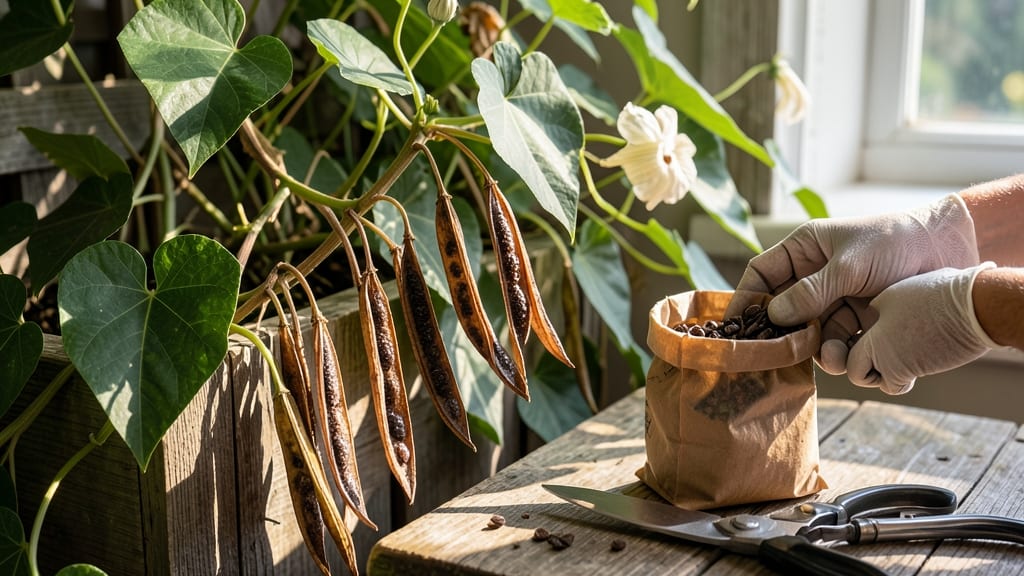
Harvesting moonflower seed pods before they twist shut is the secret to next year’s garden. 🌙 I’ve learned the hard way—wait too long, and you’ll end up with dried, brittle pods that crumble at the touch.
The key is timing: watch for those plump, green pods in late summer, just before they start turning brown. You’ll need a pair of sharp pruning shears, a paper bag for drying, and a little patience.
Cut the pods when they’re still firm but beginning to soften—this is your window for success. Once inside, let them dry completely in a cool, dark place before extracting the seeds, which should be as easy as a gentle squeeze.
What you’ll get are plump, fertile seeds ready for next spring. Plant them shallowly in well-draining soil, and within weeks, you’ll see those familiar heart-shaped leaves pushing through. The payoff? A whole new batch of moonflowers blooming by midsummer, their silvery-white blooms glowing under the moonlight.
This method works for moonflowers grown on trellises, fences, or even in containers. Just remember: speed is everything when it comes to harvesting those pods—don’t let them fool you into thinking they’ll last forever.
📚 In This Guide
- What you need
- Instructions
- Tips and common mistakes
- Wrapping up and next steps
What you need
- ● Moonflower seed pods: 10–20 mature, dried pods (brown, papery, and slightly cracked open).
- ● Pruning shears or sharp scissors: 1 pair (sterilized with rubbing alcohol for hygiene).
- ● Brown paper bags or breathable mesh bags: 2–3 (to store pods while drying further).
- ● Plastic or glass container with lid: 1 (airtight for seed storage, ~1 quart size).
- ● Fine-mesh strainer or sieve: 1 (for separating seeds from chaff).
- ○ Paper towels or silica gel packets: Optional but helpful for drying seeds faster.
- ● Permanent marker: 1 (to label containers with the harvest date).
- ● Handheld magnifying glass (to inspect seed viability).
- ● Small paintbrush (for gently brushing seeds from pods).
- ● Desiccant packets (to absorb excess moisture in storage containers).
- ● Notebook (to track seed germination rates over time).
Step-by-Step guide to harvesting moonflower seed pods
Here's how to collect seeds without damaging the plant or losing viability.
🌿 Step 1: Identify Mature Seed Pods
Moonflower seed pods are ready when they turn from green to a dry, papery brown and begin splitting open along their seams. I look for pods that feel light when gently squeezed—this means the seeds inside are fully mature. Wait until the flowers have wilted completely and the pods are completely dry to the touch.
Harvest pods in the morning after dew has dried but before the afternoon heat sets in. This timing prevents premature seed loss from wind or rain. You'll know they're perfect when the outer shell cracks open just slightly, revealing the glossy black seeds inside.
✂️ Step 2: Gently Remove Pods From the Vine
Use clean, sharp pruning shears to snip the entire seed pod from the vine, leaving a small stem attached. Cutting too close to the vine can damage new growth. I like to place a clean bucket or paper bag beneath the vine to catch any seeds that might fall during harvesting.
Handle pods carefully—moonflower seeds are delicate and can be crushed easily. Avoid twisting or pulling the pods, as this can damage the seeds inside. Place harvested pods in a dry, well-ventilated area immediately to prevent moisture buildup, which can cause mold.
🪴 Step 3: Dry and Open the Seed Pods
Spread the harvested pods on a clean, dry surface in a single layer. I use a mesh screen or a piece of window screen to allow airflow on all sides. Keep them out of direct sunlight to prevent overheating, which can reduce seed viability. Let them dry for 3-5 days until the pods feel completely brittle and hollow when tapped.
Once fully dry, gently squeeze each pod between your fingers to release the seeds. You'll hear a faint popping sound as the seeds fall out. Place the seeds in a paper envelope or breathable cloth bag to store until planting. This method ensures the seeds remain dry and viable for up to 2 years if stored in a cool, dark place.
⏰ Step 4: Store Seeds Properly for Next Season
Label your seed storage with the variety and harvest date. I keep mine in a sealed envelope inside a sealed plastic bag with a small packet of silica gel to absorb any moisture. Store the bag in the refrigerator's crisper drawer, where the cool, stable temperature prevents seed deterioration.
Moonflower seeds are light-sensitive, so avoid exposing them to light during storage. Check the envelope periodically for signs of mold or pests. If stored correctly, you'll have healthy seeds ready for planting next spring, ensuring a repeat performance of those stunning night-blooming flowers.
Tips & tricks for perfect moonflower seed pod harvesting
These little tricks will help you collect the most viable seeds without any of the common frustrations.
Timing is Everything: Harvesting in the morning after dew has dried but before the afternoon heat is critical. This timing prevents premature seed loss from wind or rain, which can scatter seeds before you even get to them. I've seen entire batches lost because I waited too late in the day—don't make that mistake! The pods should feel completely dry to the touch before you begin.
Handle with Care: Moonflower seeds are surprisingly delicate—almost like tiny glass marbles. When removing pods from the vine in Step 2, avoid any twisting or pulling motions. Use clean pruning shears and cut cleanly through the stem. Place a bucket or bag beneath the vine to catch any seeds that might fall during harvesting. I've had to start over completely after accidentally crushing seeds during rough handling.
Drying Strategy: The 3-5 day drying period in Step 3 is non-negotiable for seed viability. Spread pods in a single layer on a mesh screen for even airflow, but keep them out of direct sunlight to prevent overheating. I've noticed that pods dried in indirect light maintain better seed quality than those exposed to harsh sun. Test for readiness by tapping—when they sound hollow and brittle, they're ready to open.
Storage Wisdom: For long-term storage, I've found that using a sealed envelope inside a plastic bag with silica gel creates the perfect moisture-free environment. Store in the refrigerator's crisper drawer where the cool, stable temperature preserves seed viability for up to two years. The key is keeping them completely dry and protected from light—this is what prevents mold and maintains germination rates.
Pro Tips for Moonflower Seed Pods
- These little tricks will help you collect the most viable seeds without any of the common frustrations.
- Timing is Everything: Harvesting in the morning after dew has dried but before the afternoon heat is critical. This t...
- Handle with Care: Moonflower seeds are surprisingly delicate—almost like tiny glass marbles. When removing pods from ...
Frequently asked questions
Got questions about harvesting moonflower seed pods? You're not alone! Here are some of the most common queries—plus straightforward answers to help you master the process like a pro.
When is the best time to harvest moonflower seed pods?
The ideal time is when the pods turn brown and begin to split open naturally—usually late summer to early fall. Harvest them before they fully open to prevent seed loss. If you miss the window, pods may release seeds prematurely, reducing viability for next year’s blooms.
How do I know if the seeds inside are still viable?
Viable seeds are plump, firm, and dark-colored (often black or brown). Test a few by crushing them—if they’re hard and don’t crumble easily, they’re likely good to plant. Store them in a cool, dry place (like a paper envelope) until spring for best results.
What should I do if my moonflower pods won’t open on their own?
If pods stay closed, gently twist or squeeze them to release the seeds. Avoid cutting them open—this can damage the seed coat. If they’re still stubborn, leave them in a warm, dry spot for a few days; heat can help trigger natural splitting.
Can I save seeds from moonflower plants grown from store-bought plants?
Yes! Even seeds from nursery-grown moonflowers can be saved, but expect slight variations in color or vigor. For consistent results, collect seeds from healthy, homegrown plants. Avoid hybrid varieties unless labeled as open-pollinated.
How long can I store moonflower seeds before planting?
Store seeds in a sealed container with a desiccant (like silica gel) in a cool, dark place. They stay viable for 1–2 years, though germination rates drop after the first year. Label your container with the harvest date to track freshness!
What if I accidentally drop seeds on the ground—will they still grow?
Moonflower seeds are tough! If dropped in well-draining soil, they’ll likely sprout naturally—just like in the wild. For better control, plant them ½ inch deep in loose soil after the last frost. They thrive in full sun and tolerate poor soil, making them low-maintenance.
Wrapping up and next steps
Harvesting moonflower seed pods the right way ensures a bountiful, twist-free harvest and sets you up for next year’s blooms! 🌙 With the right tools, timing, and gentle handling, you’ll enjoy healthy seeds ready for planting.
Now that you’re armed with tips and answers, why not share your green thumb success with fellow gardeners—or even save these pods for a future moonlit garden?
Ready to plant your seeds? Start by prepping your soil and marking your calendar for next spring’s moonflower magic! 🌱