
Lawn
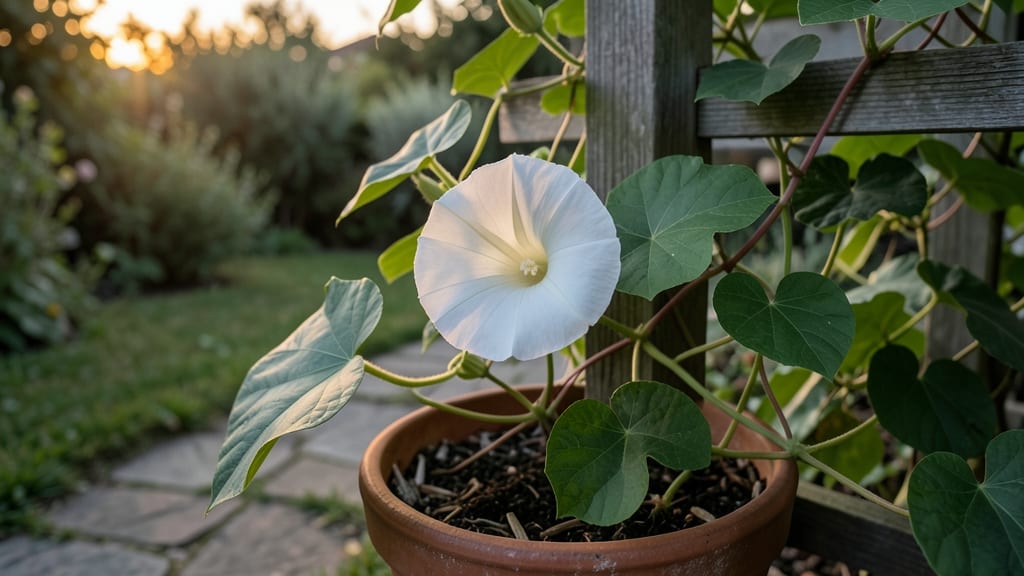
Moonflower vine seed pods hold the secret to next year’s dreamy, fragrant blooms that open only under moonlight. 🌙 I’ve saved seeds from my vines for years, and the process is simpler than you’d think—no fancy tools, just patience and a dry spot.
The key is knowing exactly when to harvest those papery pods before the seeds scatter.
First, wait until the pods turn brown and crispy—they’ll rattle when shaken, signaling it’s time. Cut them carefully with pruners, then spread them on a screen or paper towel in a warm, dry place for 1-2 weeks to finish drying.
Store the seeds in an envelope or jar in a cool, dark spot until planting season rolls around.
When spring arrives, plant your saved seeds 1/4-inch deep in well-draining soil after the last frost. Moonflowers love full sun and rich, slightly sandy soil—they’ll climb trellises or fences with ease. With the right timing, you’ll see those iconic white trumpets glowing in your garden by summer.
Pro tip: Soak seeds overnight before planting for faster germination. And if you’re in a cooler climate, start them indoors 6-8 weeks before the last frost. The wait is worth it for those intoxicating nighttime blooms!
📚 In This Guide
- What you need
- Instructions
- Tips and common mistakes
- Wrapping up and next steps
What you need
- ● Moonflower vine seed pods: Harvest mature, dried pods (brown, papery texture) from healthy vines. Aim for 10–20 pods depending on your storage goals.
- ● Paper bags or brown lunch bags: 1–2 bags (permeable to allow airflow). Avoid plastic.
- ● Newspaper or paper towels: 1–2 sheets for padding and cushioning pods.
- ○ Small cardboard box or envelope: For long-term storage (optional but helpful for organization).
- ● Permanent marker: To label pods with the harvest date and year.
- ● Scissors or pruning shears: For carefully snipping pods from the vine.
- ● Drying location: A warm, dry, well-ventilated spot (e.g., a mesh screen, paper bag propped open, or a sunny windowsill). Avoid direct sunlight.
- ● Desiccant packets: Place 1–2 silica gel packets in the storage container to absorb excess moisture.
- ● Air-tight containers: Glass jars with tight-sealing lids for storing seeds after pods are fully dried (transfer seeds to jars once pods split open).
- ● Seed-saving notebook: To track germination rates, pod sources, or notes on vine performance.
How to harvest, dry, and store moonflower vine seed pods
Preserving moonflower seeds ensures you’ll have fragrant evening blooms year after year—here’s my foolproof method.
🌿 Step 1: Identify and Harvest Ripe Seed Pods
Moonflower seed pods turn from green to brown when fully ripe, usually 4-6 weeks after flowering. Look for pods that feel dry and papery rather than plump and firm. Gently twist or cut open a few to check—if the seeds inside are dark brown and hard, the rest are ready.
Harvest on a dry, sunny morning when the pods are fully mature. Use clean, sharp scissors or pruners to snip the stems 1-2 inches below the pod. Avoid pulling pods directly off the vine to prevent damaging the plant. Place harvested pods in a paper bag or mesh sack to allow airflow while you process them.
💧 Step 2: Dry the Seed Pods Properly
Spread the pods in a single layer on a clean, dry surface like a baking sheet or mesh screen. Choose a warm, dry location with good air circulation—70-75°F and low humidity work best. Avoid direct sunlight, which can overheat and dry the pods too quickly, making them brittle.
Turn the pods every 2-3 days to ensure even drying. They’re ready when the pods feel completely dry to the touch and the seeds rattle inside when shaken. This usually takes 1-2 weeks, depending on your climate. If moisture lingers, drying may take longer—patience prevents mold.
✂️ Step 3: Extract and Clean the Seeds
Once fully dry, open each pod carefully with your fingers or a small knife. Remove the seeds and discard any that look shriveled, discolored, or damaged. Healthy moonflower seeds are dark brown and firm. I like to spread them on a clean cloth or paper towel to air-dry for an extra 24 hours to remove any remaining moisture.
For extra cleanliness, you can gently wipe the seeds with a soft brush to remove debris, but avoid washing them—moonflower seeds need their natural oils to germinate properly. Store only the plump, undamaged seeds for the best results next season.
🪴 Step 4: Store Seeds for Long-Term Viability
Place the cleaned seeds in a small, airtight container like a glass jar or resealable plastic bag. Add a packet of silica gel or a few uncooked rice grains to absorb any residual moisture. Label the container with the variety and harvest date—moonflower seeds stay viable for 2-3 years if stored properly.
Keep the container in a cool, dark place like a pantry or refrigerator. Check it occasionally to ensure no moisture has formed inside. If you notice condensation or a musty smell, transfer the seeds to a new dry container immediately. Proper storage means you’ll have fresh moonflower seeds ready for planting whenever you’re ready.
⏰ Step 5: Prepare for Next Year’s Planting
When you’re ready to plant, soak the seeds in lukewarm water for 12-24 hours to soften the tough outer coating and encourage faster germination. Moonflower seeds germinate best in 65-75°F soil, so start them indoors 6-8 weeks before your last frost date or sow directly in the garden after all danger of frost has passed.
Plant the seeds ½ inch deep in well-draining soil and keep them moist until germination, which typically occurs in 10-20 days. With your stored seeds, you’ll enjoy those enchanting evening blooms again next year—no need to buy new plants!
Tips & tricks for perfect moonflower seed preservation
Mastering these simple tricks will help you preserve moonflower seeds with professional results—no gardening degree required.
Harvest Timing Secret: The 4-6 week window after flowering is critical. I learned this the hard way—harvesting too early means soft, undeveloped seeds that won't store well. Check pods by gently squeezing them; they should feel dry and papery like crumpled paper, not firm like green beans. Harvest on dry mornings only—the morning dew can cause premature moisture issues during drying.
Drying Environment Matters: That 70-75°F temperature range is non-negotiable for even drying. I've had batches fail when humidity crept above 60%—the pods would develop mold before seeds dried completely. If your home is naturally humid, consider using a small fan to improve airflow around your drying surface. Remember to turn pods every 2-3 days; this prevents uneven drying where one side becomes brittle while the other stays damp.
Seed Selection Tip: When extracting seeds in Step 3, I use a simple float test for extra assurance: Place seeds in a bowl of water. Good seeds sink immediately, while empty or damaged ones float. This extra 30-second check saves me from storing non-viable seeds. After selecting only the plump, dark brown seeds, that extra 24-hour air-dry on a clean cloth makes all the difference—it removes any lingering surface moisture that could cause mold during storage.
Storage Wisdom: The 2-3 year viability promise only holds if you follow these two rules: First, use airtight containers—even small gaps let moisture creep in. Second, check your seeds every 6 months by opening the container and giving them a quick sniff. If you detect any mustiness at all, transfer them to a fresh container with fresh silica gel. I've had seeds last 4 years this way, but that's pushing the limit—most gardeners see 2-3 years with proper care.
Pro Tips for Moonflower Vine Seed Pods
- Mastering these simple tricks will help you preserve moonflower seeds with professional results—no gardening degree r...
- Harvest Timing Secret: The 4-6 week window after flowering is critical. I learned this the hard way—harvesting too ea...
- Drying Environment Matters: That 70-75°F temperature range is non-negotiable for even drying. I've had batches fail w...
Frequently asked questions
Got questions about harvesting, storing, or growing moonflower vine seed pods? You’re not alone! Here are answers to the most common queries to help you save those fragrant seeds for next season with confidence.
When is the best time to harvest moonflower vine seed pods?
Harvest moonflower seed pods when they turn brown and papery—usually late summer to early fall (August–October, depending on your climate). Wait until they’re fully dry but still intact; if they split open, the seeds may scatter. Pick them on a dry morning for easier handling!
How long can I store moonflower seeds before planting?
Moonflower seeds stay viable for 2–3 years if stored properly in a cool, dry place (like a sealed container in the fridge). For best results, plant them within a year. Test germination by soaking a few seeds overnight—if they sprout, they’re still good!
What if my seed pods won’t dry on the vine?
If humidity keeps pods damp, try these tricks:
- Hang them upside down in a dry, well-ventilated spot (like a garage or shed).
- Place them in a paper bag with a few silica gel packets to absorb moisture.
- Avoid plastic bags—trapped moisture causes mold.
Can I grow moonflower vines from store-bought seeds instead of saving my own?
Store-bought seeds are a great backup, but saved seeds often produce vines that thrive better in your local climate. If you choose store-bought, pick organic, non-GMO seeds for healthier growth. Just note: Moonflowers are annuals, so you’ll need fresh seeds yearly.
Will saving moonflower seeds ensure the same fragrant flowers next year?
While moonflowers are self-pollinating, saved seeds may produce slightly different blooms due to natural cross-pollination. For consistent fragrance, plant multiple vines and save seeds from the most fragrant pods. Bonus: Moonflowers attract pollinators—so you’ll get extra help with pollination!
Wrapping up and next steps
Growing moonflower vine from seed pods is a rewarding way to bring back the magic of fragrant evening blooms year after year! 🌙 With just a little patience and care, you can dry, store, and replant these pods to enjoy their delicate beauty in your garden.
Whether you're a seasoned gardener or a beginner, this simple process opens the door to lush, climbing vines that thrive with minimal effort.
Ready to take the next step? Grab your dried seed pods, gather your tools, and start planning your moonflower oasis today! Your garden—and your senses—will thank you. 🌱