
Lawn
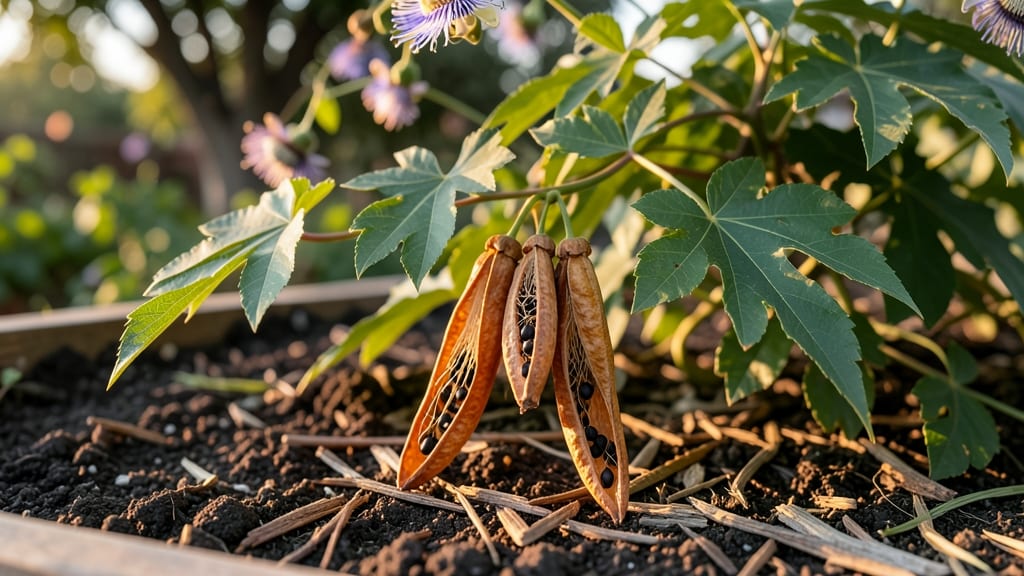
Harvesting passionflower seed pods at the perfect moment means reliable blooms next season. 🌿 These intricate, papery pods turn from green to brown—when they split open naturally, that’s your cue to collect them before the seeds scatter.
I’ve learned the hard way that waiting too long means lost seeds, while harvesting too early gives you immature ones that won’t germinate. The key is timing: aim for late summer when pods start cracking but haven’t fully dried.
Once you’ve got the pods, the real work begins—extracting the seeds and preparing them for cold stratification. You’ll need a sharp knife, a bowl of water, and a bit of patience.
The seeds hide inside the fibrous interior, so you’ll need to gently pry them out, then let them soak for a few hours to remove any lingering pulp. After that, they’re ready for their 4-6 week cold treatment in a damp paper towel inside a sealed bag in the fridge.
This mimics winter conditions and tricks the seeds into breaking dormancy.
Planting these prepped seeds in well-draining soil under bright, indirect light gives them the best shot at sprouting within 2-4 weeks. The seedlings are delicate at first, so keep the soil consistently moist but never soggy.
By the time they’re a few inches tall, you can transplant them outdoors after the last frost—where they’ll reward you with those signature exotic, trumpet-shaped blooms by next summer. The payoff? A vine that thrives with minimal fuss once established.
Here’s the secret most gardeners miss: passionflowers love full sun and rich, slightly acidic soil, but they’re surprisingly drought-tolerant once rooted. If you’re in a warmer climate, you might get blooms the first year, but cooler zones will need a bit more patience.
The real magic happens when you let them climb—a sturdy trellis or fence turns them into a living work of art, attracting hummingbirds and butterflies along the way.
📚 In This Guide
- What you need
- Instructions
- Tips and common mistakes
- Wrapping up and next steps
What you need
- ● Passionflower seed pods: 5–10 fresh, mature pods (harvested in late fall or early winter for best results). Ensure they’re fully ripe but not dried out.
- ● Cold-stratification supplies: 1–2 resealable plastic bags (quart-sized or larger, with a zip-top seal).
- ● 1 cup dampened potting mix or peat moss (moist but not soggy—think of a wrung-out sponge!).
- ○ Optional: Paper towels or coir fiber as an alternative moisture-retention medium.
- ● Storage container: A small airtight container (like a Tupperware) or a seedling tray with drainage holes.
- ● Refrigerator space: A cold, dark spot (33–41°F / 0–5°C) for 6–12 weeks. Your fridge’s crispers work perfectly!
- ● Planting supplies (post-stratification): 1–2 seedling pots (3–4 inches deep) or a long seed tray with drainage.
- ● High-quality seed-starting mix (sterile and well-draining).
- ● Small spray bottle for gentle watering.
- ○ Optional: Clear plastic dome or plastic wrap to create a mini greenhouse.
- ● Grow lights or a sunny windowsill (south-facing) for post-stratification growth.
- ● Humidity dome or pebble tray to maintain moisture during germination.
- ● Labeling tags and a permanent marker to track seed pod varieties.
- ● Gloves (if handling prickly or sticky pods—passionflower seeds can be sneaky!).
Step-by-Step instructions for cold-stratifying passionflower seed pods
Cold stratification unlocks passionflower germination—here's how to do it right every time.
🌱 Step 1: Harvest and Prepare the Seed Pods
Collect mature passionflower seed pods when they turn brown and begin splitting open naturally. The seeds inside should be plump and firm—any shriveled or discolored seeds won't germinate. I like to harvest pods in late fall or early winter when they've fully dried on the vine.
Remove the seeds from the pod by gently squeezing the dried husk. Discard the fibrous pulp and any seeds that look damaged. Store the viable seeds in a paper envelope until stratification. Never use plastic bags—they trap moisture and cause mold. Label your envelope with the variety and harvest date.
💧 Step 2: Moisten the Seeds and Mix With Stratification Medium
Place the seeds in a small bowl and pour enough lukewarm water to cover them completely. Let them soak for 12-24 hours—this softens the hard outer shell and jumpstarts germination. After soaking, drain the water and let the seeds air-dry slightly on a paper towel for 1-2 hours.
Mix the seeds with a damp peat moss or coconut coir in a ratio of 1 part seeds to 3 parts medium. I use a shallow container with drainage holes to prevent waterlogging. The mix should feel like a wrung-out sponge—moist but not dripping. This creates the ideal environment for stratification.
❄️ Step 3: Stratify in the Refrigerator for 6-8 Weeks
Place the container in a plastic bag and seal it loosely—this maintains humidity while allowing airflow. Store the bag in your refrigerator's crisp drawer, where temperatures hover around 35-40°F. Check the mix every 2 weeks; if it feels dry, mist it lightly with water.
Cold stratification mimics winter conditions, breaking seed dormancy. You'll know it's working when the seeds begin to plump slightly or tiny roots appear. If mold forms, discard the mix and start fresh—mold means too much moisture. Patience is key; some varieties need up to 8 weeks of cold treatment.
☀️ Step 4: Sow Stratified Seeds in Warmth
After stratification, fill small pots with well-draining seed-starting mix and sow the seeds ½ inch deep. Space them 1 inch apart to avoid overcrowding. Water gently until the soil is evenly moist but not soggy. Place the pots in a warm, bright location with 65-75°F temperatures.
Cover the pots with clear plastic wrap to retain humidity, but remove it daily for 10 minutes to prevent fungal growth. Germination typically occurs in 2-4 weeks, though some seeds may take longer. Keep the soil consistently moist—never let it dry out during this critical phase.
🌿 Step 5: Transplant Seedlings to Individual Containers
Once seedlings develop 2-3 true leaves (the second set after the initial seed leaves), transplant them into 3-inch pots with fresh potting mix. Handle the seedlings carefully—they're delicate at this stage. Water thoroughly after transplanting to help them establish roots.
Place the pots under grow lights or in a south-facing window where they'll receive 6+ hours of indirect light daily. Avoid direct sunlight until the seedlings are stronger. You'll see new growth within 1-2 weeks if conditions are ideal. Harden off seedlings outdoors gradually before planting in the garden.
Tips & tricks for perfect passionflower germination
These precise techniques will help you coax even the most stubborn passionflower seeds into sprouting reliably.
Seed Selection Matters: In Step 1, focus on pods that have naturally split open—this indicates full maturity. The seeds should be plump and firm, not shriveled or discolored. I've found that harvesting in late fall gives you the freshest pods with the highest germination potential. If you're unsure about seed viability, perform a float test: place seeds in water—viable ones will sink while non-viable ones float.
Stratification Medium Choices: While the instructions mention peat moss or coconut coir, you can also use a mix of perlite and vermiculite for better drainage. The key is maintaining that "wrung-out sponge" moisture level—too wet and you risk mold, too dry and germination won't occur. I've had success with a 50/50 mix of coconut coir and perlite that holds moisture while preventing waterlogging.
Temperature Consistency: The 35-40°F range in Step 3 is critical for breaking dormancy. If your refrigerator runs hotter, place the container on the bottom shelf where temperatures are cooler. Use a small thermometer to monitor the exact temperature—consistency is more important than hitting that exact range. I've seen germination rates drop significantly when temperatures fluctuate more than 5°F during stratification.
Germination Timing: When you're ready to sow in Step 4, don't be surprised if germination takes longer than the 2-4 week estimate. Some varieties, especially heirlooms, can take up to 6 weeks. The key is maintaining consistent moisture—water gently every 2-3 days rather than soaking the pots. I've found that using a spray bottle helps distribute water evenly without disturbing the seeds.
Pro Tips for Passionflower Seed Pods
- These precise techniques will help you coax even the most stubborn passionflower seeds into sprouting reliably.
- Seed Selection Matters: In Step 1, focus on pods that have naturally split open—this indicates full maturity.
- Stratification Medium Choices: While the instructions mention peat moss or coconut coir, you can also use a mix of perlite and vermiculite for better drainage.
Frequently asked questions
about growing passionflower seed pods—here’s what you need to know before diving in!How long does cold stratification take for passionflower seeds?
Cold stratification typically requires 6–12 weeks in the fridge (34–40°F). Place damp seeds in a sealed bag with moist peat moss or paper towels, then refrigerate. Patience is key—some varieties may need longer, so check periodically for sprouts after 8 weeks.
Can I skip cold stratification and plant seeds directly?
While possible, germination rates drop dramatically (often below 20%) without stratification. If you’re impatient, try soaking seeds in warm water for 24 hours first, but cold treatment mimics natural winter conditions and yields far better results. Worth the wait!
When’s the best time to plant stratified passionflower seeds outdoors?
Aim for late spring after the last frost (when soil temps hit 60°F+). Seedlings are frost-sensitive, so wait until nighttime temps stay above 50°F. Start indoors 8–10 weeks before the last frost if your climate is unpredictable.
What if my passionflower seeds won’t sprout after stratification?
Try these fixes:
- Check moisture: Seeds must stay damp but not soggy. Re-moisten if dry.
- Test viability: Cut open a seed—if it’s hard and white, it’s likely dead.
- Adjust warmth: Move to a sunny windowsill or use a heat mat (70–75°F).
- Fresh seeds: Older seeds (over 1 year) germinate poorly—source new ones if needed.
Are passionflower seed pods edible, or just for flowers?
While the pods aren’t typically eaten, some cultures use young passionflower shoots or leaves in teas (for calming effects). Focus on growing them for stunning blooms—their vibrant flowers attract pollinators and add drama to gardens. Save the pods for propagation!
Wrapping up and next steps
Growing passionflower seed pods from scratch is a rewarding journey that unlocks vibrant blooms and lush vines—but success starts with patience and precision. By mastering cold stratification and following the right steps, you’ll break through dormancy and nurture thriving plants.
Whether you’re a seasoned gardener or a curious beginner, this blueprint gives you the confidence to turn seeds into stunning, fragrant vines.
Ready to dive in? Start by gathering your supplies—then roll up your sleeves and get planting! Your future passionflower blooms will thank you. 🌱✨