
Planting
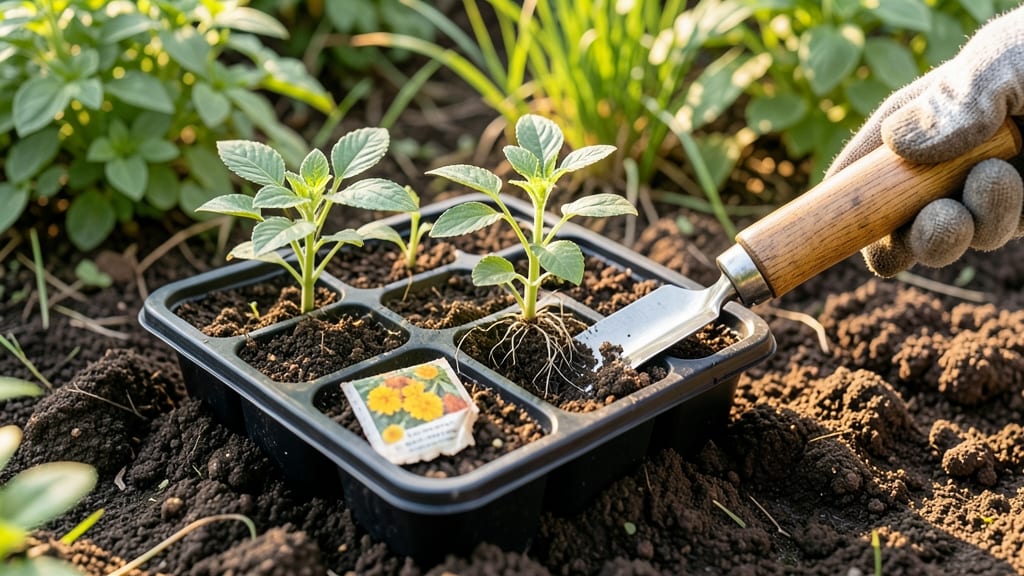
Putting seeds in soil isn't rocket science—it's about giving them the right head start. 🌱 I've buried more seeds than I can count, and the difference between strong starts and weak seedlings comes down to three simple steps: soil prep, proper depth, and gentle care.
The secret weapon here is loose, crumbly soil that lets roots spread easily. Most seeds need to go in just twice as deep as they are wide—tiny seeds like lettuce go in shallow, while big beans can handle a deeper spot.
Pressing them in gently keeps them from washing away when you water. Once planted, keep the soil consistently moist but never soggy. A light misting every other day works wonders, and you'll see those first green shoots within 5-14 days, depending on the plant.
That's when the real magic begins. This method works for almost any seed—veggies, flowers, or herbs—so you can apply it everywhere from raised beds to small pots. Let's get those seeds growing!
📚 In This Guide
- What you need
- Instructions
- Tips and common mistakes
- Wrapping up and next steps
What you need
- ● Seeds: Choose high-quality, fresh seeds suited to your climate (e.g., tomato, basil, or marigold). Start with 5–10 seeds per variety for testing.
- ● Potting soil or garden soil: Use lightweight, well-draining soil (e.g., miracle-gro potting mix or organic compost). You’ll need about 1–2 gallons per seedling.
- ● Containers or garden bed: Containers: 4–6 inch pots (1 per seedling) or seed trays with drainage holes.
- ● Garden bed: Loose, fertile soil in a sunny spot (6+ hours of light daily).
- ● Watering can or spray bottle: A gentle spray nozzle prevents seed displacement.
- ● Seedling heat mat (for cooler climates): Keeps soil 65–75°F for faster germination.
- ● Grow lights: Provides 12–16 hours of light/day if natural light is limited.
- ● Plant labels: Write seed names/dates to avoid mix-ups.
- ● Gloves & knee pad: Protects hands and knees during planting.
- ● Check your last frost date (use Almanac’s tool) to time planting.
- ● Prepare soil: Loosen 6–12 inches deep for garden beds or mix in compost.
- ● Soak seeds overnight (if hard-coated, like beans or peas) to speed up germination.
Instructions for planting seeds like a pro
Here's how I get every seed to sprout reliably—no guesswork, just strong starts.
🌱 Step 1: Prepare the Soil for Perfect Seed Placement
Loosen the top 2-3 inches of soil with a fork or trowel until it crumbles easily between your fingers. I like to work in a small trench about ½ inch deep—this keeps seeds at the ideal depth while preventing them from washing away during watering. If your soil feels compacted, mix in a handful of compost to improve drainage and aeration.
Moisten the soil lightly before planting—it should hold together when squeezed but not leave wet streaks. Too much moisture drowns seeds, while dry soil makes them struggle to establish roots. Think "damp sponge," not "waterlogged." This prep step is where most planting mistakes happen, so take your time here.
🌱 Step 2: Plant Seeds at the Right Depth and Spacing
Most seeds need to go in twice as deep as their diameter. Tiny seeds like lettuce go in ¼ inch deep, while larger ones like beans need 1 inch. I use my pinky finger as a guide—if the seed fits snugly in the first knuckle crease, it's about right. Space seeds 1-2 inches apart in rows that are 6-12 inches apart, depending on the mature plant size.
Here's the thing—don't overcrowd. I've planted seeds too close before, and while they sprout, they compete for light and nutrients, leading to weak, leggy seedlings. For 4 plants, you'll want about 4-6 seeds total to account for some that may not germinate. Gently press each seed into place with your finger rather than dropping it in—this ensures good soil contact for faster germination.
💧 Step 3: Cover and Water for Optimal Germination
Lightly cover seeds with soil, then water gently with a fine spray nozzle until the surface looks evenly moist. I like to use a watering can with a rose attachment—it delivers water without disturbing the seeds. Avoid heavy watering that can wash seeds deeper than intended. After watering, use your fingers to press the soil surface lightly around each seed to ensure good contact.
For most seeds, a clear plastic dome or plastic wrap over the tray helps retain moisture and warmth. Remove it as soon as you see the first sprouts—usually within 5-14 days, depending on the plant. Watch for condensation on the inside of the dome; if it's heavy, you've got enough moisture. If you see mold instead, that's your signal to remove the cover immediately and let the soil dry slightly.
☀️ Step 4: Position for Light and Monitor Growth
Place your newly planted seeds in a warm spot with bright, indirect light immediately. A south-facing window works, but if your space is dim, supplement with a grow light kept 2-3 inches above the seeds. Seedlings need light to prevent them from stretching toward any available source—this is called "leggy" growth, and it's a sign they're hungry for more light.
Check soil moisture daily by sticking your finger ½ inch deep. If it feels dry, water gently again. You'll know you've got the right balance when you see the first tiny green shoots pushing through the soil. That's when the real fun begins—just don't move the tray around too much once they sprout. Seedlings are sensitive to disturbances, so keep them in one spot until they have at least their first set of true leaves.
Tips & tricks for stress-free seed planting
Took me years of trial-and-error to nail these down—here's how I guarantee strong starts every time.
Soil Prep Secret: Before planting, run your finger through the loosened soil to check texture. It should feel like crumbly cake batter—not sandy or clay-like. If your soil resists breaking apart, mix in a little perlite or vermiculite to lighten it up. I also like to sprinkle a thin layer of sand at the bottom of containers to prevent waterlogging. This step makes all the difference for root development in Step 1.
Depth Visual Guide: For Step 2, here's my foolproof trick: Use a ruler or even a business card to mark your planting depth. The card's thickness (about 1/8 inch) works perfectly for tiny seeds like lettuce, while a standard pencil (about 1/2 inch) marks ideal depth for larger seeds. Press the seed in gently until it reaches your marked line—this prevents over-planting which can suffocate seeds.
Germination Hack: In Step 3, after covering seeds, I give the soil one final press with my fingertips to eliminate air pockets. This ensures consistent contact between seed and soil, which speeds up germination. For extra warmth, place your seed tray on top of your fridge—it creates a cozy environment without overheating. Just watch for condensation like I mentioned, and remove the dome immediately if you see mold forming.
Lighting Troubleshooting: For Step 4, if your seedlings start stretching toward the light (that leggy look), it's time to adjust. Move them closer to the light source or increase light exposure by 2-3 hours daily. I've had great results with LED grow lights on a timer—14-16 hours of light mimics natural daylight perfectly. Remember, those first true leaves are your signal to keep conditions stable.
Pro Tips for Put The Seed In The Soil
- Took me years of trial-and-error to nail these down—here's how I guarantee strong starts every time.
- Soil Prep Secret: Before planting, run your finger through the loosened soil to check texture. It should feel like cr...
- Depth Visual Guide: For Step 2, here's my foolproof trick: Use a ruler or even a business card to mark your planting ...
Frequently asked questions
What’s the best time of year to put seeds in the soil?
The ideal time depends on your climate and the plant type. For cool-season crops like lettuce or spinach, aim for early spring or fall when soil temps are below 70°F. Warm-season plants (tomatoes, peppers) need soil at at least 60°F—usually after the last frost. Check your seed packet for specifics!
How deep should I plant seeds?
Rule of thumb: Plant seeds 2-3 times deeper than their width. Tiny seeds (like basil) go just 1/8 inch under, while larger ones (beans, peas) need 1-2 inches of coverage. Press soil gently over seeds to ensure good contact—this helps moisture reach them without washing them away.
What if my seeds don’t sprout? Troubleshooting tips?
Don’t panic! First, check moisture—soil should stay consistently damp (not soggy). If seeds are old (1+ years), germination rates drop. Try a warm, sunny windowsill for a quick test. If still no luck, test viability by soaking seeds in water—sinkers are good, floaters may be dead.
Can I use regular garden soil for planting seeds?
While garden soil works, seed-starting mix is lighter and drains better, reducing rot. For containers, blend 50% potting mix + 50% compost. Avoid heavy clay soil—it compacts and suffocates roots. If repurposing garden soil, sterilize it first with a baking-soda solution (1 cup per gallon) to kill pests.
Are there alternatives to planting seeds directly in soil?
Try seed tape (pre-spaced seeds on tape) for easy placement, or peat pots to transplant seedlings without disturbing roots. For delicate seeds, use paper towels or coffee filters to speed up germination indoors before transplanting. Just keep them moist and warm!
Wrapping up and next steps
Putting a seed in the soil is your first step toward a thriving garden—simple, rewarding, and full of potential! 🌱 Whether you’re a beginner or a seasoned gardener, the key is patience, preparation, and a little love.
Trust the process, and soon you’ll watch tiny sprouts transform into lush plants that bring beauty (and maybe even fresh herbs or veggies!) to your space.
Ready to take the next step? Start small:
- Choose one easy plant (like marigolds or lettuce) to build confidence.
- Track your progress with a journal or photos—it’s fun to see growth over time!
- Expand your garden as you gain confidence, adding more seeds or varieties.