
Lawn
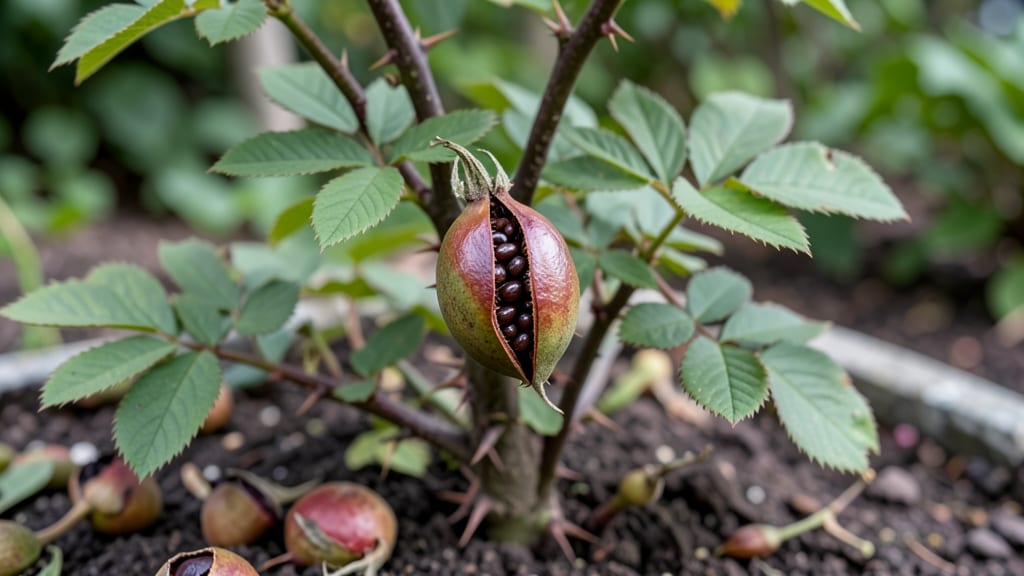
Harvesting rose seed pods before they twist open preserves the seeds inside for growing your own roses. ✨ The key is timing—wait until the pods turn brown but haven't split yet, then carefully collect them to avoid crushing the seeds.
This natural method skips the messy twist-and-catch approach while keeping seeds viable for germination.
You’ll need just a few simple supplies: paper bags for drying pods, a clean workspace, and a small container for storing seeds. The process takes about 2 weeks from harvest to planting, with most of the time spent in cold stratification to mimic winter conditions.
Not all roses reproduce true-to-type from seed, but the surprises make it worth trying—especially with heirloom varieties.
Once you’ve dried and stratified the seeds, planting them in a well-draining mix gives you the best shot at success. Keep the soil consistently moist but not soggy, and expect germination to take 4-8 weeks—patience is key here.
The seedlings you grow won’t be identical to the parent plant, but they’ll have the same hardy rose spirit, just with their own unique twist.
Common challenges include low germination rates and slow growth, but adjusting light and humidity can make a big difference. Grafted roses won’t come from seed, so this method works best for species roses or those grown from seed naturally.
If you love the thrill of growing something entirely your own, this is the way to go!
📚 In This Guide
- What you need
- Instructions
- Tips and common mistakes
- Wrapping up and next steps
What you need
- ● Mature rose seed pods: 5–10 fully brown, dry pods (from hybrid tea, floribunda, or climber roses—avoid grafted varieties if you want true-to-type seeds).
- ● Pruning shears or sharp scissors: Clean, sterilized (70% isopropyl alcohol wipe), and sharp for clean cuts.
- ● Paper towels or coffee filters: 2–3 sheets per pod for drying seeds.
- ● Small paper bags or envelopes: 1 per pod type (labeled with rose variety + date).
- ● Permanent marker or labels: For tracking seed sources.
- ○ Plastic zip-top bags (optional but handy): For short-term seed storage (1–2 weeks).
- ○ Gloves (optional): Nitrile or latex to avoid thorns and residue.
- ● Seed stratification kit: If you want to speed up germination (e.g., damp sand in a sealed container).
- ● Fine-mesh strainer: For rinsing seeds if they’re sticky.
- ● Spray bottle with water: To moisten paper towels gently.
- ● Notebook: To log pod details (color, size, parent plant notes).
How to harvest rose seed pods for viable seeds
Here's my foolproof method for collecting seeds from rose hips without damaging the plant.
🌿 Step 1: Identify and Select Mature Seed Pods
Wait until the rose hips turn from green to deep red or orange—this signals full ripeness. Gently squeeze one to test: it should feel firm but yield slightly under pressure, like a ripe tomato. Avoid pods that are still green or have begun to split open naturally, as their seeds won't be viable.
Select pods from healthy plants that produced abundant blooms. I always choose hips from the second flush of flowers, as they tend to have higher germination rates. Use clean, sharp pruners to snip the stem just below the hip, leaving the main branch intact for future growth.
🌱 Step 2: Prepare the Seed Pods for Processing
Rinse the harvested hips under cool water to remove any dirt or debris. Lay them out on a clean towel to air-dry for 24-48 hours in a well-ventilated area. This prevents mold growth during storage. Once dry, place them in a paper bag (not plastic) and store in a cool, dark place for 4-6 weeks to complete the drying process.
During this time, the hips will naturally split open. You'll know they're ready when you can easily separate the seeds from the surrounding pulp. Avoid rushing this step—proper drying ensures higher germination rates. If you're impatient, check weekly by gently squeezing a few hips.
✂️ Step 3: Extract and Clean the Seeds
Once the hips have fully dried, crush them gently between your fingers or use a mortar and pestle to release the seeds. The pulp will come away easily, leaving behind small, brown seeds. Spread the seeds on a clean surface and use a fine-mesh strainer or sieve to remove any remaining pulp or debris.
For best results, soak the cleaned seeds in lukewarm water for 12-24 hours before planting. This softens the seed coat and encourages faster germination. After soaking, drain the water and let the seeds dry again briefly on a paper towel before storing or planting.
💧 Step 4: Stratify for Successful Germination
Rose seeds require stratification to break dormancy. Place the seeds in a plastic bag with a damp paper towel, seal it loosely, and refrigerate for 8-12 weeks. Check the towel weekly—it should stay moist but not soggy. You'll see tiny roots emerge during this time, signaling the seeds are ready for planting.
This cold treatment mimics winter conditions, tricking the seeds into thinking they've survived a natural cycle. After stratification, you can plant them directly in the garden or in seed trays filled with well-draining potting mix. Keep the soil consistently moist but not waterlogged until germination occurs, which typically takes 3-6 weeks.
Tips & tricks for perfect rose seed pod harvesting
Between us, harvesting rose seed pods successfully takes patience—but these little tricks will help you avoid the most common pitfalls and maximize your seed viability.
Timing is Everything: The 24-48 hour drying period in Step 2 isn't just arbitrary—it's when the hips develop the right moisture balance to prevent mold while allowing natural splitting. I've learned the hard way that rushing this step leads to either moldy hips or seeds that won't separate properly. Place your drying hips in a spot with good airflow, like an open windowsill or under a fan on low setting. This mimics natural drying conditions and speeds up the process without sacrificing quality.
Seed Extraction Technique: When crushing dried hips in Step 3, work gently but firmly—think of it like opening a walnut rather than smashing it with a hammer. A mortar and pestle gives you the most control, but if you're short on time, rolling the dried hips between two sheets of clean toweling with a rolling pin works surprisingly well. The goal is to release seeds without crushing them, which reduces viability. Spread the crushed contents on a dark-colored surface (like black parchment paper) to make those tiny brown seeds stand out against the pulp.
Stratification Secrets: The 8-12 week cold treatment in Step 4 is where the magic happens for rose seeds, but many gardeners either don't do it long enough or let the moisture levels get wrong. I keep my stratification bags in the crisper drawer of my fridge (not the freezer) where temperatures stay consistently around 35-40°F. The damp paper towel should feel like a well-wrung sponge—if water drips out when you squeeze it, it's too wet. You'll see the first signs of success when you notice tiny white roots emerging from the seeds after about 6 weeks.
Pro Tips for Rose Seed Pod
- Between us, harvesting rose seed pods successfully takes patience—but these little tricks will help you avoid the most common pitfalls and maximize your seed viability.
- Timing is Everything: The 24-48 hour drying period in Step 2 isn't just arbitrary—it's when the hips develop the right moisture balance to prevent mold while allowing natural splitting.
- Seed Extraction Technique: When crushing dried hips in Step 3, work gently but firmly—think of it like opening a walnut rather than smashing it with a hammer.
Frequently asked questions
Got questions about harvesting rose seed pods?
You’re not alone! Here are some of the most common queries—plus straightforward answers to help you succeed.
Why do rose seed pods sometimes fail to open naturally?
Rose seed pods (hips) may not open due to immature seeds, disease, or environmental stress (like extreme heat or cold). If pods stay closed, they might still contain viable seeds—just twist them open gently. Overripe pods often split on their own, but forcing them (when dry) ensures better seed access.
How long does it take for rose seed pods to mature?
Timing varies by rose variety, but pods typically mature in 60–90 days after flowering. Start checking in late summer—ripe pods turn deep red, brown, or orange and feel firm. Harvest when they’re fully colored but before they split open to avoid seed loss.
Can I use rose seed pods from store-bought roses?
Probably not! Most commercial roses are hybrids or treated with chemicals to prevent seed production. For viable seeds, use pods from organic, heirloom, or wild roses. If unsure, test a few seeds—success rates are low but possible with healthy pods.
What’s the best way to store harvested rose seeds?
Clean seeds, then store them in a paper envelope (not plastic) in a cool, dry place. For faster germination, stratify them: Mix seeds with damp sand or peat moss, refrigerate for 4–8 weeks, then plant. Label your storage with the rose variety and harvest date!
What if my rose seed pods have bugs or mold?
Discard pods with visible pests (like aphids or beetles) or mold. To prevent issues, harvest pods when dry and store them in a well-ventilated container. If mold appears on seeds, soak them in a 1:9 hydrogen peroxide-water solution for 10 minutes before planting.
Wrapping up and next steps
Harvesting rose seed pods is a rewarding way to grow new roses naturally—without the hassle of twists or tangles! By following the right steps, you can collect viable seeds, nurture them, and even propagate your own plants. Your garden just got a little more magical.
Ready to try it? Start with just one rose bush—pick a healthy pod, follow the simple steps, and watch your green thumb grow! 🌱✨