
Lawn
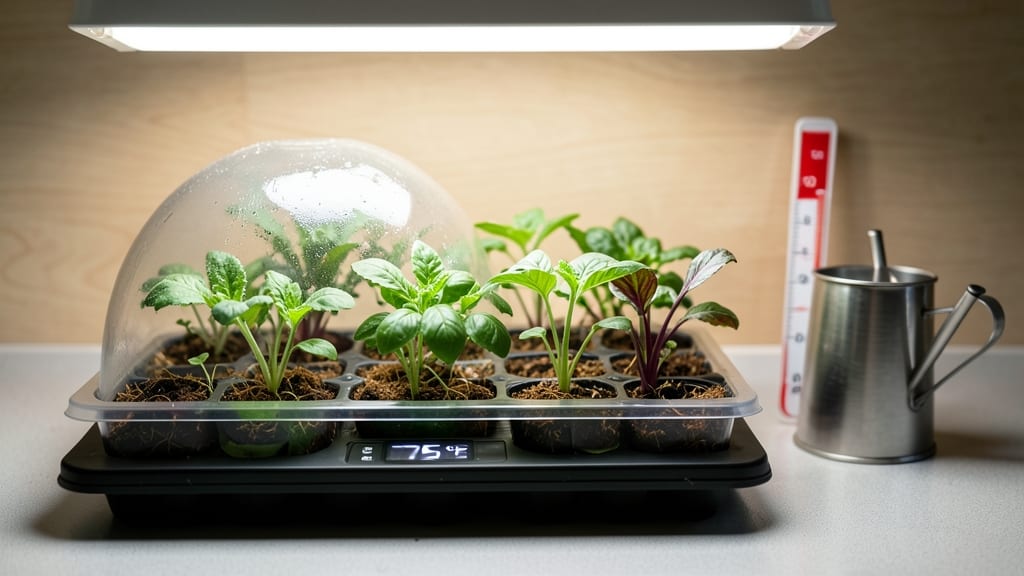
A seed heating pad can cut your germination time in half—literally. 🌱 I’ve used mine to go from weeks of waiting to seeing tiny sprouts in just days, especially with slow starters like peppers and tomatoes.
The secret lies in mimicking the warm soil conditions these seeds crave, but without the fuss of a greenhouse.
These pads work by providing consistent bottom heat—think of it like a cozy blanket for your seeds. You’ll need a seed tray, some quality seed-starting mix, and your chosen seeds.
Most pads let you adjust temperatures between 65°F and 95°F, so you can tailor it to what your plants need. Just place the pad under your tray, add moisture, and watch the magic happen.
With the right setup, you’ll see sprouts 3-7 days faster than with regular methods. The warmth encourages enzymes to activate, breaking dormancy and kickstarting growth. It’s especially game-changing for tropical plants or seeds from warm climates that struggle in cool homes.
Plus, fewer seeds rot because the heat helps prevent mold.
Pro tip: Monitor humidity—too much moisture can overheat seeds. And don’t rush—once sprouts appear, move them to a brighter spot to avoid leggy seedlings. This tool turns patience into productivity, and the results speak for themselves. Ready to try it?
📚 In This Guide
- What you need
- Instructions
- Tips and common mistakes
- Wrapping up and next steps
What you need
- ● 1–2 heating pads (electric, low-wattage—ideally 25–50 watts for safety and efficiency). Look for ones designed for medical use or pet heating.
- ● 1 roll of aluminum foil (heavy-duty, 12-inch width to cover the pad securely).
- ● 1 sheet of black construction paper or cardboard (12" x 18" or larger to absorb heat).
- ● 1–2 seed trays or shallow containers (with drainage holes, 6–12 inches wide depending on seed volume).
- ● Potting mix (lightweight, seed-starting blend—avoid garden soil to prevent compaction).
- ● Seeds (your chosen variety—check planting depth on seed packets!).
- ○ Thermometer (optional but helpful) (to monitor temperatures—aim for 65–85°F depending on seed type).
- ● Scissors or utility knife (for cutting foil/paper to size).
- ● Ruler (to measure and mark cuts evenly).
- ● Spray bottle with water (for gentle misting of soil).
- ○ Plastic wrap or clear lid (optional, to create a mini greenhouse effect).
- ○ Timer or smart plug (optional, to cycle the heating pad on/off for 12–16 hours/day).
How to use a seed heating pad for faster germination
Here’s my foolproof method for cutting germination time in half using a seed heating pad.
🌱 Step 1: Prepare Your Seeds and Containers
Start by filling your seed trays or small pots with the sterile seed-starting mix you’ve chosen. Moisten it lightly—just enough so it feels like a damp sponge, not soggy. Press down gently to remove air pockets, then arrange your seeds according to their spacing needs (usually ¼ inch deep for most varieties).
I like to label each pot with the seed type and date—once those sprouts pop, identical seedlings can get confusing fast. Cover the seeds with a thin layer of soil, then give everything a light mist with water. The mix should feel damp but not dripping.
💧 Step 2: Set Up the Heating Pad
Place your seed trays directly on the seed heating pad—no need for extra layers. Most pads maintain a consistent 70-85°F temperature, which is ideal for breaking seed dormancy. If your pad has adjustable settings, check the seed packet for specific warmth needs (some tropical seeds need 80°F+, while cool-season crops like lettuce prefer 65°F).
Here’s the thing—don’t cover the trays with plastic or a dome yet. The pad’s warmth creates enough humidity for germination, and trapping extra moisture can lead to mold. Instead, place the setup in a bright, indirect-light spot (like a north-facing windowsill) until you see sprouts.
⏰ Step 3: Monitor for Sprouting
Check your seeds daily for the first signs of life. Most will sprout within 3-7 days with the heat pad—half the time of regular germination. You’ll notice tiny white roots first, followed by the seedling’s first true leaves (not the initial cotyledons).
Once 50% of seeds have sprouted, remove the heating pad immediately. Leaving seedlings on the pad too long can cause overgrowth or even root burn. Move them to a cool but bright spot (like under grow lights) to prevent leggy, weak stems.
☀️ Step 4: Transition to Light and Care
Seedlings need 12-16 hours of light daily now that they’ve sprouted. If using natural light, rotate trays daily so they don’t lean toward the window. For artificial light, keep it 2-4 inches above the plants and raise it as they grow.
Water gently from the bottom (place trays in an inch of water for 10 minutes) to avoid disturbing the soil. You’ll know they’re getting enough moisture when the top inch feels dry to the touch. Avoid overhead watering—it can spread disease in crowded trays.
✂️ Step 5: Harden Off Before Transplanting
Two weeks before your last frost date, start hardening off seedlings by placing them outside in a shaded, sheltered spot for 1-2 hours the first day. Gradually increase their outdoor time over 7-10 days, ending with a full day in direct sun.
This step is critical—skipping it shocks seedlings and stunts growth. Look for sturdy stems and vibrant leaves before transplanting. Once hardened off, they’ll handle the garden’s conditions like pros.
Tips & tricks for perfect seed heating pad results
Cutting germination time in half isn't just about following the steps—it's about understanding the little details that make all the difference. Here's what I've learned after years of experimenting with seed heating pads.
Temperature Precision: That 70-85°F range isn't just arbitrary—it's the sweet spot for most seeds to break dormancy. For tropical varieties needing 80°F+, I use a thermometer to verify the pad's output. If your kitchen runs cold, consider a small space heater nearby (but keep it away from the trays). The key is consistency—fluctuations can delay sprouting or even prevent it entirely.
Soil Moisture Secret: In Step 1, when you're moistening that sterile seed-starting mix, think "damp sponge" not "wet towel." I test by squeezing a handful—water should barely drip out. Too wet creates anaerobic conditions that prevent germination, while too dry means seeds can't access moisture. Pro tip: Use a spray bottle with room-temperature water to avoid shocking seeds with cold.
Light Positioning: The bright, indirect light spot mentioned in Step 2 deserves more attention. North-facing windows work best for natural light, but if you're using artificial grow lights, position them 2-4 inches above the seedlings. I've seen seedlings stretch toward weak light sources—this is called etiolation—and it creates weak, leggy plants. Rotate trays daily to ensure even growth.
Sprout Monitoring: Those 3-7 days can feel like an eternity, but daily checks are crucial. Look for the tiny white roots first—they're your signal that germination has begun. Once 50% of seeds have sprouted, remove the heating pad immediately. I've seen seedlings become over-dependent on the warmth, leading to poor development when transitioned to cooler conditions.
Pro Tips for Seed Heating Pad
- Cutting germination time in half isn't just about following the steps—it's about understanding the little details that make all the difference.
- Temperature Precision: That 70-85°F range isn't just arbitrary—it's the sweet spot for most seeds to break dormancy.
- Soil Moisture Secret: In Step 1, when you're moistening that sterile seed-starting mix, think "damp sponge" not "wet towel."
Frequently asked questions
How long should I keep seeds on a heating pad for germination?
A heating pad typically speeds up germination by 20-50%, but timing varies by seed type. Most seeds benefit from 12–24 hours of consistent warmth (70–90°F). Check seed packets for specific needs—tiny seeds (like lettuce) may only need 6–12 hours, while larger seeds (like beans) might take 24–48 hours. Avoid overheating!
Can I use a regular heating pad or do I need a special one for seeds?
You can use a low-wattage, adjustable heating pad (like a microwaveable seedling mat), but avoid high-heat therapy pads. Look for models labeled for germination or seed starting—they’re designed to maintain steady, gentle warmth. A DIY option? A pilow or sock filled with rice microwaved for 30 seconds works in a pinch!
What if my seeds aren’t sprouting after using a heating pad?
First, check moisture (seeds need damp—not soggy—paper towels or soil). If using a pad, ensure it’s consistently warm (test with your hand—should feel like a cozy bath, not a sauna). Try stratifying (cold treatment) for seeds like peppers or apples, or scarifying (lightly nicking the seed coat) for tough shells. If all else fails, test viability by soaking seeds in water—floaters are likely dead.
Are there alternatives to a heating pad for seed germination?
Yes! Try these low-cost hacks:
- Bottom watering tray: Place seeds in a sealed container with a damp paper towel and a few ice cubes—melting water creates a mini greenhouse.
- Refrigerator + warm spot: Stratify cold-loving seeds (e.g., tomatoes) in the fridge for a week, then move to a sunny windowsill.
- Compost heat: Bury seeds in warm compost (120–140°F) for 24 hours—nature’s incubator!
- Incubator substitute: Use a fish tank heater (5–10W) in a seedling tray for precise warmth.
How do I know if my heating pad is too hot for seeds?
Overheating can kill seeds or stunt growth. Signs it’s too hot:
- Seeds feel warm to the touch (like a hot tub—adjust immediately!).
- Condensation doesn’t evaporate within 30 minutes.
- Seeds darken or smell foul (fungus alert!).
Ideal temp: 70–90°F. Use a thermometer or the back-of-hand test—if it’s uncomfortable for you, it’s too hot. For extra safety, wrap the pad in a thin towel to diffuse heat.
Wrapping up and next steps
Ready to unlock faster, healthier germination with ease? A seed heating pad is your secret weapon for transforming tiny seeds into thriving plants—no guesswork, just science-backed warmth! Whether you're a seasoned gardener or just starting, this tool simplifies the process while giving your seedlings the perfect head start. 🌱
Now that you’re armed with the how-to and why, it’s time to take action! Grab a heating pad, gather your seeds, and watch your green thumb grow—literally. Start small, experiment, and enjoy the rewards of a lush, vibrant garden in record time!