
Lawn
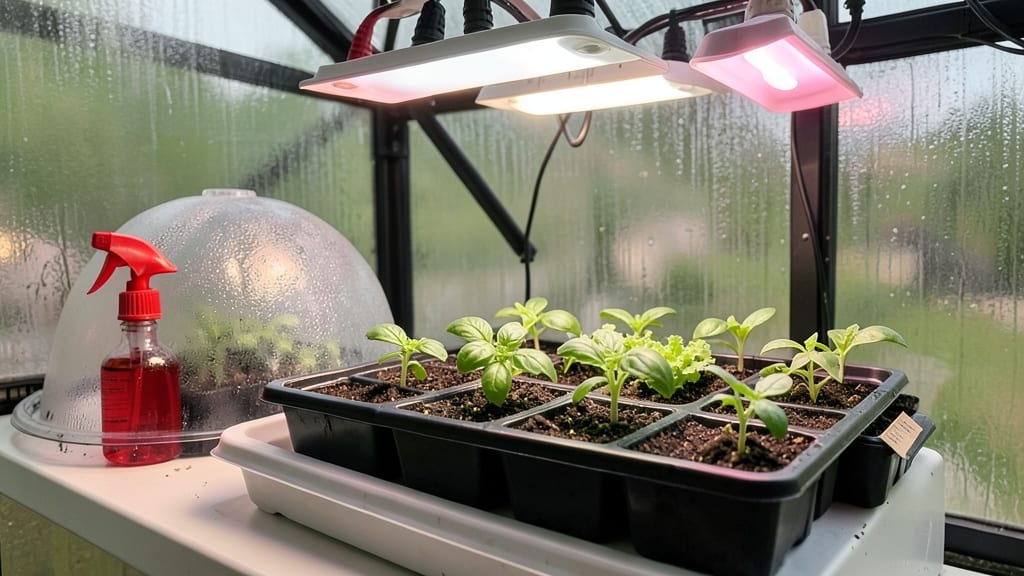
Lightweight loam seed trays in your greenhouse mean faster germination and stronger roots. 🌱 I’ve seen seedlings emerge in half the time using the right mix—no more waiting weeks for stubborn sprouts.
The key is balancing moisture retention with airflow, so roots don’t drown or suffocate before they even push through the soil.
These trays come in plastic or biodegradable options, with cell sizes tailored to tiny seeds or larger transplants. I prefer the 2-inch cells for most veggies—they’re big enough to prevent root circling but small enough to keep humidity high.
Place them on greenhouse benches where they’ll catch diffused light, not scorching direct sun.
You’ll notice seedlings popping up in as little as 3–5 days with the right setup. The loam mix stays moist without soggy bottoms, and the trays’ lightweight design makes moving them easy when it’s time to harden off.
No more wrestling with heavy flats or losing fragile sprouts to transplant shock.
For best results, start with sterilized mix and keep trays slightly elevated on racks. If your greenhouse runs hot, mist the trays daily—humidity is everything for those first critical days. Once roots fill the cells, you’re ready to transplant without disturbing delicate stems.
📚 In This Guide
- What you need
- Instructions
- Tips and common mistakes
- Wrapping up and next steps
What you need
- ● Seed trays: 10–20 trays (depending on scale), preferably black plastic (retains heat) or biodegradable fiber (eco-friendly). Size: 10"x20" or 12"x24" for optimal spacing.
- ● Lightweight loam mix: 50% peat moss or coco coir (moisture retention)
- ● 30% perlite or vermiculite (aeration, 2–4 mm granules)
- ● 20% compost or worm castings (nutrients, sterilized)
- ● Seeds: Pre-soaked or dry (check seed packet for depth/spacing).
- ● Tools: Garden trowel or small shovel
- ● Spray bottle (for gentle watering)
- ● Fine-mesh screen or sifter (for even loam distribution)
- ● Bottom heat mat ($10–$20) – Speeds germination (70–75°F ideal).
- ● Humidity dome or plastic wrap – Retains moisture for delicate seeds.
- ● pH test kit – Ensure loam mix is 5.8–6.5 (adjust with lime/sulfur if needed).
- ● Label markers – Track seed varieties (avoid mix-ups!).
- ● Greenhouse thermometer/hygrometer – Monitor conditions like a pro.
Step-by-Step guide to setting up lightweight loam mix trays in a greenhouse
Here’s how to create the perfect seed-starting environment for quick germination and strong roots.
🌱 Step 1: Choose the Right Seed Trays and Loam Mix
Start with 4 lightweight seed trays (each about 10x20 inches) that have drainage holes—this prevents waterlogging, which can drown seeds. I like trays with a removable bottom for easy transplanting later. For the loam mix, blend 50% peat moss (for moisture retention) with 30% perlite (for aeration) and 20% compost (for nutrients). This mix stays light enough to handle easily but holds moisture just right for fast germination.
Fill each tray about 3/4 full with the mix, then gently rake the surface to create a fine, even layer. Avoid compacting it—just press lightly so the soil holds its shape when you plant. You’ll want the mix to feel like a damp sponge, not a soggy mess. If it clumps when squeezed, add a little more perlite to lighten it up.
💧 Step 2: Moisten the Mix and Sow Seeds Evenly
Water the trays thoroughly from the bottom by placing them in a shallow tray of warm water for about 10 minutes. This ensures the mix is evenly moist without creating surface puddles, which can wash seeds away. Let the excess water drain completely before sowing. You’ll know it’s ready when the top layer feels damp but not wet to the touch.
Scatter seeds thinly across the surface—aim for about 1/8 inch apart if they’re tiny, or 1/4 inch apart for larger seeds. Press them lightly into the soil with your finger, just enough to make contact. Cover with a thin layer of vermiculite (about 1/8 inch deep) to hold moisture and protect the seeds. This step is key for fast germination—keep the mix consistently moist but never soggy.
☀️ Step 3: Position Trays in the Greenhouse for Optimal Conditions
Place the trays in a warm, shaded area of the greenhouse first—70-75°F is ideal for most seeds. Direct sunlight can overheat the mix and dry it out too quickly, slowing germination. Use a clear plastic dome or humidity tent to trap warmth and moisture until seeds sprout. Check daily for condensation on the inside of the dome; if it’s foggy, you’re good. If it’s dry, mist the soil lightly.
Once you see the first signs of sprouts (usually in 3-10 days, depending on the seed), remove the dome immediately. This prevents fungal growth and encourages sturdy stems. Keep trays in bright, indirect light for the first week, then gradually introduce more sunlight. You’ll know they’re ready for stronger light when the seedlings have 2-3 true leaves and look plump, not stretched or pale.
🌿 Step 4: Maintain Moisture and Light for Fast Root Growth
Water the trays from the bottom again when the top 1/2 inch of soil feels dry. Avoid overhead watering—it can dislodge seeds or seedlings and spread disease. Use a spray bottle for gentle misting if needed, but aim for the soil, not the leaves. The goal is to keep the mix consistently moist, not waterlogged. Overwatering is the fastest way to kill seedlings before they even get started.
Rotate the trays quarter-turn daily so seedlings grow straight toward the light, not lopsided. You’ll notice them leaning toward the greenhouse’s brightest side? That’s your cue to adjust their position. After 2-3 weeks, when seedlings have 4-6 leaves, they’re ready to be thinned or transplanted. Thin by snipping unwanted seedlings at the base with clean scissors—this avoids disturbing the roots of the ones you’re keeping.
Tips & tricks for perfect greenhouse seed trays
These little details make all the difference between healthy seedlings and a greenhouse full of flops.
Mix Consistency is Everything: When blending your 50% peat moss, 30% perlite, and 20% compost, aim for a texture like a damp sponge—not clumpy, not powdery. I learned this the hard way after watching seedlings rot from compacted soil. If your mix feels too dense after filling the trays, sprinkle in an extra 10% perlite and fluff it with your fingers. This prevents that suffocating, waterlogged feeling that kills roots before they even start.
Temperature Matters: That 70-75°F range in Step 3 isn't just a suggestion—it's the sweet spot for most seeds to germinate. If your greenhouse runs cooler, place trays on a heating mat set to 75°F. For warmer climates, move them to the shadiest corner until sprouts appear. I once watched basil seeds take 14 days to sprout because I ignored this—now I always check my greenhouse thermometer first thing in the morning.
Vermiculite Secret: The thin 1/8-inch layer of vermiculite in Step 2 isn't just for show—it creates a perfect microclimate. Sprinkle it lightly (don't press down) to maintain that critical moisture without smothering seeds. Pro tip: If you're sowing tiny seeds like lettuce, mix a pinch of vermiculite directly into the soil before sowing to prevent them from sinking too deep.
Pro Tips for Seed Trays For Greenhouse
- These little details make all the difference between healthy seedlings and a greenhouse full of flops.
- Mix Consistency is Everything: When blending your 50% peat moss, 30% perlite, and 20% compost, aim for a texture like a damp sponge—not clumpy, not powdery.
- Temperature Matters: That 70-75°F range in Step 3 isn't just a suggestion—it's the sweet spot for most seeds to germinate.
Frequently asked questions
Got questions about optimizing your seed trays for greenhouse success? You’re not alone! Here are answers to the most common queries—so you can grow with confidence.
What’s the best lightweight loam mix for seed trays in a greenhouse?
A well-draining 50% peat moss, 30% perlite, and 20% vermiculite mix is ideal. It retains moisture while preventing compaction, ensuring fast germination. For extra aeration, add composted coconut coir (10%). Avoid heavy garden soil—it can suffocate roots!
How long until seeds sprout in greenhouse seed trays?
Germination time varies by plant: fast growers (lettuce, radishes) sprout in 3–7 days, while slower types (tomatoes, peppers) take 10–21 days. Keep trays in a warm (70–85°F), humid greenhouse with consistent moisture—but avoid waterlogging. Patience pays off!
Can I reuse seed trays for multiple planting cycles?
Clean trays with a 10% bleach solution (1 part bleach to 9 parts water) to kill pathogens, then rinse thoroughly. Replace trays if they’re cracked or warped. Pro tip: Sterilize between heavy-use crops (like tomatoes and peppers) to prevent disease transfer.
What’s the ideal greenhouse temperature for seed trays?
Most seeds thrive in 70–85°F (21–29°C) during the day, with a 5–10°F drop at night. Use a heat mat (75–80°F) for slow germinators like basil or snapdragons. Monitor with a thermometer—below 60°F (15°C) stalls growth, while above 90°F (32°C) can scorch seedlings.
What if my seedlings look leggy or weak in the trays?
Leggy seedlings signal too little light or overcrowding. Move trays to a bright, south-facing shelf (or add grow lights) and thin seedlings to 1 inch apart. For extra support, bury seed trays halfway in growing medium to stabilize stems. Bonus: A daily misting keeps humidity high without soggy soil.
Wrapping up and next steps
Investing in the right seed trays for greenhouse—especially lightweight loam mixes—can transform your gardening game by accelerating germination and root growth.
Whether you're a seasoned grower or just starting, these trays create the perfect environment for healthy seedlings, setting you up for a thriving lawn or garden. Now’s the time to take action!
Ready to elevate your greenhouse success? Start by selecting the ideal seed trays and mix, then dive into planting with confidence. Your future plants will thank you!