
Vegetables
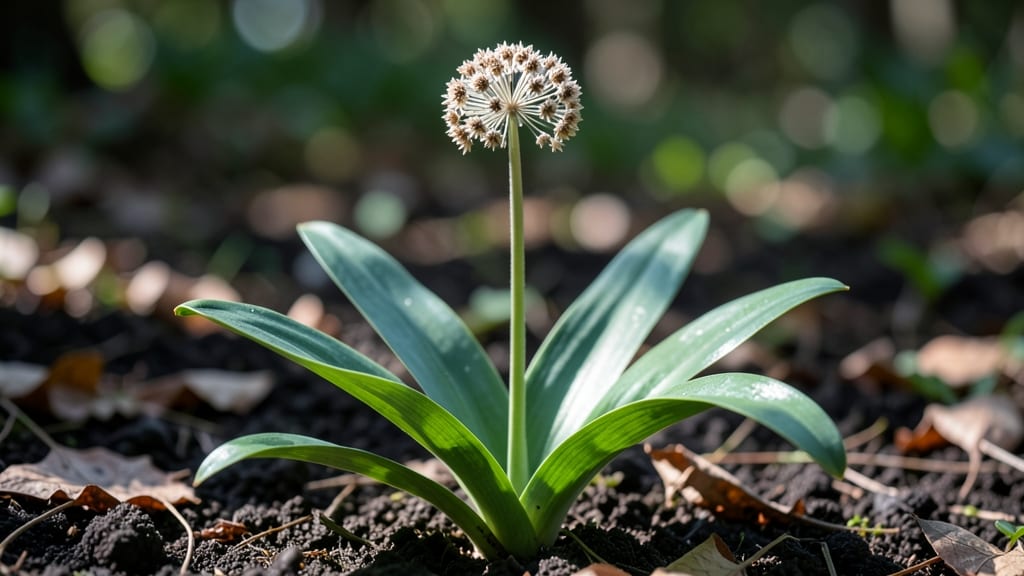
Those stubborn wild garlic seed heads hold the key to free, organic plants for years to come. 🌱 I’ve wrestled with their twisty pods for seasons, and here’s how to turn them into reliable seedlings without wasting a single seed.
The secret isn’t brute force—it’s timing, technique, and understanding when those pods are ready to release their treasure.
You’ll need just three things: sharp scissors, a paper bag, and patience. Harvest the seed heads when they turn brown and papery (usually late spring to early summer), then let them dry indoors for a week.
The twisty stems resist opening naturally, so we’ll crack that code with a simple method that preserves every seed. No fancy tools, no guesswork—just you, the pods, and a little know-how.
What you end up with is a stash of seeds that produce hardy wild garlic plants with minimal effort. These thrive in partial shade, spread naturally, and return every year—cutting your grocery bill for fresh garlic while filling your garden with fragrant foliage.
The best part? You’ll never buy garlic bulbs again once you master this zero-waste cycle.
Works for garden beds, containers, or even woodland edges. Here’s exactly how to handle those tricky pods without losing a single seed to the birds—or your own frustration.
📚 In This Guide
- What you need
- Instructions
- Tips and common mistakes
- Wrapping up and next steps
What you need
- ● Mature wild garlic plants (with fully formed seed heads—look for brown, twist-resistant pods 🌿). Aim for at least 10-15 plants for a good seed yield.
- ● Pruning shears or sharp scissors (sterilized with rubbing alcohol to prevent disease spread).
- ● Brown paper bags or breathable paper envelopes (1-2 per plant). Avoid plastic to prevent moisture buildup.
- ● Permanent marker (for labeling seed sources—e.g., "Wild Garlic 2024").
- ● Drying tray or mesh screen (to spread seed heads in a single layer for drying).
- ● Small paper plates or parchment paper (for storing dried seeds temporarily).
- ● Gloves (nitrile or cotton—wild garlic can irritate sensitive skin 🧤).
- ● Magnifying glass (for inspecting seed pods for pests or damage).
- ● Seed packet or airtight container (for long-term storage—glass jars with silica gel work best).
- ● Notebook (to jot down growing conditions, location, or any notes on plant health).
- ● Twine or rubber bands (to bundle seed heads for hanging dry if space is tight).
How to harvest and save wild garlic seed heads
Here's my foolproof method for collecting and saving wild garlic seeds without losing them to stubborn pods.
🌱 Step 1: Identify and Select Mature Seed Heads
Wait until the seed pods turn from green to a papery brown color—this means they're fully mature and ready for harvesting. I look for pods that feel dry and brittle to the touch, almost like they'll crumble if I squeeze too hard. Avoid any pods still green or soft, as they won't contain viable seeds.
Harvest on a dry day when the pods are completely dry. This prevents moisture from causing the pods to stick together or mold. Use clean, sharp scissors to snip the entire seed head from the stem, leaving about 1 inch of stem attached. This helps keep the pods intact during handling.
🪴 Step 2: Dry and Prepare the Seed Heads
Lay the harvested seed heads in a single layer on a clean, dry surface like a baking sheet or mesh screen. Place them in a warm, dry spot with good airflow—like a sunny windowsill or a well-ventilated room. The goal is to dry them completely, which usually takes 3-5 days depending on humidity.
Check daily to ensure no moisture remains. If you notice any dampness or condensation, spread them out again and let them dry longer. Once fully dry, the pods should feel light and hollow when tapped. At this stage, they'll easily release seeds when twisted, but don't twist them yet—wait until they're completely dry to avoid seed loss.
✂️ Step 3: Twist and Collect the Seeds
Here's where the twist-resistant trick comes in: hold the dried seed head firmly by the stem and twist it gently but firmly with your fingers. The pods should twist off cleanly, releasing seeds into your hand. If they resist, let them dry a little longer—they'll release more easily once fully dry.
Place a clean piece of paper or a small container beneath the seed head to catch the seeds as they fall. I like to use a white piece of paper so the tiny black seeds stand out against the background. Once all the seeds are collected, gently shake the pods again to release any remaining seeds.
💧 Step 4: Store Seeds for Future Planting
Transfer the collected seeds to a small envelope or airtight container. Label it with the date and variety (if known) to keep track of how fresh they are. Store the seeds in a cool, dry place—like a pantry or seed storage box—where they'll remain viable for 2-3 years.
Before planting, test a few seeds by placing them on a damp paper towel in a sealed bag. Keep them in a warm spot and check for sprouts in 7-10 days. If they sprout, your seeds are ready to plant. If not, they may need more time or a warmer environment to germinate.
☀️ Step 5: Plant the Seeds for Next Season
Sow the seeds directly in the garden in early spring or late summer, when the soil is cool and moist. Scatter them lightly on the surface of the soil—wild garlic seeds don't need deep planting. Press them gently into the soil so they make contact, then cover lightly with a thin layer of soil or mulch.
Keep the soil consistently moist but not soggy until the seedlings appear, which usually takes 2-4 weeks. Once they sprout, thin them to 6 inches apart to give each plant room to grow. Avoid disturbing the roots too much, as wild garlic can be sensitive to transplanting.
Tips & tricks for perfect wild garlic seed collection
These little tricks will help you turn stubborn wild garlic pods into a zero-waste gardening goldmine without losing a single seed.
Harvesting Tip: I can't stress enough how important that 1-inch stem is when harvesting. It acts like a natural handle, making it much easier to twist off the pods later. If you cut too close, you'll struggle to grip the seed head properly during the twisting step—trust me, I learned this the hard way after dropping seeds everywhere!
Drying Strategy: For the 3-5 day drying period, I've found that placing a small fan nearby helps speed up the process, especially in humid climates. Just make sure the airflow is gentle—you don't want to blow seeds everywhere. If you're short on time, you can also place them in a low-temperature oven (200°F) for about 1 hour, but monitor closely to avoid overheating.
Seed Collection Hack: Here's what nobody tells you—those tiny black seeds are actually magnetic! Keep a small magnet nearby (not touching the seeds) while you're collecting, and you'll be amazed at how many stray seeds it picks up from your work surface. This recovers seeds you'd normally lose sweeping up or brushing off.
Storage Wisdom: When storing your seeds in envelopes, I add a tiny silica gel packet (the kind that comes with electronics) to absorb any residual moisture. This keeps them viable for the full 2-3 years without risking mold. Just make sure the silica packet doesn't touch the seeds directly—place it in a small mesh bag first if needed.
Pro Tips for Wild Garlic Seed Heads
- These little tricks will help you turn stubborn wild garlic pods into a zero-waste gardening goldmine without losing a single seed.
- Harvesting Tip: I can't stress enough how important that 1-inch stem is when harvesting.
- Drying Strategy: For the 3-5 day drying period, I've found that placing a small fan nearby helps speed up the process, especially in humid climates.
Frequently asked questions
about wild garlic seed heads—here’s what you need to know before diving in!When is the best time to harvest wild garlic seed heads?
Harvest seed heads when they turn light brown and begin to split open (usually late spring to early summer). Wait until pods are dry but haven’t scattered seeds yet—this ensures viability. Avoid harvesting in wet weather to prevent mold.
Why are my wild garlic seed heads twisting or curling?
Twisting pods are normal! Wild garlic’s umbel structure (flat-topped clusters) naturally twists as seeds mature. If pods are extremely gnarled or brittle, they may be overripe. Harvest early to avoid seed loss or use them for crafts (like garlands) instead of saving.
Can I save seeds from store-bought wild garlic?
No—store-bought wild garlic is often hybridized or treated with chemicals to prevent seed production. For reliable seeds, grow your own plants from scratch or source seeds from organic, heirloom suppliers. Wild garlic thrives in perennial patches, so patience pays off!
What’s a good alternative if I can’t find wild garlic seed heads?
Try garlic chives (easier to grow) or wild onions (like ramps) for similar flavors. For seed-saving, Allium vineale (wild onion) or Allium ursinum (true wild garlic) are great substitutes. Check local foraging groups for wild patches!
How do I store wild garlic seeds to keep them viable?
Let seeds dry completely in a paper bag (not plastic!) for 1–2 weeks in a cool, dark place. Store in an airtight container in the fridge (up to 2 years) or freeze for longer shelf life. Label with the harvest date—fresh seeds sprout faster!
Pro Tip:
Wild garlic seeds are tiny—use a fine-mesh sieve to separate them from debris. For extra fun, press seeds into homemade seed paper as a zero-waste craft!
Wrapping up and next steps
Harvesting wild garlic seed heads isn’t just a clever way to save seeds—it’s a sustainable, zero-waste victory for gardeners and nature lovers alike! 🌱 With a little patience and the right techniques, you’ll unlock a free, organic resource that thrives year after year.
Now that you’re armed with the know-how, why not share your newfound skills? Try saving a few extra seed heads to swap with fellow gardeners or plant a small patch for future harvests. Every twist-resistant pod you rescue is a step toward a greener, more self-sufficient garden!