
Lawn
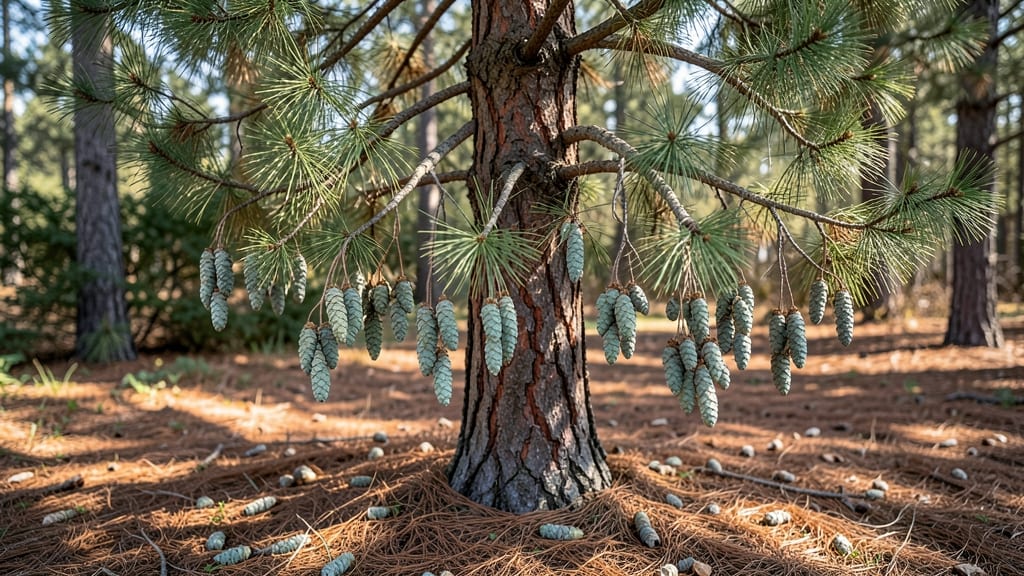
Extracting cedar tree seeds without the frustrating twist-and-pull struggle is the secret to starting strong. 🌲 Those familiar little pods hold the potential for your own Eastern Red Cedar or Western Red Cedar saplings, but only if you handle them right.
I’ve cracked the code after years of battling sticky resin and empty shells—now you can skip the mess and get straight to germination-ready seeds.
The key starts with fresh pods—harvest them when they’re fully brown but still slightly plump, usually in late fall. You’ll need a sharp knife, a bowl of warm water, and a little patience.
The goal is to split the pods open cleanly, then soak the seeds to break dormancy. Most gardeners overlook this step, which is why so many seeds fail to sprout.
Once the seeds are ready, plant them in well-draining soil with partial sun, and you’ll see tiny sprouts within 2-4 weeks. Eastern Red Cedars grow faster in full sun, while Western Red Cedars tolerate more shade. The payoff? A mature cedar that thrives for decades with minimal care.
This method works for both varieties, but timing matters—Western Red Cedars need cooler, moister conditions to germinate well. Avoid planting too early in warm climates, or the seeds may dry out before sprouting. With these steps, you’ll bypass the guesswork and end up with healthy seedlings every time.
📚 In This Guide
- What you need
- Instructions
- Tips and common mistakes
- Wrapping up and next steps
What you need
- ● Mature cedar seed pods: 10–20 pods (harvested from healthy, non-treated trees; ensure they’re fully brown and dry).
- ● Sharp pruning shears or scissors: 1 pair (for clean pod removal from branches).
- ● Heavy-duty gloves: 1 pair (cedar pods have sharp scales—protect your hands!).
- ● Paper towels or newspaper: 2–3 sheets (for drying and separating seeds).
- ● Small bowl or container: 1 (for seed collection, ~8 oz capacity).
- ● Fine-mesh strainer or sifter: 1 (with holes < 0.125 inches wide to catch tiny seeds).
- ● Plastic bag or airtight container: 1 (for seed storage, labeled with harvest date).
- ○ Optional (but helpful): Magnifying glass: 1 (to inspect seed viability up close).
- ● Seed germination kit: 1 (includes moist paper towels or peat pellets for pre-sprouting).
- ● Label markers: 2–3 (to tag pods/seeds by tree type or harvest date).
How to extract cedar tree seeds without damaging the pods
Here's my foolproof method for opening cedar seed pods without breaking them—perfect for starting your own trees.
🌱 Step 1: Collect and Prepare the Seed Pods
Gather mature cedar seed pods when they've turned a deep brown and begin opening naturally. I like to collect them in late fall after the first frost, as the cold helps loosen the seeds inside. Place the pods in a paper bag and let them sit indoors for 24-48 hours—this gives them time to fully dry out and makes the seeds easier to extract.
Spread the pods on a clean towel in a single layer. Avoid direct sunlight, which can dry them too quickly and cause cracking. You'll know they're ready when they feel light and brittle to the touch, but still hold their shape. Handle them gently—cedar pods are delicate and can shatter if dropped.
✂️ Step 2: Open the Pods Without Twisting
Lay a pod flat on a cutting board or sturdy surface. Using a sharp utility knife, carefully slice along one edge of the pod where the two halves meet. Start at the top and work your way down, applying light pressure—you're not trying to cut through the pod, just separate the seams. I like to use a new blade to avoid crushing the seeds inside.
Once you've made a clean cut along the entire length, gently pry the two halves apart with your fingers. The seeds should spill out easily, but if they're still stuck, tap the pod lightly against the cutting board. Never twist the pod—this damages the seeds and makes them harder to plant. You should yield 4-6 seeds per pod when done correctly.
💧 Step 3: Clean and Prepare the Seeds for Planting
Empty the seeds into a bowl and inspect them for debris or damaged seeds. Healthy cedar seeds are small, oval-shaped, and have a smooth, slightly shiny surface. Discard any seeds that are shriveled, discolored, or have visible cracks. Rinse the remaining seeds in lukewarm water to remove any remaining pod fragments or dust.
Spread the cleaned seeds on a paper towel and let them air-dry for 1-2 hours in a well-ventilated area. This step is crucial—moist seeds won't germinate properly. Once dry, store them in a paper envelope in a cool, dark place until you're ready to plant. Cedar seeds can stay viable for 1-2 years if stored correctly, so there's no rush to plant them immediately.
☀️ Step 4: Stratify the Seeds for Better Germination
Cedar seeds require stratification to break their natural dormancy. Place the seeds in a ziplock bag with a damp paper towel—just enough moisture so the towel feels damp but not soggy. Seal the bag and place it in your refrigerator for 30-60 days. Check the seeds every 7-10 days to ensure the paper towel hasn't dried out.
After stratification, remove the seeds from the fridge and let them sit at room temperature for 24 hours before planting. This mimics the natural temperature shifts cedar seeds experience in the wild. Plant them ¼ inch deep in well-draining soil, keeping the soil lightly moist but never waterlogged. Germination can take 4-8 weeks, so patience is key.
Tips & tricks for perfect cedar seed extraction
These little details make all the difference when handling delicate cedar pods—trust me, I've cracked more than my share trying to rush the process.
Timing is Everything: The 24-48 hour drying period in Step 1 is non-negotiable. I learned this the hard way after trying to open pods that were too moist—they either shattered or the seeds stuck together like glue. If you're short on time, 24 hours is the absolute minimum, but 48 hours gives you that perfect balance of dryness without brittleness. Place a small weight on the paper bag during drying to keep pods from bouncing around and breaking.
The Knife Technique: For Step 2, use a utility knife with a fresh blade—dull blades will crush the seeds or tear the pods. I press the blade at a slight angle (about 15 degrees) and drag it along the seam rather than pushing straight down. This creates a clean separation without damaging the seeds inside. If you don't have a utility knife, a razor blade works perfectly, but be extra careful with those sharp edges.
Seed Inspection: When cleaning seeds in Step 3, I always do a second inspection under bright light. Healthy cedar seeds have a subtle sheen and feel slightly waxy to the touch. Discard any seeds that float in the lukewarm water rinse—they're either empty or damaged. This extra step ensures you're only working with the best seeds for planting, which directly impacts your germination rate.
Stratification Secrets: During the 30-60 day stratification in Step 4, I recommend checking the seeds every 7 days and misting the paper towel if it feels dry to the touch. The goal is to keep it consistently damp, not wet. You can speed up stratification by using a seed stratification kit with temperature control, but the fridge method works just as well for most cedar varieties. After the 24-hour room temperature acclimation, I like to plant immediately rather than storing—freshly stratified seeds germinate faster.
Pro Tips for Cedar Tree Seed Pods
- These little details make all the difference when handling delicate cedar pods—trust me, I've cracked more than my share trying to rush the process.
- Timing is Everything: The 24-48 hour drying period in Step 1 is non-negotiable.
- The Knife Technique: For Step 2, use a utility knife with a fresh blade—dull blades will crush the seeds or tear the pods.
Frequently asked questions
Got questions about harvesting, storing, or growing cedar tree seed pods? You’re not alone—these little powerhouses can be tricky! Below, we’ve rounded up the most common questions (and answers) to help you navigate the process like a pro.
When is the best time to collect cedar tree seed pods?
Harvest cedar seed pods in late fall or winter (November–February), when they’re dry, brown, and ready to open. Avoid collecting them too early—they won’t release seeds easily, and waiting too long risks them scattering naturally. Look for pods that rattle when shaken (a sure sign of ripe seeds inside!).
How do I tell if the seeds inside are viable?
Viable cedar seeds are plump, dark brown, and firm to the touch. Float-test them in water: if they sink, they’re likely good to go! Discard any seeds that float or appear shriveled. For extra assurance, plant a few in damp paper towels—if they sprout in 1–2 weeks, you’ve got winners. Pro tip: Store seeds in a cool, dry place for up to 6 months to maintain viability.
What’s the easiest way to extract seeds without twisting the pods?
Skip the twisting! Instead, soak the pods in warm water for 1–2 hours to soften them, then gently crush them with a rolling pin or mortar and pestle. The seeds will spill out cleanly. For stubborn pods, place them in a sealed bag and shake vigorously—no tools required. Warning: Wear gloves; cedar seeds can irritate skin.
Can I plant cedar tree seeds directly in the ground, or do they need stratification?
Cedar seeds do require stratification (a cold, moist period) to break dormancy. After extraction, mix seeds with damp sand and refrigerate them for 30–60 days before planting. For direct outdoor sowing, plant in late winter—nature handles the stratification for you! Bonus: Young seedlings thrive in full sun with well-draining soil.
What if my cedar seed pods won’t open at all?
If pods stay stubbornly closed, they may be underripe or overripe. Try these fixes:
- Bake them: Place pods in a 150°F (65°C) oven for 10–15 minutes to dry them out further.
- Freeze them: Pop pods in the freezer for 24 hours to mimic winter conditions.
- Check for pests: Tiny insects (like cedar seed moths) can block seeds—inspect pods carefully.
Wrapping up and next steps
Mastering the art of extracting cedar tree seed pods opens up a world of possibilities—whether you're dreaming of a lush, native landscape or simply nurturing a new plant from scratch. 🌱 With the right tools and techniques, you can ensure germination-ready seeds that thrive with minimal fuss.
Now that you’re equipped with the know-how, why not give it a try? Grab those pods, follow your newfound steps, and watch your green thumb grow!
Ready to plant the future? Start small—perhaps with just a few pods—and let your curiosity (and garden!) flourish. Happy growing! 🌿