
Lawn
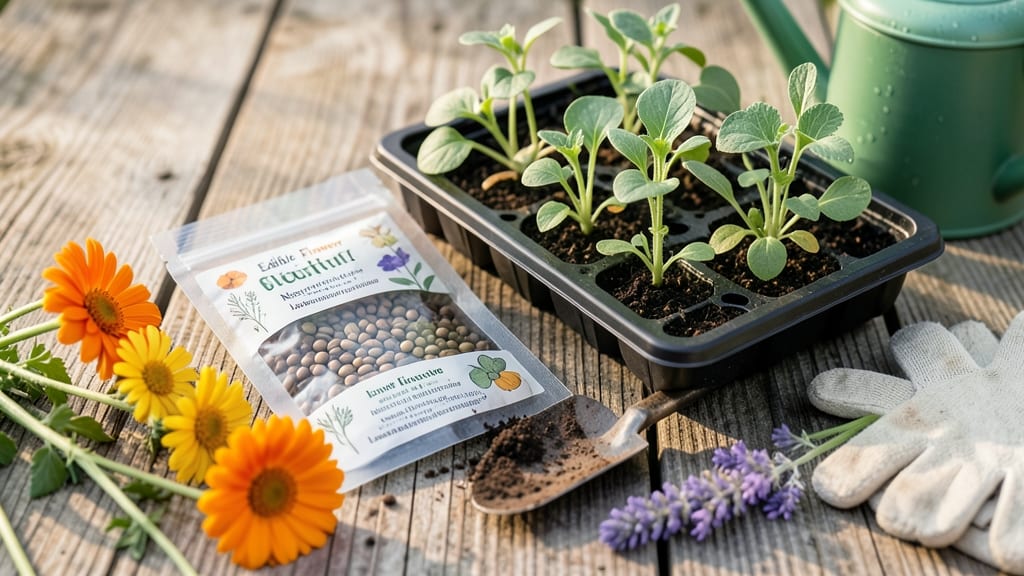
An edible flower seed mix turns your garden into a fragrant, colorful kitchen pantry. 🌸 I've grown mine for three years now, and the first harvest—just 8 weeks after planting—taught me everything I needed to know about timing, soil, and patience.
The magic is in the mix: nasturtiums for peppery greens, calendula for golden petals, and borage that tastes like cucumber. You'll need well-draining soil, a sunny spot (at least 6 hours of light), and consistent watering—about 1 inch per week.
The flowers attract pollinators while you harvest petals for salads, teas, or garnishes. By mid-summer, your plants will be bursting with blooms, and you'll be clipping edible petals without even looking at a recipe.
The key is spacing them 12 inches apart so they don't compete for nutrients, and deadheading spent blooms to encourage more flowers. Works in containers, raised beds, or in-ground gardens—even in small urban spaces. Here's how to get started without overcomplicating it.
📚 In This Guide
- What you need
- Instructions
- Tips and common mistakes
- Wrapping up and next steps
What you need
- ● Edible Flower Seed Mix: 1 packet (check for organic, non-GMO, and heirloom varieties like nasturtium, calendula, or borage for best results).
- ● Well-draining potting soil: 2–3 gallons (or enough to fill your chosen containers). Opt for a mix labeled for vegetables/herbs or seed starting.
- ● Containers or garden bed: Containers: 6–12-inch deep pots with drainage holes (3–5 containers for a small harvest).
- ● Garden bed: A sunny spot (6+ hours of light daily) with loose, fertile soil (amend with compost if needed).
- ● Watering can or spray bottle: With a gentle nozzle to avoid disturbing seeds.
- ○ Plant labels (optional but helpful): To track varieties if mixing multiple flowers.
- ○ Gloves (optional): To protect hands from soil or prickly stems (e.g., nasturtiums).
- ● Small hand trowel or spoon: For gently pressing seeds into soil.
- ○ Compost or balanced fertilizer (5-10-5): 1–2 tablespoons per plant at planting time (optional for nutrient boost).
- ● Mulch (straw or shredded leaves): To retain moisture and suppress weeds (1–2 inches after germination).
- ● Sunlight access: Full sun (6+ hours/day) for most edible flowers; partial shade (3–4 hours) for delicate varieties like violets.
- ● Patience! 🌱 Germination times vary (5–21 days), so check your seed packet for specifics.
- ● Grow lights: If starting indoors before the last frost (12–16 hours of light/day).
- ● Fish emulsion or seaweed extract: Organic liquid fertilizer for a mid-season boost.
- ● Decorative stones or pebbles: To create a polished look in containers.
- ● Bee-friendly companion plants: Like dill or fennel, to attract pollinators and boost yields.
Step-by-Step instructions for growing your edible flower seed mix
Here's how to transform that single packet into a vibrant, year-round edible garden.
🌱 Step 1: Prepare the Soil and Planting Area
Choose a location with at least 6 hours of sunlight daily—most edible flowers thrive in full sun but tolerate partial shade. Loosen the soil to a depth of 6 inches with a garden fork or tiller, removing any rocks or debris. The soil should feel light and crumbly, like a sponge that holds moisture but drains well.
Work in a 2-3 inch layer of compost to enrich the soil with nutrients. Mix it thoroughly into the top 6 inches of soil—this ensures your flowers get the energy they need to produce abundant blooms. If your soil is heavy clay, add a 50/50 mix of compost and perlite to improve drainage.
💧 Step 2: Sow the Seeds at the Right Depth
Scatter the seeds evenly across the prepared area, following the spacing guidelines on the packet—typically 12-18 inches apart for most varieties. Press them lightly into the soil with your fingers; most edible flower seeds need only ¼ inch of coverage. If the packet includes larger seeds like nasturtiums, plant them ½ inch deep.
Lightly mist the area with water until the soil is evenly moist but not soggy. Avoid using a hose or watering can directly over the seeds—this can dislodge them or create deep grooves where water pools. Instead, use a gentle spray nozzle to keep the soil surface damp without disturbing the seeds.
☀️ Step 3: Provide Consistent Water and Light
Water the seeds once daily for the first 7-10 days, keeping the soil surface consistently moist. You’ll know it’s right when the top ½ inch feels damp but not wet. After germination, reduce watering to every other day, allowing the top 1 inch of soil to dry slightly between waterings. Overwatering is the fastest way to invite mold or rot.
Place a garden stake or small marker near each seedling as they emerge to avoid disturbing them while weeding. Most edible flowers grow quickly, so you’ll see first true leaves within 10-14 days. Once seedlings reach 2 inches tall, thin them to the recommended spacing to give each plant room to flourish.
✂️ Step 4: Maintain and Harvest for Continuous Blooms
Deadhead spent blooms by pinching off the flower heads with your fingers or a small pair of scissors. This encourages the plant to produce more flowers instead of focusing on seed development. Harvest flowers in the early morning when they’re fully open and vibrant—this is when their flavors and aromas are strongest.
Use clean, sharp scissors to snip stems at a 45-degree angle, leaving 1-2 inches of stem attached. This helps the plant absorb water efficiently and promotes bushier growth. Store harvested flowers in a paper towel-lined container in the fridge for up to 5 days, or dry them in a cool, dark place for later use in teas, salads, or garnishes.
🌿 Step 5: Extend the Season with Succession Planting
For year-round blooms, sow a new batch of seeds every 4-6 weeks after the first planting. This staggered approach ensures a continuous supply of fresh flowers, even as some varieties fade or go dormant. Choose a mix of cool-season and warm-season flowers—like violas for spring/fall and zinnias for summer—to keep your garden lively all year.
In colder climates, protect tender flowers with a lightweight row cover or move potted varieties indoors near a sunny window. Many edible flowers, like pansies and calendula, tolerate light frosts and can even improve with a touch of chill. Watch for new growth after cold snaps—this is your signal that the plants are resilient and ready to rebound.
Tips & tricks for perfect edible flower gardens
Transforming that single seed packet into a thriving garden takes just a few smart moves—here's what I've learned after growing these beauties for years.
Soil Prep Secret: The 6-inch deep soil preparation in Step 1 isn't just about loosening dirt—it's about creating the perfect air-soil balance. After loosening, run your fingers through the soil; it should crumble easily between your fingers like cake crumbs. If it clumps, mix in another 1 inch of compost to break up heavy particles. For container gardens, use a blend of potting soil and perlite (50/50) to mimic that perfect drainage.
Seed Placement Precision: When sowing those ¼-inch deep seeds in Step 2, I've found using a simple ruler helps maintain even spacing. Press seeds gently with your thumb—just enough to make contact with soil, not embed them. For larger seeds like nasturtiums, make small dimples with your finger first to ensure consistent ½-inch depth. This prevents uneven germination and gives every seedling equal growing space.
Watering Wisdom: That 7-10 day daily watering window in Step 3 is your critical period. I use a spray bottle with a fine mist setting to avoid disturbing seeds, keeping the soil damp like a wrung-out sponge. After germination, switch to a watering can with a gentle shower nozzle—this prevents soil compaction around delicate seedlings. The key is consistency: let the top ½ inch dry between waterings after the initial phase.
Harvesting Hack: For continuous blooms, I harvest in the early morning when flowers are fully open and flavors peak. Use clean, sharp scissors to cut stems at a 45-degree angle, leaving 1-2 inches of stem attached—this prevents water loss and encourages bushier growth. Store harvested flowers in a paper towel-lined container in the fridge for up to 5 days, or lay them flat to dry in a cool, dark place for later use.
Pro Tips for Edible Flower Seed Mix
- Transforming that single seed packet into a thriving garden takes just a few smart moves—here's what I've learned aft...
- Soil Prep Secret: The 6-inch deep soil preparation in Step 1 isn't just about loosening dirt—it's about creating the ...
- Seed Placement Precision: When sowing those ¼-inch deep seeds in Step 2, I've found using a simple ruler helps mainta...
Frequently asked questions
Got questions about growing your own edible flower seed mix?
You’re not alone! Here are some of the most common queries—plus straightforward answers to help you bloom with confidence.
How long does it take for edible flower seeds to sprout?
Most edible flower seeds sprout within 7–21 days, depending on the variety and growing conditions. Calendula and nasturtiums often sprout quickly (7–10 days), while some delicate blooms like borage may take up to 3 weeks. Keep soil moist but not soggy, and place seeds in a warm, sunny spot to speed up germination. Pro tip: Use a heat mat if your space is chilly!
Can I plant edible flower seeds year-round?
It depends on your climate! In mild zones (Zones 8–10), you can plant edible flowers year-round, but in cooler regions, stick to spring (after frost) and fall (6–8 weeks before first frost). Some hardy varieties, like pansies, tolerate light frost, while tender flowers (e.g., sunflowers) need warm soil. Always check your seed packet for specific timing tips!
What if my edible flowers don’t bloom?
No blooms? Don’t panic! Common culprits include:
- Too much nitrogen (focus on phosphorus-rich fertilizer for flowers).
- Overcrowding (thin seedlings to 6–12 inches apart).
- Insufficient sunlight (most edible flowers need 6+ hours of sun daily).
- Deadheading delay (snip spent blooms to encourage new growth).
Are all edible flowers safe to eat raw?
Not quite! While many edible flowers (like nasturtiums, violets, and pansies) are safe raw, others—such as foxglove or larkspur—are toxic. Always double-check your mix and start with small amounts to test for allergies. When in doubt, cook delicate flowers (e.g., in salads or teas) to mellow flavors. Pro tip: Harvest flowers in the morning after dew dries for the best flavor!
Can I use edible flower seeds in containers instead of a garden?
Containers are perfect for edible flowers—just ensure pots have drainage holes and use well-draining soil. Choose shallow-rooted varieties (e.g., marigolds, basil flowers) for small pots (6+ inches deep), while deeper-rooted types (like sunflowers) need 12+ inches. Place containers in full sun and water consistently. Bonus: Edible flowers thrive in hanging baskets too!
Wrapping up and next steps
Transforming your space into a vibrant, edible garden has never been easier—or more rewarding! With an edible flower seed mix, you’re not just adding beauty to your lawn; you’re cultivating a functional, delicious, and sustainable oasis.
Whether you’re a seasoned gardener or a curious beginner, these blooms bring color, flavor, and joy to your table year-round.
Ready to take the next step? Start small—plant a few seeds in a pot or a sunny patch of your yard—and watch your garden (and your plate!) flourish. Happy growing! 🌸🌱