
Planting
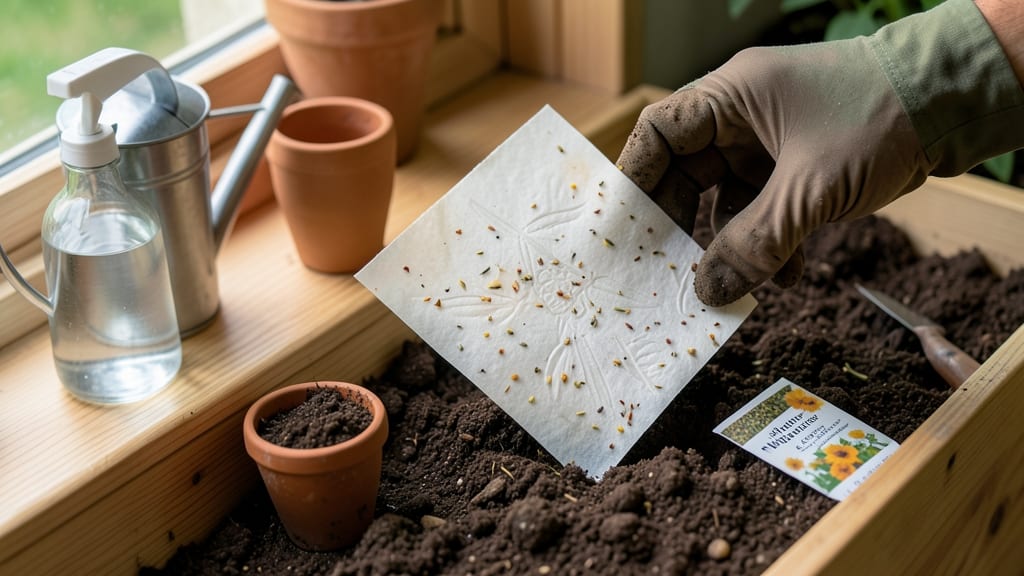
Planting seed paper is like growing a tiny, biodegradable garden in your pocket—no soil mess, no fuss. 🌱 The key is patience and gentle watering; these little pods unfurl naturally when they're ready, revealing delicate sprouts that surprise even the most skeptical gardeners.
I've planted mine in both containers and garden beds, and the difference between forcing them and letting nature take its course is night and day.
Start with a shallow tray or direct-sow into well-draining soil—seed paper thrives in moist but not soggy conditions. Most varieties (like basil, marigolds, or wildflowers) germinate within 7-14 days if kept consistently damp, but avoid drowning them.
The paper dissolves as it hydrates, so you won’t need to remove anything—just wait for those first green shoots to peek through.
Once sprouted, treat them like any other seedlings: bright indirect light at first, then gradually introduce more sun. You’ll end up with lush herbs, vibrant flowers, or even edible greens that grow faster than store-bought transplants. The best part? No transplant shock—these plants start their lives exactly where they’ll stay.
Perfect for beginners, eco-conscious gardeners, or anyone who wants to skip the fuss of traditional seed-starting. Try it with sunflowers for a bold statement or basil for a kitchen garden—either way, the results are shockingly satisfying. Ready to give it a shot?
📚 In This Guide
- What you need
- Instructions
- Tips and common mistakes
- Wrapping up and next steps
What you need
- ● Ready to grow seed paper with ease? Here’s everything you’ll need to turn those tiny, twist-free pods into lush greenery—no fancy tools required! 🌱✨
Step-by-step instructions for planting seed paper
Here's how to plant these eco-friendly pods without fuss—just water and watch them bloom.
🌱 Step 1: Choose Your Planting Location
Seed paper thrives in well-draining soil with 4-6 hours of sunlight daily. I like to plant mine in small garden beds or hanging planters where the roots can spread without competition. Avoid low spots where water pools—root rot is the silent killer of these delicate pods.
Loosen the soil to a depth of 1 inch with a fork or trowel. You'll see the difference immediately—soil that crumbles easily instead of clumping. If your soil feels dense, mix in a handful of compost to improve aeration. The goal is to mimic the airy texture of a forest floor, where these seeds naturally grow.
💧 Step 2: Plant the Seed Paper Pods
Lay each pod flat on the soil surface—never bury them. The seeds are embedded just beneath the surface, designed to germinate when exposed to moisture and light. I press them gently with my thumb to ensure full contact with the soil. This ensures even water distribution when you water.
Space pods 2-3 inches apart for small flowers like wildflowers, or 4-6 inches apart for heartier varieties like basil. You'll notice the paper starts to soften within 24 hours—this is normal as it begins to break down. Don't be tempted to water aggressively yet; let nature take its course.
☀️ Step 3: Water Gently and Consistently
Water the planted pods lightly but thoroughly using a fine mist spray bottle or a gentle stream from a watering can. The soil should be evenly moist but not soggy—think of a damp sponge, not a dripping one. I water in the early morning to prevent evaporation and fungal growth.
Keep the soil moist for the first 7-10 days until you see tiny green sprouts pushing through the paper. This is your cue that germination has begun. After that, water every 2-3 days, allowing the top inch of soil to dry slightly between waterings. Overwatering at this stage is the fastest way to kill your seedlings.
🌿 Step 4: Monitor Growth and Thin if Needed
Once seedlings reach 1-2 inches tall, they'll start to outgrow the seed paper. You'll see the paper disintegrate naturally, leaving only the roots and stems behind. This is the magic of seed paper—no digging, no fuss. I gently pull away any remaining paper fragments with my fingers to prevent tangling.
If seedlings grow too close together, thin them to the strongest 1-2 plants per pod location. Use clean scissors to snip unwanted stems at soil level—this prevents disturbing the roots of nearby plants. You'll know you've done it right when the remaining seedlings stand upright with bold green leaves and no signs of yellowing.
⏰ Step 5: Maintain Through Maturity
Continue watering deeply but infrequently—aim for 1 inch of water per week, adjusting for rain. Mature plants will develop stronger root systems and fuller blooms when they're not overwatered. I fertilize lightly with a balanced organic fertilizer every 4-6 weeks during the growing season to encourage healthy growth.
Watch for pests like aphids or slugs, which love tender new growth. A neem oil spray applied in the evening keeps them at bay without harming your plants. With proper care, your seed paper plants will thrive for several weeks, providing beauty and sometimes even edible leaves or flowers.
Tips & tricks for perfect seed paper planting
These simple strategies will help you coax the best growth from your eco-friendly seed pods.
Soil Prep Secret: Before planting, test your soil's moisture level by squeezing a handful—it should crumble easily without sticking. If it feels compacted, work in a handful of compost per square foot to improve drainage and aeration. I like to add a thin layer of coarse sand to heavy clay soils to prevent waterlogging, which can drown those delicate seedlings before they even sprout.
Planting Precision: When spacing your pods, use a small ruler to mark 2-3 inch intervals for delicate flowers or 4-6 inch spacing for heartier herbs like basil. The twist-free design means you can plant them directly on top of mulch or even in hanging planters—just ensure the container has drainage holes. I've even planted mine in biodegradable pots that dissolve into the soil over time.
Watering Wisdom: The first 7-10 days are critical for germination, so I set a timer to remind me to water lightly every morning. Use a spray bottle to mimic natural rain—this prevents soil compaction and ensures even moisture distribution. If you notice the paper starting to curl before sprouts appear, it's a sign of uneven watering. A gentle mist from below (using a tray with water) can help correct this.
Thinning Technique: When thinning seedlings to 1-2 plants per pod location, use clean scissors to snip at soil level rather than pulling. This prevents disturbing the roots of nearby plants and reduces the risk of disease. I always thin on a cloudy day to minimize stress on the remaining seedlings—direct sunlight after thinning can cause them to wilt temporarily.
Pro Tips for Plant Seed Paper
- These simple strategies will help you coax the best growth from your eco-friendly seed pods.
- Soil Prep Secret: Before planting, test your soil's moisture level by squeezing a handful—it should crumble easily wi...
- Planting Precision: When spacing your pods, use a small ruler to mark 2-3 inch intervals for delicate flowers or 4-6 ...
Frequently asked questions
Got questions about planting seed paper? You’re not alone! Here are answers to the most common queries to help you grow confidently—no green thumb required.
Can I plant seed paper in rain or heavy moisture?
Seed paper thrives in moisture, so yes! Plant it directly in damp soil or even in rain—just press it gently into the earth. Avoid waterlogging, though, as excess water can suffocate seeds. If planting in dry conditions, mist the paper lightly before covering it with soil.
How long does it take for seed paper to sprout?
Sprouts typically appear in 7–14 days, depending on seed type, temperature, and moisture. Keep the soil consistently moist (not soggy) and place the paper in a sunny spot. Patience is key—some seeds, like wildflowers, may take longer to break through the paper.
What if my seed paper doesn’t sprout?
Don’t panic! Check these troubleshooting steps:
- Moisture: Ensure the soil stays damp but not waterlogged.
- Light: Most seeds need 4–6 hours of sunlight daily.
- Temperature: Ideal germination temps vary by seed (check your paper’s label).
- Depth: Lightly cover with soil (¼ inch max) unless specified otherwise.
Can I plant seed paper in containers or hanging planters?
Seed paper works beautifully in containers, hanging baskets, or vertical gardens. For hanging planters, use a lightweight potting mix and secure the paper with a bit of soil or a mesh. Just ensure the container has drainage holes to prevent root rot.
What’s the best way to harvest flowers or herbs from seed paper?
Harvesting depends on the plant:
- Flowers: Snip stems when blooms are fully open but before they wilt. Use clean scissors to avoid damaging the plant.
- Herbs (like basil or thyme): Pick leaves in the morning for maximum flavor. Avoid cutting more than ⅓ of the plant at once.
Can I reuse seed paper if it doesn’t sprout?
Unfortunately, no—seed paper is a one-time-use product. The fibers break down over time, and unused seeds may lose viability. However, you can compost the paper after its lifespan to reduce waste. Some brands offer multi-use seed tapes as an alternative if you’re eager to replant!
Wrapping up and next steps
Planting seed paper is a simple, eco-friendly way to grow wildflowers or herbs with minimal effort—no twisting or fuss required! 🌱 Whether you’re brightening up a garden, creating a thoughtful gift, or reducing waste, these biodegradable paper pods make it easy to turn creativity into vibrant blooms.
Now that you’re armed with the right materials and answers to common questions, it’s time to get your hands dirty and watch nature do the rest.
Ready to take the next step? Try experimenting with different seed paper designs or share your green thumb with friends by making custom seed paper gifts. Happy planting! 🌸