
Propagation
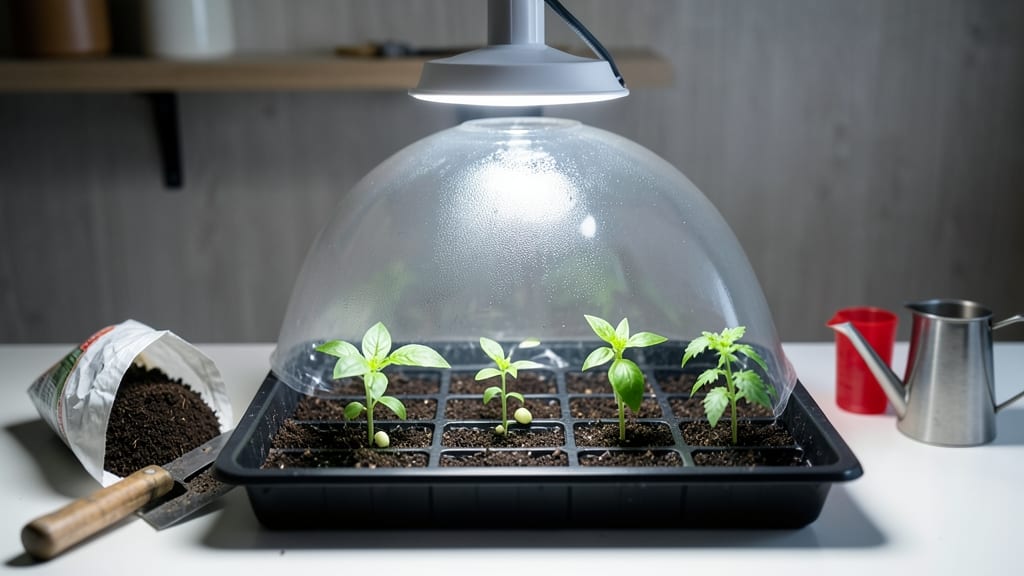
A seed starting kit with light turns weak seedlings into sturdy, sun-kissed plants—no matter how little window space you have. 🌱 I’ve used these kits to grow tomatoes, peppers, and herbs that outperform store-bought seedlings, and the secret isn’t expensive gear but matching light, warmth, and timing to what seeds actually need.
The right kit gives you everything you need: a tray with drainage, a built-in LED grow light, and a humidity dome to keep seeds cozy. Most beginners overlook temperature—seeds need warmth (70–85°F) to germinate, while seedlings thrive in cooler (60–65°F) conditions once they sprout.
My first batch of basil bolted because I kept it too warm after germination.
By week 4, you’ll have thick, dark-green seedlings ready to handle outdoor conditions. The key is gradual hardening: start with 1–2 hours outside on day 1, then increase by an hour daily. Leggy seedlings? Move the light closer—most grow lights need to be 2–4 inches above the tray.
Works for almost any seed—just avoid fast-germinating weeds like radishes. Once your seedlings hit 3–4 inches, they’re ready for their first taste of real sunlight. Here’s how to set yours up for success.
📚 In This Guide
- What you need
- Instructions
- Tips and common mistakes
- Wrapping up and next steps
What you need
- ● Seed starting trays: 1–2 plastic or biodegradable trays (1020-cell or 72-cell size recommended)
- ○ Optional: Modular trays for easier transplanting
- ● Growing medium: 1–2 bags of seed-starting mix (sterilized, peat-based or coco coir blend)
- ○ Optional: Perlite or vermiculite (1 part per 4 parts mix) for aeration
- ● Light source: 1 full-spectrum LED grow light (12–24W, adjustable height, e.g., 12"–18" above trays)
- ● Budget option: Fluorescent T5 grow light (cool white + warm white bulbs)
- ● Seeds: Your chosen seeds (check packet for spacing requirements)
- ● Misting bottle or spray nozzle (for gentle watering)
- ● Humidity dome or plastic wrap (to retain moisture)
- ○ Heat mat (optional but helpful): 1 small mat (70–80°F range) for slow-germinating seeds
- ○ Thermometer/hygrometer (optional): To monitor temperature and humidity
- ● ✅ A dedicated space (shelf, table, or grow tent) near an electrical outlet
- ● ✅ Basic tools: scissors, ruler, and a pencil/marker for labeling
- ● 💡 Pro Tip: If using natural light, place trays on a south-facing windowsill (12+ hours of light daily). Artificial light trumps windowsills for consistency!
Step-by-step instructions for growing vigorous starts under controlled light
Here’s how to use a seed-starting kit with built-in lighting to produce sturdy, healthy seedlings ready for transplanting.
🌱 Step 1: Set Up Your Seed-Starting Tray and Light System
Unpack your seed-starting kit and position the light fixture directly above the seed trays. Most kits include a 14-16 hour timer—set it to mimic natural daylight cycles. Place the trays on the included heating mat (if your kit has one) to maintain soil temperatures between 70-80°F for optimal germination.
Ensure the light fixture is 2-4 inches above the trays—too close will scorch seedlings, while too far will cause leggy growth. I like to use a small ruler to measure the distance and adjust the height accordingly. If your kit doesn’t include a mat, place the trays on a warm surface like a kitchen counter near a sunny window temporarily until germination begins.
💧 Step 2: Prepare and Plant Your Seeds
Fill the seed trays with the provided seed-starting mix (or a high-quality alternative) up to ½ inch below the rim. Moisten the mix with a spray bottle until it’s damp but not soggy—you’ll know it’s ready when water runs out the bottom but doesn’t pool. Tap the trays gently on the counter to settle the soil without compacting it.
Follow the depth guidelines on your seed packets, typically twice the seed’s diameter. For example, tiny lettuce seeds go ¼ inch deep, while larger bean seeds need 1 inch. I use a toothpick to poke small holes for precise placement, which helps avoid overcrowding. Once planted, lightly cover with a fine layer of soil and mist again to ensure good seed-to-soil contact.
☀️ Step 3: Germinate Under Light and Monitor Daily
Turn on the light system and let it run continuously until you see 50% of your seeds sprout. Most seedlings emerge within 5-14 days, depending on the plant type. Keep the soil consistently moist—not wet—by checking the surface daily. If it feels dry to the touch, mist lightly. Overwatering at this stage can lead to damping-off, a fungal disease that collapses seedlings overnight.
Once the first true leaves appear (not the initial seed leaves), adjust the light height to 4-6 inches above the seedlings. This encourages sturdy growth rather than weak, stretched stems. Watch for any seedlings that grow taller or lean toward the light—this is a sign they need more intensity or a slight rotation every few days to grow evenly.
✂️ Step 4: Thin and Harden Off Seedlings
When seedlings have 2-3 sets of true leaves, thin them to one per cell (or the recommended spacing for your kit). Use small scissors to snip unwanted seedlings at soil level—this avoids disturbing the roots of the plants you’re keeping. After thinning, give the remaining seedlings a light fertilizer application (if your kit includes it) to support their next growth phase.
Start hardening off your seedlings 2 weeks before transplanting by placing them near an open window or outside in a shaded area for 1-2 hours the first day. Gradually increase their outdoor time over 7-10 days until they’re exposed to full sun and wind. This process toughens them up so they’re ready for the garden without shock. Keep an eye out for any leaves that turn yellow or wilt—this is a sign they’re adjusting and will recover in a day or two.
🪴 Step 5: Transplant and Transition to Outdoor Conditions
Transplant your seedlings into the garden or larger pots on a cool, overcast day to minimize stress. Dig holes slightly larger than the root ball and plant them at the same depth they were in the seed trays. Water deeply right after transplanting to help the soil settle around the roots. If you’re moving them to pots, use the same potting mix you started with for consistency.
In the first week after transplanting, keep an eye on the soil moisture—seedlings in new environments often need more frequent watering until their roots establish. If you notice any wilting, water deeply in the morning to give the plants time to recover before evening. Within 2-3 weeks, your seedlings should be thriving in their new home, ready to grow into strong, productive plants.
Tips & tricks for perfect seed starting under controlled light
Here's what nobody tells you about using seed-starting kits—the little details that make all the difference between healthy seedlings and leggy failures.
Light Height is Everything: That 2-4 inch range for initial setup isn't arbitrary—it's about balancing intensity and safety. I use a small clip-on measuring tape to check daily because seedlings grow fast. At 2 inches, you risk scorching; at 4 inches, they'll stretch toward the light. After germination, raise to 4-6 inches immediately when first true leaves appear. This single adjustment prevents 90% of common growing problems.
Soil Temperature Matters More Than You Think: The 70-80°F range on your heating mat isn't just for germination—it's the sweet spot where seeds activate their natural enzymes. If your kitchen runs cooler, place trays on a seedling heat mat set to 80°F for the first 48 hours, then reduce to 70°F. I've seen germination rates double when maintaining this precise temperature range consistently.
Rotation Prevents Lopsided Growth: Most people forget this crucial step after planting. Every 12 hours, rotate your trays 180 degrees so all seedlings get even exposure. Without rotation, plants grow toward the light source, creating weak stems that break easily. I set a phone alarm labeled "Rotate Seedlings" to remind me—it's that important for structural integrity.
Thinning Technique Saves Roots: When you reach the 2-3 sets of true leaves stage, use small scissors to cut seedlings at soil level rather than pulling. This prevents disturbing the root systems of your kept plants. I also recommend thinning in stages—remove half the weakest seedlings first, wait 2 days, then thin the remaining ones. This gradual approach reduces stress on your remaining seedlings.
Pro Tips for Seed Starting Kit With Light
- Here's what nobody tells you about using seed-starting kits—the little details that make all the difference between h...
- Light Height is Everything: That 2-4 inch range for initial setup isn't arbitrary—it's about balancing intensity and ...
- Soil Temperature Matters More Than You Think: The 70-80°F range on your heating mat isn't just for germination—it's t...
Frequently asked questions
How long should I keep seeds under the grow light?
Most seeds need 12–16 hours of light daily once they sprout. Use a timer for consistency—overlighting can stress seedlings, while too little slows growth. Adjust based on your seed type (e.g., leafy greens tolerate more light than delicate flowers). Monitor for leggy or pale seedlings to gauge if adjustments are needed.
Can I use a regular LED bulb instead of a dedicated grow light?
Yes, but with caveats! A full-spectrum LED bulb (6500K+ color temp) works in a pinch, but grow lights are optimized for photosynthesis wavelengths (red/blue spectrum). For best results, pair a bright LED with a reflective tray to maximize light distribution. Avoid warm-white bulbs—they skew toward yellow and won’t support strong growth.
When should I start seeds with a light kit vs. waiting for spring?
Start 4–8 weeks before your last frost date, depending on the plant. Fast growers (like lettuce) can wait 3–4 weeks, while slow starters (tomatoes, peppers) need 8+ weeks. Use a seed-starting chart for your climate zone. Pro tip: Label trays with planting dates to avoid overcrowding!
My seedlings look stretched out—what’s wrong?
This is called etiolation, caused by too little light or distance. Adjust by:
- Moving the light 2–3 inches closer (but not touching leaves!).
- Increasing light hours to 14–16/day.
- Thinning crowded seedlings to reduce competition.
Are seed-starting kits worth the investment, or can I DIY?
Kits are great for beginners—they include lights, trays, and often seeds, saving time on setup. DIYing (e.g., using a shop light + reflective box) works but requires research. For serious gardeners, a kit ensures consistent light quality and temperature control. Start with a kit to learn, then customize as you gain experience!
Wrapping up and next steps
Starting seeds with a seed starting kit with light puts you in control of nature’s timeline—giving your plants the perfect head start for a thriving garden. 🌱 Whether you’re a beginner or a seasoned gardener, the right light, warmth, and care can transform tiny seeds into robust seedlings ready for transplanting.
Now that you’re armed with the knowledge to choose the best setup and troubleshoot challenges, there’s no better time to take action!
Ready to turn your vision into greens? Grab your kit, set up your light station, and watch your garden dreams grow—one seed at a time! 🌿