
Lawn
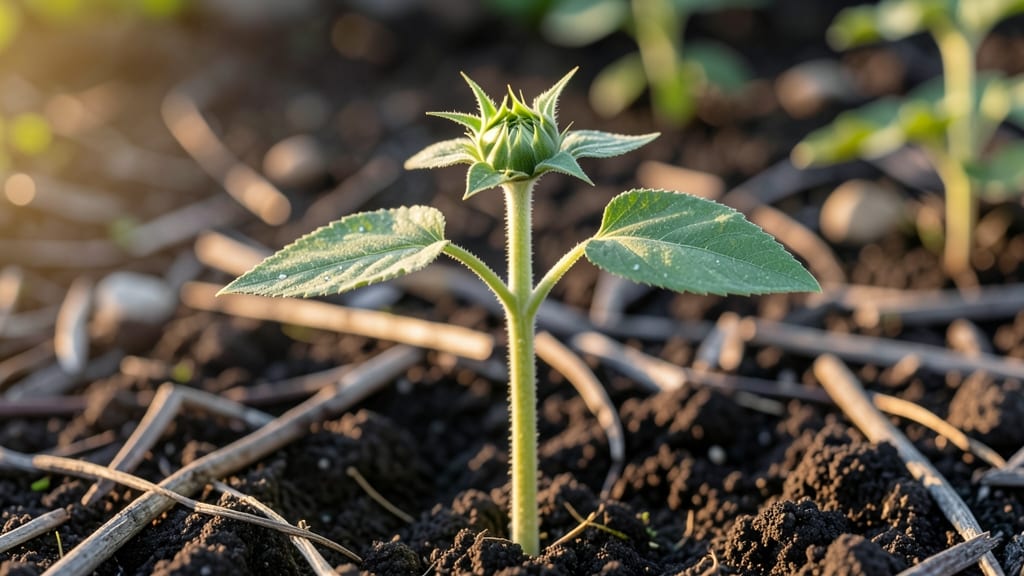
Sunlight transforms a seed into something extraordinary—just like a zero-waste garden transforms empty spaces into vibrant life. 🌻 This isn't just about planting; it's about creating a sun-drenched sanctuary where every element tells a story of growth, hope, and sustainability.
The magic starts with seeds that thrive under the sun's kiss, like sunflowers reaching for the sky or marigolds blooming with fiery joy.
Imagine a garden where every pod—whether from a sunflower, bean, or even a decorative gourd—becomes part of the design after its harvest. Solar-powered garden lights twinkle like fireflies, bright pathways guide visitors through the space, and sun-catching sculptures reflect the golden hues of dusk.
The result? A space that feels alive, intentional, and utterly yours, all while reducing waste.
You’ll end up with a garden that doesn’t just grow plants but nurtures a deeper connection to the sun’s energy and the cycle of life. The air hums with the scent of blooming lavender and citrusy marigolds, while the sight of towering sunflowers makes every visit feel like a celebration.
This is gardening as art—where every seed sown in the sun becomes a masterpiece.
Perfect for small urban balconies or sprawling backyard retreats, this approach works anywhere the sun shines brightest. Let’s turn those empty pods into something beautiful—and meaningful.
📚 In This Guide
- What you need
- Instructions
- Tips and common mistakes
- Wrapping up and next steps
What you need
- ● Sunflower seeds: 10–20 non-GMO, organic seeds (choose heirloom varieties for best results).
- ● Biodegradable seed pods: 10–15 cardboard egg cartons (or repurposed toilet paper rolls for mini pods).
- ● OR 5–10 recycled paper cups (cut in half for depth).
- ● Potting soil: 2–3 cups of seed-starting mix (lightweight and sterile).
- ● Watering can or spray bottle: With a fine mist nozzle for gentle hydration.
- ● Scissors or craft knife: For cutting egg cartons/cups to size.
- ● Twine or twine alternative: 1–2 feet of jute string or recycled fabric strips for hanging.
- ● Decorative elements: Acrylic paint (non-toxic), markers, or pressed flowers to personalize pods.
- ● Compostable labels: Small sticks or seed paper tags to track varieties.
- ● Heat mat: A low-wattage (50W) heating pad to speed up germination in cooler climates.
- ● Sunlight tracker: A DIY sundial or app (like Sun Surveyor) to optimize pod placement.
Instructions: how to grow vibrant flowers from zero-waste pods
Here's my go-to method for transforming simple seed pods into a sunlit garden—no waste, just beauty.
🌱 Step 1: Select and Prepare Your Seed Pods
Choose zero-waste seed pods designed for direct sowing—these often contain built-in soil and nutrients, eliminating the need for extra materials. Look for varieties like marigolds, sunflowers, or cosmos, which thrive in full sun and bloom quickly. Handle pods gently to avoid damaging the seed inside; a light tap on the table releases the seed if needed.
If your pods require soaking, place them in a shallow dish of lukewarm water for 12 hours to soften the outer shell. This step is critical for pods with thick coatings, like some wildflower varieties. After soaking, drain excess water—never let the pods sit in standing water, as this can cause rot before germination.
☀️ Step 2: Choose the Perfect Sunny Spot
Find a location that receives at least 6-8 hours of direct sunlight daily—this is non-negotiable for most seed pods, which rely on strong light to germinate and grow. If you're planting in containers, place them on a south-facing porch, balcony, or windowsill with unobstructed light. For ground planting, mark the area with stakes to avoid disturbing the soil later.
Test the soil temperature with your finger—it should feel warm to the touch (around 65-75°F). If the ground is still cool in early spring, wait a few weeks or use a black plastic mulch sheet to warm the soil faster. Cool soil slows germination, and pods may take 2-3 times longer to sprout than in ideal conditions.
💧 Step 3: Plant the Pods at the Right Depth
Dig small holes twice as deep as the pod itself—most pods are designed to be planted shallowly, so burying them too deep can suffocate the seed inside. If planting in soil, press the pod lightly into the hole so it sits upright. For containers, place the pod directly on the soil surface and cover it with just ¼ inch of potting mix to keep it in place.
Water gently but thoroughly right after planting—this helps settle the soil around the pod and kickstarts the germination process. Use a spray bottle or watering can with a fine rose to avoid displacing the pod. Overwatering now can cause the pod to swell and burst too soon, so let the soil dry slightly between waterings once planted.
🌿 Step 4: Monitor for Germination and Early Growth
Keep the soil consistently moist but not soggy—you’ll know it’s right when the top inch feels damp to the touch. Most seed pods sprout within 7-14 days, though some may take up to 3 weeks depending on temperature and sunlight. Watch for the first tiny green shoots breaking through the pod’s outer layer; this is your signal to reduce watering slightly.
Once seedlings emerge, remove the pod entirely—it’s served its purpose and can be composted. Thin seedlings to 6 inches apart if they’re crowded, as competition for light and nutrients will stunt growth. If you’re growing in containers, ensure each plant has enough space to avoid overcrowding, which can lead to leggy, weak stems.
✂️ Step 5: Support and Maintain for Blooms
As plants grow, provide light stakes or cages for taller varieties like sunflowers to prevent them from toppling in wind or rain. Water at the base of the plant in the morning to reduce fungal risks and encourage deep root growth. Most seed-grown flowers benefit from a balanced fertilizer applied 4-6 weeks after germination, but skip this step if your pods already contained nutrients.
Deadhead spent blooms regularly to encourage continuous flowering throughout the season. Pinch off faded flowers with your fingers or a clean pair of scissors—this redirects the plant’s energy into producing more blooms instead of seeds. By mid-summer, your zero-waste pods will have transformed into a sun-drenched garden bursting with color and life.
Tips & tricks for perfect zero-waste flower pods
Here's what I've learned after transforming my own backyard into a sunlit haven using these clever seed pods.
Sunlight Strategy: Those critical 6-8 hours of direct sunlight are non-negotiable, but don't panic if your space gets partial shade. For containers, rotate them daily to ensure even sun exposure. I've had great success with sunflowers in east-facing windowsills—just move them to full sun by mid-morning. Morning sunlight is gentler and prevents scorching, especially for delicate varieties like cosmos.
Soaking Secrets: The 12-hour soak is your best friend for tough-coated pods, but don't overdo it—some varieties can actually rot if submerged longer. I test the water temperature by dipping my wrist: it should feel warm but not hot to the touch. For extra insurance, add a drop of dish soap to reduce surface tension and help water penetrate the pod's protective layer.
Planting Precision: When creating those twice-as-deep holes, use a pencil to mark the depth first—it's shocking how easy it is to bury pods too deep when digging by feel. For container gardening, I press the pods into the soil surface first, then add just ¼ inch of mix on top. This creates a natural barrier that prevents soil from washing away during watering while keeping the pod stable.
Germination Timing: Those 7-14 days can feel like an eternity, but remember: cooler temperatures stretch germination time significantly. I've seen pods take up to 3 weeks in early spring, but they always catch up. The key is patience—keep the soil consistently moist and resist the urge to overwater once you see those first shoots. That's when you should reduce watering by half to prevent fungal growth.
Pro Tips for A Seed In The Sun
- Here's what I've learned after transforming my own backyard into a sunlit haven using these clever seed pods.
- Sunlight Strategy: Those critical 6-8 hours of direct sunlight are non-negotiable, but don't panic if your space gets partial shade.
- Soaking Secrets: The 12-hour soak is your best friend for tough-coated pods, but don't overdo it—some varieties can actually rot if submerged longer.
Frequently asked questions
Got questions about growing your own zero-waste garden with A Seed in the Sun pods?
You’re not alone! Here are the most common queries—and their answers—to help you get started with confidence.
What exactly is a "seed pod," and how is it different from regular seeds?
A seed pod is a pre-packaged, biodegradable capsule containing seeds, soil, and nutrients—all you need to grow a plant without plastic pots or extra tools. Unlike loose seeds, pods eliminate waste, simplify planting, and often include instructions for zero-waste gardening. Perfect for beginners!
How long does it take for a seed pod to sprout and grow into a mature plant?
Sprouting time varies by plant, but most A Seed in the Sun pods show signs of life in 7–14 days. For example, herbs like basil or chives may be ready to harvest in 4–6 weeks, while flowers or veggies like lettuce can take 6–8 weeks. Always check the pod’s label for specific timelines!
Can I use seed pods indoors, or do they only work outside in the sun?
Many seed pods thrive indoors with bright, indirect sunlight (like a sunny windowsill) or under grow lights. However, some varieties—especially sun-lovers like tomatoes or marigolds—need 6+ hours of direct sunlight daily. Check the pod’s care guide or opt for low-light pods (e.g., herbs or microgreens) if you’re short on sunshine.
What do I do if my seed pod doesn’t sprout after 2–3 weeks?
Don’t panic! Try these fixes:
- Check moisture: Keep soil lightly damp (not soggy) by misting or using a spray bottle.
- Test warmth: Most seeds need soil temps between 60–75°F. Place pods near a heat source if your space is chilly.
- Verify depth: Some seeds need light to germinate—gently press them just below the soil surface.
- Start fresh: If all else fails, open the pod and replant the seeds individually.
Still stuck? Contact A Seed in the Sun’s support—they’re happy to help!
Are seed pods truly zero-waste, or is there hidden plastic?
The pods themselves are made from 100% biodegradable materials, including seed paper, coconut coir, or compostable peat. Even the packaging is often plastic-free. After planting, the entire pod decomposes into the soil—no trash left behind! For extra eco-friendliness, compost the pod after harvest.
Wrapping up and next steps
A seed in the sun isn’t just a dream—it’s a promise waiting to bloom with the right care. By starting with zero-waste seed pods, you’re planting more than seeds; you’re nurturing a greener lawn and a sustainable future. 🌱
Now that you’re armed with knowledge, take that first step: pick your pods, prep your soil, and let the sunshine do the rest. Your sunny-season lawn begins with a single, thoughtful choice—so go ahead, dig in and watch your garden grow!