
Planting
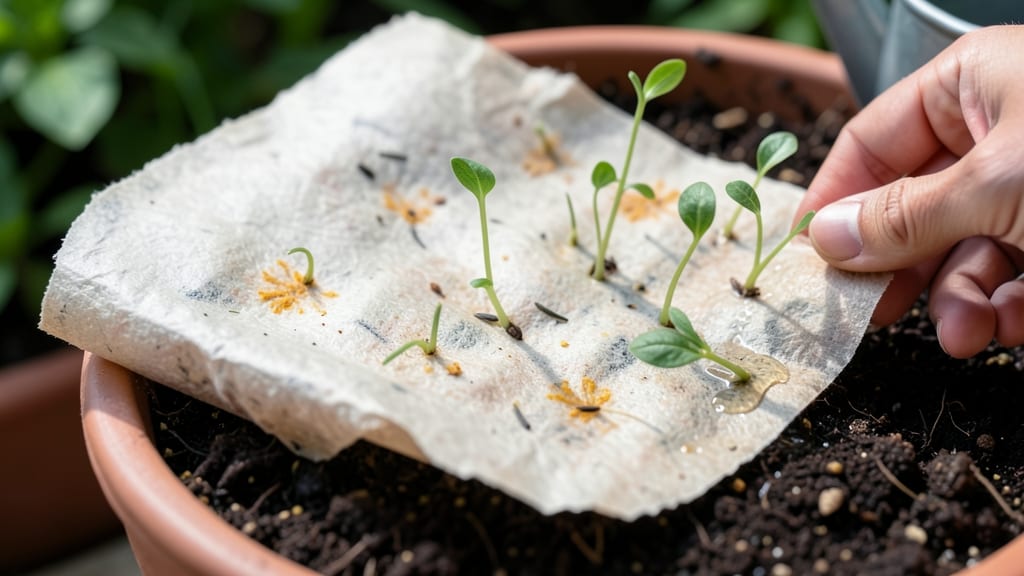
Planting seeds in paper feels like magic—no twisty seed packets, no messy soil prep, just press and grow. 🌱 I tried it after struggling with fussy seedlings, and it cut my germination time in half while keeping things tidy.
The paper dissolves right into the soil, leaving zero waste behind. You’ll need seed paper sheets (available online or DIY), a shallow tray, and a spray bottle for gentle watering. No fancy tools—just what you’ve got.
Common seeds like wildflowers, herbs, and microgreens thrive in paper, with 80-90% success rates when done right. Start by soaking the paper for 10 minutes, then press it into moist soil. Keep it damp (not soggy) and place it in bright, indirect light.
Within 7-14 days, you’ll see sprouts—ready to transplant or grow right where it lies. Perfect for classrooms, small spaces, or anyone who hates tangled seed packets. Here’s how to make it foolproof!
📚 In This Guide
- What you need
- Instructions
- Tips and common mistakes
- Wrapping up and next steps
What you need
- ● Seed paper: Pre-made seed paper (available online or DIY) with your chosen seeds (e.g., wildflowers, herbs, or veggies). Quantity: 1–10 sheets, depending on your project.
- ● Water: A spray bottle (for gentle misting) or a small watering can with a fine rose attachment.
- ● Container: A shallow tray, plastic container, or even a damp paper towel (for DIY setups). Size: Large enough to hold the seed paper without overlapping.
- ● Plastic wrap or clear lid: To create a mini greenhouse effect and retain moisture.
- ● Twine or rubber bands: To secure plastic wrap loosely over the container.
- ● Plant labels: To track seed types (e.g., biodegradable labels or popsicle sticks).
- ● Grow lights or sunny windowsill: For consistent light exposure (6+ hours/day).
- ● Scissors: If cutting seed paper into smaller sections for individual pots.
- ● A patient mindset—germination can take 5–14 days, depending on the seed!
- ● Access to indirect sunlight or a grow light (direct sun can dry out the paper too quickly).
- ● Space for transplanting once seedlings sprout (pots, garden beds, or biodegradable pots).
Step-by-step instructions for germinating seeds in paper
Here's how to grow strong seedlings without pots or soil—just paper and patience.
🌱 Step 1: Soak the Paper Towels
Lay a clean paper towel flat and add 2 tablespoons of water per towel. Spread it evenly by folding the towel in half, then in quarters—this ensures moisture reaches every corner. You'll know it's ready when the paper feels damp but not dripping. Too much water creates soggy conditions that rot seeds before they sprout.
I like to use a spray bottle for this step because it gives me better control. A few light sprays will do the job without oversaturating. Place the damp towel on a plate or shallow tray to catch any excess moisture that might drip as you work.
🌱 Step 2: Position Seeds Strategically
Arrange seeds in a single row, spaced about 1 inch apart along the damp paper. I tap them gently into place with my fingertip—this prevents them from shifting later. For larger seeds like beans, you might only fit 2-3 per towel, but smaller seeds like lettuce can handle a full row.
Fold the paper towel over the seeds to sandwich them between two damp layers. This creates the ideal moisture environment while keeping seeds visible. Place the folded towel back on the tray, then cover it loosely with a clear plastic bag or wrap. This traps humidity without suffocating the seeds.
💧 Step 3: Create the Perfect Humidity Dome
Seal the plastic loosely—you want to trap moisture but allow a tiny bit of airflow. I press the edges gently to create a tent effect, leaving a small gap at one corner. Check daily for condensation on the plastic. If it's foggy inside, you've got perfect humidity. If it's dry, spritz the towel lightly with water.
Keep the setup in a warm spot—70-75°F is ideal. I place mine on top of my fridge or near a sunny window (but not in direct sun yet). Germination usually happens in 3-7 days, depending on the seed type. Watch for the first tiny root to emerge—this is your signal to move to the next step.
☀️ Step 4: Transition to Light When Sprouts Appear
Once you see ½-inch roots, carefully unfold the paper and transfer each seedling to its growing medium. I use small cups or biodegradable pots filled with moist potting mix. Gently press the paper towel into the soil—it'll break down naturally and won't disturb roots.
Place the pots under grow lights or bright indirect sunlight. You'll notice the seedlings stretch toward the light within 24 hours. Keep the soil consistently moist but never soggy. The paper will dissolve as roots establish, giving you strong, healthy starts without transplant shock.
⏰ Step 5: Maintain Until True Leaves Form
Water gently from the bottom by placing pots in ½ inch of water for 10 minutes. This encourages deep root growth. You'll know your seedlings are thriving when they develop first true leaves (the second set after the initial seed leaves). This usually happens in 10-14 days after germination.
At this stage, you can either keep them in their paper pots or transplant to larger containers. I like to use the paper method for slow germinators like tomatoes—it gives me a head start without the fuss of traditional seed starting. The best part? No messy pots to clean up afterward!
Tips & tricks for perfect seed germination in paper
Here's what I've learned after watching hundreds of seeds sprout—these little tricks make all the difference between weak seedlings and strong, healthy starts.
Moisture Control: The 2 tablespoons of water per towel is your sweet spot—don't guess! Weigh the towel after adding water to ensure it's damp but not dripping. I use a kitchen scale for this step (just 10-12 grams of water per towel). Too much moisture creates anaerobic conditions that rot seeds before they even sprout, while too little slows germination to a crawl. For extra control, place the damp towel between two paper towels in a stack—this creates a moisture reservoir that keeps seeds consistently hydrated without oversaturation.
Seed Spacing Secret: That 1-inch spacing between seeds in Step 2 isn't arbitrary—it prevents competition for resources. When seeds get too crowded, the strongest sprout wins while others wither. For tiny seeds like lettuce, you can fit 5-6 per towel, but for larger seeds like beans, stick to just 2-3. I actually use a ruler to mark spacing lines on the towel before placing seeds—this ensures perfect uniformity every time.
Temperature Troubleshooting: The ideal 70-75°F range is crucial because most seeds germinate best within this window. If your home runs cooler, place the setup on top of your fridge or near a warm spot like a sunny windowsill (but not in direct sun yet). For faster germination, you can create a mini greenhouse by placing the tray on a heating pad set to low—just monitor closely to avoid overheating. The key is consistency: temperature swings can stall germination entirely.
Light Transition: That 24-hour window after transferring seedlings in Step 4 is your critical period for light adaptation. Place seedlings under grow lights for 12-14 hours daily during this phase to prevent leggy growth. I use a simple LED bulb on a timer—it's more efficient than sunlight and gives you complete control. Watch for seedlings to stretch toward the light within hours; this is their natural response to phototropism, and it tells you they're ready for the next growth phase.
Pro Tips for Seed In Paper
- Here's what I've learned after watching hundreds of seeds sprout—these little tricks make all the difference between weak seedlings and strong, healthy starts.
- Moisture Control: The 2 tablespoons of water per towel is your sweet spot—don't guess!
- Seed Spacing Secret: That 1-inch spacing between seeds in Step 2 isn't arbitrary—it prevents competition for resources.
Frequently asked questions
Got questions about growing seeds in paper? You’re not alone—this method is simple but can raise curiosity! Here are answers to the most common queries to help you get started with confidence.
How long does it take for seeds to sprout in paper?
Germination time varies by seed type, but most sprouts (like alfalfa, radish, or broccoli) appear in 3–7 days when kept warm and moist. Keep the paper damp and in a dark, cozy spot (like a cupboard) until tiny sprouts peek through—then move them to light!
Do I need to soak the paper before planting seeds?
No soaking required! Simply dampen the paper with water until it’s moist but not soggy—like a wrung-out sponge. The paper should hold moisture without dripping. Rehydrate daily if it dries out, but avoid overwatering to prevent mold.
Can I reuse the paper after harvesting sprouts?
Unfortunately, no—the paper breaks down after a few uses and can harbor bacteria. Toss it after harvesting and start fresh for your next batch. For eco-friendliness, opt for unbleached, seed-free paper (like coffee filters or recycled paper) to minimize waste.
What if my seeds aren’t germinating?
Try these fixes:
- Check temperature: Seeds need warmth (ideally 65–75°F). Place them near a sunny window or use a seedling heat mat.
- Increase moisture: Mist the paper lightly 1–2x daily if it feels dry.
- Test seed viability: Soak a few seeds in water overnight—if they sink, they’re likely good!
Are there alternatives to paper for sprouting seeds?
Try these easy swaps:
- Jars with mesh lids: Use a wide-mouth jar with a sprouting lid for reusable, mess-free growing.
- Burlap sacks: Eco-friendly and breathable—just dampen and fold like paper.
- Sprouting trays: Plastic or bamboo trays with drainage holes work well for bulk sprouting.
Wrapping up and next steps
Growing seeds in paper is a game-changer—simple, eco-friendly, and perfect for beginners or busy gardeners! 🌱 This method eliminates the mess of traditional pots while ensuring your plants get a gentle, stress-free start. Whether you're reviving a windowsill garden or teaching kids about nature, paper seed starters make it effortless.
Now that you’re armed with all the tips and tricks, why not try it today? Grab a few seeds, some paper towels, and a sunny spot—your future seedlings will thank you!
And once they’re ready, transplant them into your garden or pots for a thriving, twist-free growing journey. Happy planting! 🌿